Jira
Jira monday.com


Regression testing is your release safety net
Regression testing is the part of software testing that keeps your existing functionality stable when new changes ship. You can add a new feature, fix a bug, refactor code, update UI, or change an API. Something unrelated can still break. That’s why QA teams run regression tests as a regular checkpoint in the testing process and do not use them as a one-off “extra step.”
A strong regression testing template helps you stay consistent without turning every release into a week-long testing cycle. The point is to validate the most important workflows, prioritize risk areas, and capture test results in a way stakeholders can trust.
Our QA team describes it simply: before a release, you re-run the critical flows your users rely on the most, so you can confirm that new code changes didn’t introduce regressions in existing features. That mindset is the foundation of this template.
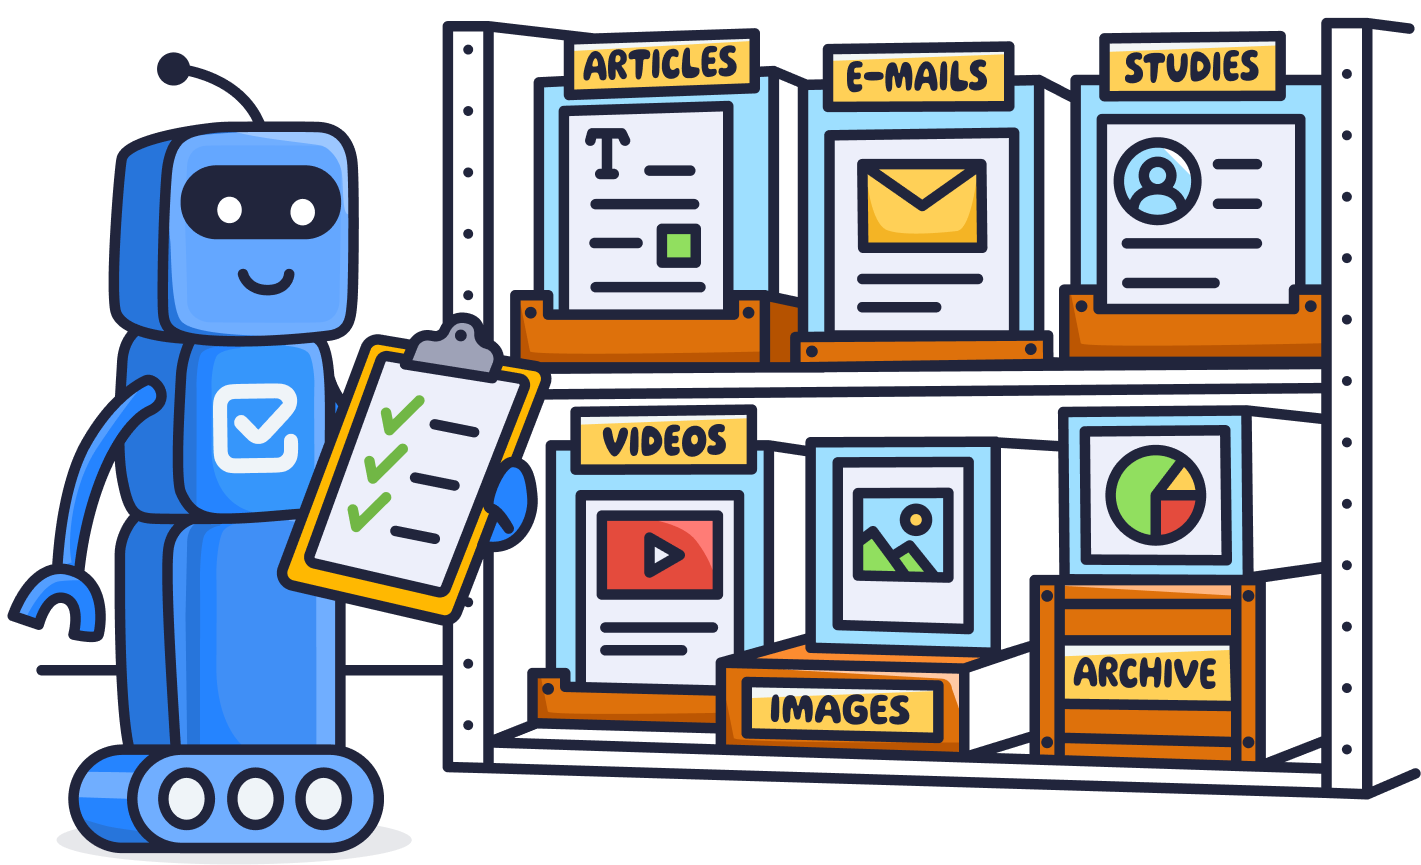
In this guide, you’ll get:
- A practical regression testing checklist template you can reuse in Jira.
- Guidance on choosing between checklists vs test cases (test steps and expected results).
- A lightweight approach to test coverage, metrics, and continuous improvement, so your regression suite stays effective as your product grows.
What is regression testing?
Regression testing is a repeatable check of existing functionality after new changes go live in your codebase. These changes can be new features, bug fixes, refactoring, dependency updates, or API changes. The goal is simple: confirm that what used to work still works in the current build.
Teams typically run regression tests at key points in the testing lifecycle:
- before a release as part of release readiness
- after a risky merge into the main branch
- after a hotfix, when stakeholders want fast validation
- after infrastructure or configuration changes in the test environment
A practical regression testing approach focuses on high-risk areas and most-used workflows. QA teams rarely test every edge case every time. Instead, they prioritize test scenarios that reflect real user behavior across core modules.
One thing we see in practice: regression scope grows as the product grows. As our QA put it, “new functionality gets added to the regression scope over time.” That’s why a regression testing template matters. It keeps your test cases, test data, and expected results consistent across testing cycles.
Sanity check before regression
Run a short “sanity check” first. It answers one question: is the build stable enough to test?
If login fails or core screens don’t load, stop and fix that before spending effort on the full regression test plan.
What should a regression testing template include?
A good regression testing template is not about “test everything” but is focused more on testing the right scenarios consistently. The goal is to protect existing functionality from unexpected breakage after new features, bug fixes, or code changes.
At a minimum, your template should cover:
1) Scope (what you test and why)
Start from the most-used workflows and the highest risk areas (core application functions, critical modules, permissions, integrations, API behavior). This is where regression test cases bring the most value.
“In most cycles we test the most common user flows and mostly happy paths. Regression has to protect what users rely on.” — QA insight
2) Test environment and test data
Specify where you run tests (staging, pre-prod), what accounts/roles you use, and what “ready” means (fresh build, required config, stable test data). This avoids wasted testing efforts caused by environment noise.
3) A clear checklist of test scenarios
Keep items phrased as actions with expected results, even if you don’t write full test scripts. Example pattern:
“Create X -> verify -> appears -> refresh-> verify state persisted.”
This keeps test execution consistent across QA teams and team members.
4) A lightweight “retest” loop
When something fails, the workflow should be explicit: log bug ? fix ? rerun the affected regression test case(s) ? confirm test results ? mark validated.
5) A simple test report output
Define what you record at the end: pass/fail summary, key issues found, what was skipped, and release recommendation. Stakeholders don’t need raw detail, they need decision-ready signal.
One important reality check: the regression scope changes over time. As you ship new features, you gradually add the most important scenarios into the template, so test coverage grows without turning the process into a week-long bureaucracy.
Regression testing template checklist
Use this as your regression test plan template for each release, sprint, or batch of code changes. It’s built for QA teams running both manual testing and automated testing (CI/CD or ad-hoc), and it keeps test execution and validation visible in one Jira workflow.
1) Define scope, risk areas, and test objectives
- Confirm what’s shipping: new features, bug fixes, refactors, config changes
- List the risk areas (modules most likely affected by this release)
- Choose the regression test cases you’ll run (critical flows first)
- Decide coverage level: “critical only” vs “full regression” for this cycle
- Agree on expected results and “go / no-go” criteria (who approves)
2) Prepare test environment and test data
- Confirm test environment build/version and any feature flags
- Prepare test accounts, roles, and permissions required for validation
- Refresh or seed test data (users, records, sample content)
- Check key integrations if your product relies on them (API connections, webhooks)
- If you run automated checks: confirm the pipeline/test suite is green and up to date
3) Run regression test execution
- Run the prioritized regression test scenarios (happy paths first)
- For each scenario: record outcome (Pass / Fail / Blocked) and attach evidence when needed
- Log defects as Jira issues and link them to the parent regression work item
- Track testing progress with checklist statuses so stakeholders can see what’s left in real time
4) Retest and targeted regression after fixes
- Retest failed scenarios after bug fixes and code changes are merged
- Run a targeted regression for affected modules (avoid rerunning everything blindly)
- Watch for regressions around dependencies and shared components
- Update test results and confirm closure criteria are met
5) Test report and release decision
- Summarize results: pass/fail counts, high-priority defects, remaining blockers
- Capture key metrics (cycle duration, defect density, repeat failures)
- Share the test report link (often in Confluence) and confirm final decision with stakeholders
Example of the regression checklist template
If you’re testing a checklist-based app (like Smart Checklist), your regression scope often maps to modules:
- Work with checklist (add/edit items, statuses, reorder, delete)
- Details + due dates (add/edit, different date formats)
- Mandatory items (mark/unmark + mandatory items validation)
- Headers/structure (collapse/expand, progress behavior)
- Templates (create/import/default assignment)
- Linked templates (update once ? reflected across linked issues)
- Search/JQL (find issues by checklist content/status)
- Automation touchpoints (template assignment triggers, field-based conditions)
Epic: Regression Testing — Smart Checklist
Issue 1: Checklist on Issue View (Core flows)
## Work with checklist
- Add checklist item using Quick View
- Add checklist item using Full-Screen Editor
- Add checklist item by applying “Getting started” template
- Change checklist item statuses (To Do > In Progress > Skipped > Done)
- Edit checklist in Full-Screen Editor (headers, bullet/number points, bold/italic/emphasize text, link)
- Edit checklist in Full-Screen Editor: add item with custom status
- Edit checklist in Quick View (headers, bullet/number points, bold/italic/emphasize text, date, link)
- Verify tooltips exist for checklist items (after add/edit/change status/replace)
## Details
- Add details to checklist item from Smart Checklist menu
- Edit details from Quick View
- Add details to checklist item in Full-Screen Editor
## Dates
- Add date to checklist item (past, today, future; different formats)
- Add calendar date by typing //
## Content operations
- Copy & paste checklist from text to add-on
- Convert checklist item to Jira issue
- Reorder checklist items
- Delete checklist item in Quick View
- Delete details from Quick View
- Clear checklist
## Links & references
- Add Jira ticket with Jira key
- Add external link (Facebook, Instagram, GitHub, HelpScout, etc.)
## Assignees
- Assign a user to checklist item (current user / another user / custom user)
## Clone coverage
- [Company-managed] Clone issue with checklist when Checklists custom field is not on the screen
- [Team-managed] Clone issue with checklist when Checklists custom field is not on the screen
## Bulk actions
- Check all items when there is at least one not completed item
- Uncheck all items when all items are completed/checked
Issue 2: Mandatory items
## Mandatory items (Issue view)
- Make mandatory exists in the menu for checklist items
- Make non-mandatory exists in the menu for mandatory checklist items
- Asterisk * is added to mandatory checklist item
- Asterisk * is removed for non-mandatory checklist item
- Make an item mandatory > Check History
- Make it non-mandatory > Check History
## Mandatory items (Templates)
- [Create Template] Make mandatory exists in the menu for checklist items
- [Create Template] Make non-mandatory exists in the menu for mandatory checklist items
- Add “-! with text” in Full-Screen Editor > item becomes mandatory, asterisk * is added
- Mandatory items displayed as “-!” in custom field Checklists
## Pro History behavior
- Using Pro version, change the mandatoriness of items > check events on History
- Open version History > confirm behavior
Issue 3: Headers
## Work with headers
- Collapse/Expand all headers button
- Convert to header
- Convert to item
- Check/uncheck items under header
- Add item under header
- Drag and drop headers/items when all expanded
- Drag and drop headers/items when all collapsed
- Delete header with items
- Delete header without items
- Checklist header progress
- Header of different levels (progress, collapse, indent)
- Add details to headers
- Delete details from headers
## Headers in templates
- Header in templates (progress, indent, reorder, edit, delete, add details)
- Collapse/Expand all headers of different levels
Issue 4: Checklist templates
## Checklist templates
- Save Checklist as a Template
- Create a Template
- Import Checklist from a Template
- Set Template as Default for a few issue types
- Set Template as Default to all issue types
- Remove assignment from Template
- Rename a Template
- Edit a Template from Editor
- Edit a Template from Checklist UI
- Delete a Template
- Duplicate a Template
- Convert to Global Template
- Convert to Project Template
- Reorder Templates for issue type
## Template ID
- Template ID exists for Project templates
- Template ID exists for Global templates
Issue 5: Linked templates
## Linked templates
- Create Linked Template
- Convert non-linked template to Linked
- Convert Linked template to non-Linked
- Import Linked Template to issue
- Editor is disabled for Linked Template
- Items imported from Linked template are not displayed in Full-Screen Editor
## Editing + sync
- Edit Linked Template from Checklist UI (add item, delete item, add header, add details, reorder)
- Change status of any item in linked template on issue view
- Update linked template > verify it reflects in linked issues
## Unlink behaviors
- Unlink template and keep items
- Unlink template and remove items (check UI, issue property, custom fields)
## Order + duplication
- Manage order of linked templates assigned to default issue type
- Duplicate Linked Template
- Delete Linked Template
## History events
- Verify events for linked template operations in Smart Checklist History tab
Issue 6: Template categories
## Template categories
- Assign Project template to Category
- Assign Global template to Category
- Unassign Project/Global template from Category
- Create template with defined category
## UI checks
- Verify Categories list on Category dropdown on Template edit popup
- Verify hint icon, hint text, and link for Categories field
- Expand/Collapse category
- Edit template under Category section
## Actions under category
- Convert to linked Project template under Category section
- Convert to non-linked Project template under Category section
- Convert to project/global template with Category
- Delete Project/Global template under Category section
- Import Project/Global template under Category section
Issue 7: Template assignment (General vs Advanced conditions)
## Template assignment UI
- Advanced and General tabs are displayed in template assignment section
- Check Learn more links for General/Advanced tabs
## General > Advanced mapping scenarios
- [General] Select “All issue types” > [Advanced] Issue created trigger
- Template appears in Manage order view for All issue types
- Create issue to verify template is applied
- [General] Select several issue types > [Advanced] Issue created + Issue type field values
- Template appears for selected issue types
- Create issue to verify template is applied
## Advanced-only scenarios
- [Advanced] Issue transitioned trigger + Save
- General tab has nothing selected
- Create issue to verify template is applied based on conditions
- [Advanced] Issue transitioned trigger + Issue type values + Save
- Create issue to verify template is applied based on conditions
- [Advanced] Issue updated trigger + any other fields + Save
- Create issue to verify template is applied based on conditions
## Available fields/conditions check coverage
- Check available fields in Fields dropdown
- Check available options in Conditions dropdown
- Check available options in Value dropdown
## Guardrail
- Template is applied only once per configured trigger even when all conditions match multiple times
Issue 8: Search, assigned items, boards, and history
## History
- Track Smart Checklist changes for Free Version
- Track Smart Checklist changes for Pro Version
## Search / JQL examples (smart checklist data)
- Search by currently logged user (issue.property[SmartChecklist].assignees ~ currentUser())
- Search by any user (issue.property[SmartChecklist].assignees ~
- Search by custom mention (issue.property[SmartChecklist].assignees ~ HRTeam)
- Search for not done checklist items (“Smart Checklist Progress” ~ “-Done”)
- Search for completed checklist (“Smart Checklist Progress” ~ “Done”)
- Search for issue that contains checklist (Checklists (or cf[CustomFieldID]) is not EMPTY)
- Search for content in checklist (Checklists (or cf[CustomFieldID]) ~ “your item value”)
- issue in checklistItemStatus(“Item Content”, “Done”)
- issue.property[SmartChecklist].hasClosedChecklistItems = ‘true’
- issue.property[SmartChecklist].hasOpenChecklistItems = ‘false’
- issue.property[SmartChecklist].itemsDates (=, >, <) '2022-03-10' - issue.property[SmartChecklist].itemsDates (=, >, <) '10/03/2022' - issue.property[SmartChecklist].totalChecklistItems > 13
- issue.property[SmartChecklist].totalChecklistItems <= 13 - issue.property[SmartChecklist].totalChecklistItems = 13 - issue.property[SmartChecklist].itemsStatus ~ 'Done' - issue.property[SmartChecklist].itemsStatus ~ 'IN PROGRESS' - issue.property[SmartChecklist].itemsStatus ~ 'custom'

How to run a regression cycle in Jira using this template
A practical way to manage regression testing in Jira is to treat it like a small project with clear ownership, a visible workflow, and traceable test execution.
Start with one Epic per release or testing cycle (for example, Regression testing — vX.Y). Then create a small set of Jira issues that map to your scope. Each issue carries one checklist (like the ones we just prepared), so testers can execute test scenarios and mark progress in real time.
Here’s a simple structure that matches the Smart Checklist flow:
- Epic: Regression testing — vX.Y (or Sprint N)
- Task: Work with checklist (core flows)
- Task: Mandatory items
- Task: Headers
- Task: Templates + Linked templates
- Task: Search/JQL + history
- (optional) Task: Automation + workflow validators (only if the release touches these modules)
- Task: Work with checklist (core flows)
During test execution, keep it lightweight:
- Use checklist item statuses to show testing progress (for example: To Do ? In Progress ? Done).
- Assign owners at the issue level (QA team members) and, if needed, assign specific checklist items when a step requires a second set of eyes.
- When you find a bug, log it as a separate Jira issue and link it to the parent regression task. After bug fixes, use a short retest pass on the affected modules only, rather than rerunning the entire regression test plan.
This approach also scales well as your product grows. Your regression test cases will expand over time as new features become “existing functionality” and move into the standard scope. The template stays the same; you simply add or refine the checklist items inside the relevant module issue.
Regression testing checklist vs. test cases
Most teams end up using a mix of both. The key is matching the format to your product maturity, QA capacity, and the risk level of the release.
Use a checklist when you need speed and consistency
A checklist works best when your QA team already understands the product and can validate functionality using compact prompts.
This is how many teams run regression in agile cycles: you keep a stable checklist of core workflows and verify them every testing cycle. It’s also the easiest format to keep updated as the product grows.
Good fit for:
- Fast releases and frequent bug fixes
- Smaller QA teams
- Manual testing where you rely on expert intuition
- Keeping testing progress visible to the team
Use detailed test cases when you need repeatability and precision
Test cases are better when you need each test step explicitly: preconditions, test data, exact actions, and expected results. This becomes important when QA is less familiar with the product, when the workflow is complex, or when the stakes are high (regulated environments, payments, security-sensitive changes).
Good fit for:
- Larger QA teams (including new testers)
- Complex workflows with many edge cases
- Highly regulated or high-risk releases
- Building a long-term test management system
A practical way to position this in the template: treat the checklist as your “regression test plan at a glance,” and link out to detailed test cases only for the most critical flows or risk areas.
How to define your regression test plan
A good regression test plan is a prioritization exercise, not a wish list.
Start with 3 layers of test coverage:
1) Core user journeys (your “must-pass” suite)
These are the workflows most users execute in real life. In our QA session, the default approach was simple: simulate normal user behavior and validate the happy paths first, because that’s what breaks customer trust fastest.
2) Risk areas (what could realistically regress)
Add targeted checks based on what changed:
- new features that touch shared components
- changes in permissions/roles
- changes in formatting/parsing (rich text, markdown-like input, special characters)
- automation, validators, and transitions
- integrations (Jira Automation, Jira Service Management, CI/CD, API)
3) Known edge cases (based on real incidents)
These don’t need to be huge. Add only the edge cases that were previously reported by users or found in production.
A useful mindset from our QA: regression scope grows over time. Each “new feature” eventually becomes “existing functionality,” and a couple of its test scenarios should be added to the regression checklist for future cycles.
A good regression testing template helps QA teams validate existing features after code changes, bug fixes, and new releases without turning every cycle into a full test suite rewrite. Use Jira issues to track ownership and testing progress, then use a checklist template to keep test execution consistent, visible, and easy to repeat across releases.
FAQ: Regression testing template
What is regression testing?
Regression testing checks that existing functionality still works after new changes, bug fixes, or updates. It helps protect software quality before release.
What should a regression test plan include?
A focused list of high-priority test cases and test scenarios that cover critical workflows, core modules, and risk areas. Add expected results when the team needs more guidance.
Are regression test cases always manual testing?
No. Many QA teams mix manual testing and automated testing. Automated tests usually cover stable, critical flows, while manual test execution is used for broader coverage and real-world validation.
How do I keep regression testing effective as the product grows?
Prioritize core workflows, add new checks gradually, and split the regression checklist into modules when it becomes too large. Keep edge cases separate unless they’re high risk.
How do you track regression testing progress in Jira?
Keep regression in one Jira issue (small scope) or one Epic with several issues (large scope). Use checklist templates inside issues so team members can mark progress in real time.
What’s the difference between a checklist and detailed test cases?
A checklist is a compact “what to verify” list. Detailed test cases include step-by-step actions, test data, and expected results. Teams often use checklists for routine regression cycles and test cases for complex or regulated workflows.
When should I add new items to the regression checklist?
After releasing new features, add a small number of high-signal checks that represent the most common usage paths or the riskiest changes.