


 Jira
Jira monday.com


Yesterday, I stumbled upon an interesting question on the Atlassian forum – how does one add a subtask to another subtask? After briefly looking around, I found that more people are searching for an answer to this than I anticipated.
So, given the demand, I thought I’d share my two cents: you can not create a subtask of a subtask. Jira simply doesn’t offer this functionality.
“Hold on, dude!” – you might think to yourself – “I thought there’s a solution to my question. In the title, you literally say that the Jira subtask of a subtask problem is solved.”
And you’ll be correct in your assumption. Technically, you will not be able to create a subtask of a subtask in a conventional way, but our tool Smart Checklist for Jira offers a handy workaround.
Checklist items as subtasks?
In layman’s terms, subtasks in Jira are parts of a more complex main task, which functions as their parent work item. Subtasks can contain certain attributes such as a description of work that needs to be done, the person responsible for completing that work, and a deadline.
Having a checklist in your task – or subtask, for that matter – can achieve all of the above while also offering a series of added benefits:
Get the key features of a subtask
A checklist can contain basic information about the task, as well as additional context in a collapsible field – links, images, lists, and more.

You can also add deadlines and tag responsible team members. The assignees will receive a notification and will be able to view all checklist items assigned to them on a special tab. So, basically, you get all the functionality you would have if it were possible to create a subtask of a subtask.
Benefit from features that subtasks don’t have
But hold on, there’s more to it. Smart Checklist allows you to add mandatory steps and prevent users from moving to the next step until a mandatory one is completed.
Additionally, if you have a recurring task or process, you can save any checklist as a template and reuse it multiple times. For example, this can be a Definition of Done checklist or an Onboarding checklist. If needed, you can even add it automatically to your tasks with the help of Automation for Jira.
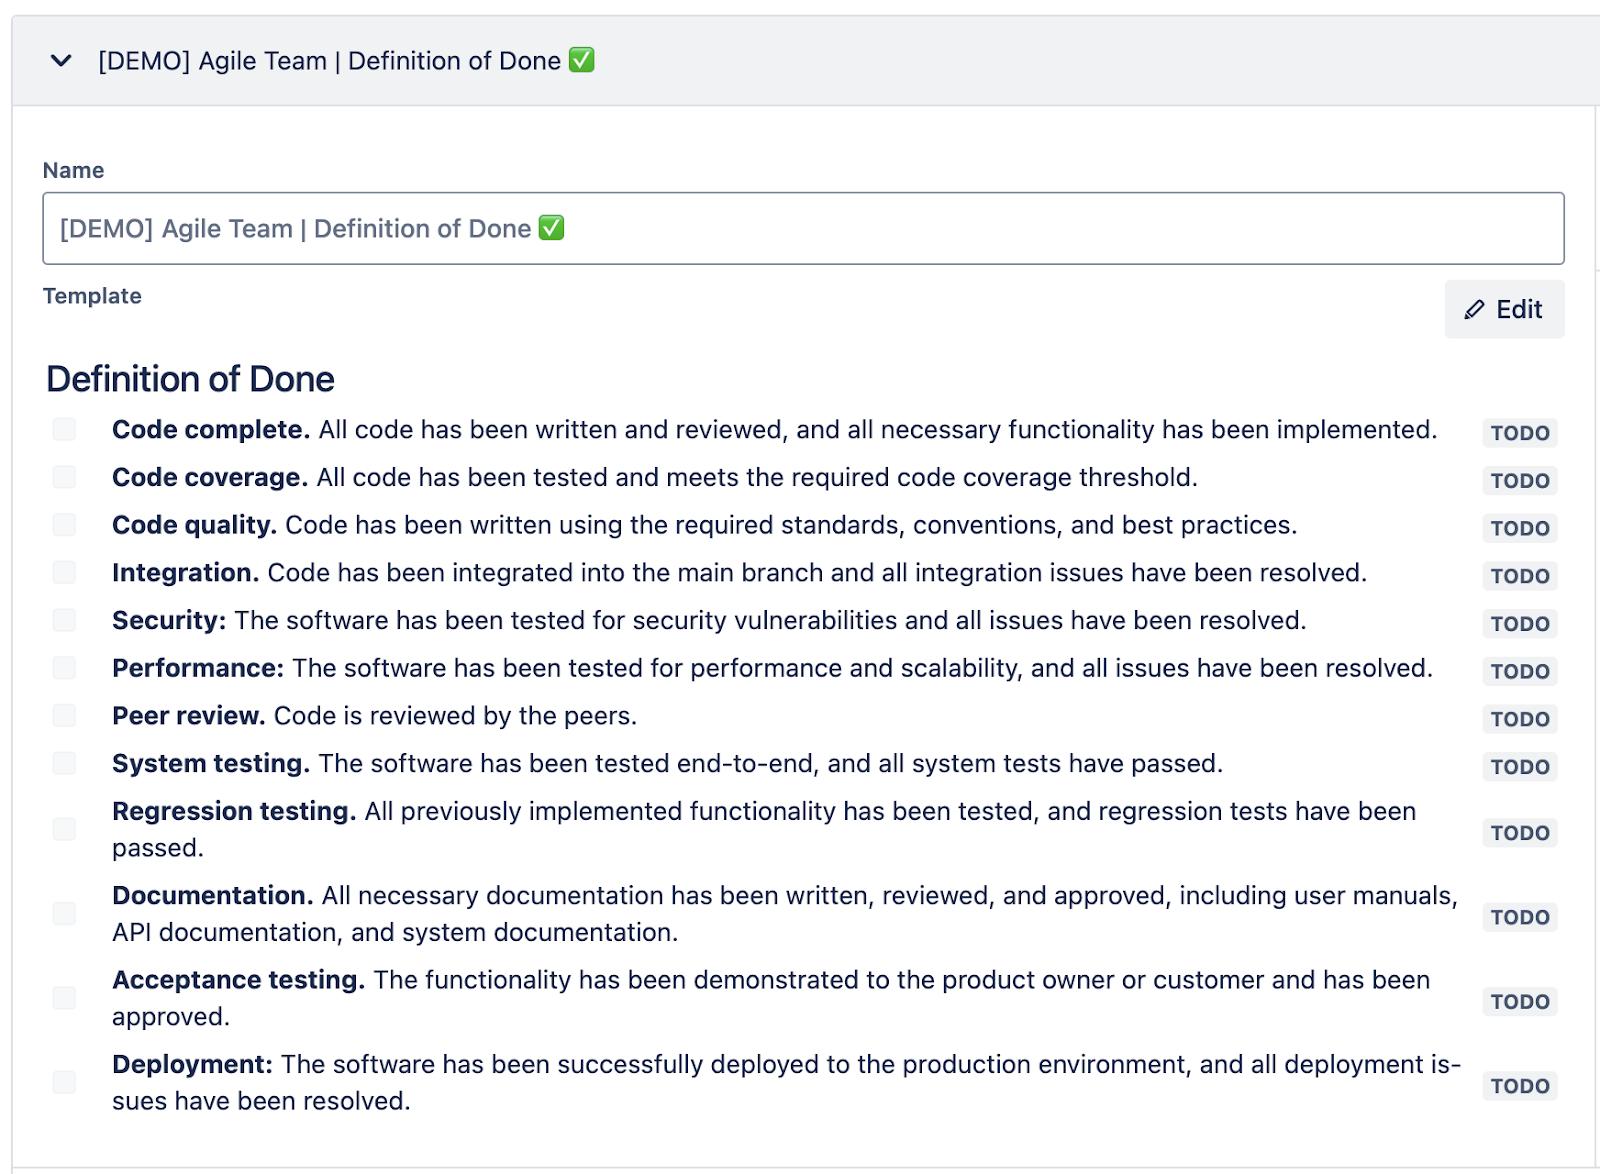
## Definition of Done
- **Code complete.** All code has been written and reviewed, and all necessary functionality has been implemented.
- **Code coverage.** All code has been tested and meets the required code coverage threshold.
- **Code quality.** Code has been written using the required standards, conventions, and best practices.
- **Integration.** Code has been integrated into the main branch, and all integration issues have been resolved.
- **Security:** The software has been tested for security vulnerabilities, and all issues have been resolved.
- **Performance:** The software has been tested for performance and scalability, and all issues have been resolved.
- **Peer review.** The code is reviewed by the peers.
- **System testing.** The software has been tested end-to-end, and all system tests have passed.
- **Regression testing.** All previously implemented functionality has been tested, and regression tests have been passed.
- **Documentation.** All necessary documentation has been written, reviewed, and approved, including user manuals, API documentation, and system documentation.
- **Acceptance testing.** The functionality has been demonstrated to the product owner or customer and has been approved.
- **Deployment:** The software has been successfully deployed to the production environment, and all deployment issues have been resolved.
Track progress at a glance
A smart checklist has a progress bar showing how many steps have already been completed. It’s visible from the parent task (or subtask) view and from the board view. As a result, you can quickly estimate the progress of multiple tasks and subtasks directly from your Scrum board or Kanban board.
Avoid overly complex hierarchies
You won’t have to deal with the ever-growing pile of tasks, subtasks, and subtasks for subtasks hidden inside one another. When you use checklists, you can easily structure work within one parent ticket.
By the way, a smart checklist can be added to any Jira issue type. Apart from subtasks, you can add it to epics, tasks, user stories, bugs, or any custom Jira work types you have.
Here’s an example of a checklist added to a subtask:
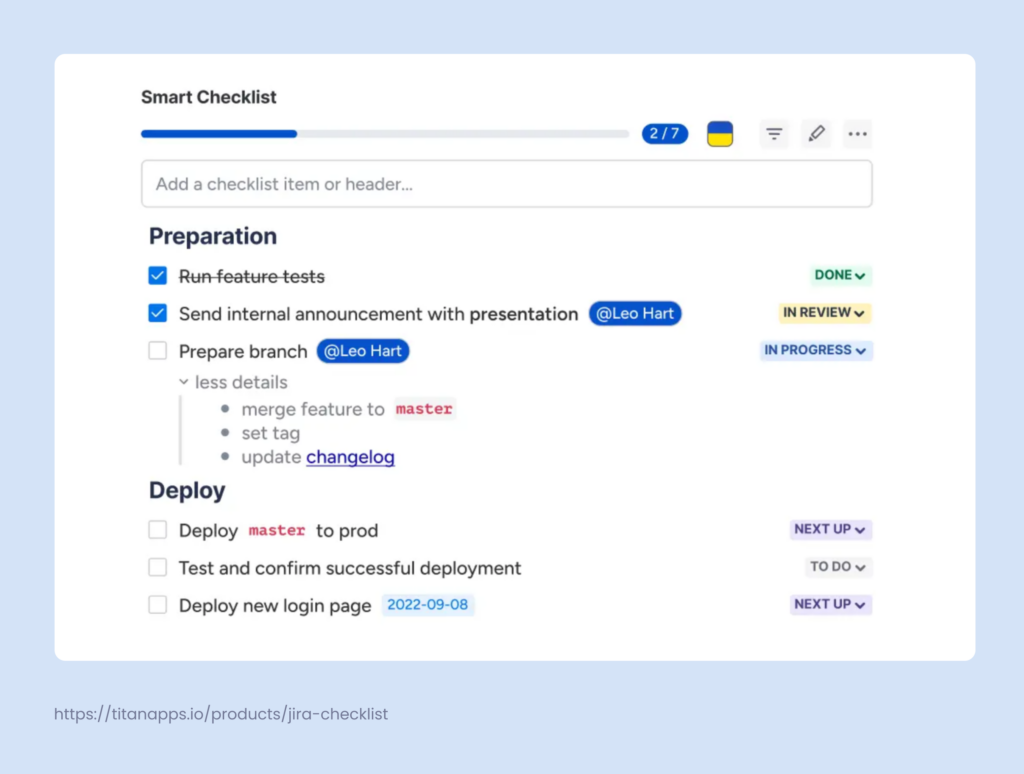
As you can see, it’s structured with headers and includes expandable fields – that’s where you can provide details for a particular step or list sub-steps.
Each checklist item has a customizable status so that it’s clear what is in progress, in review, or already done. This is basically the same as a Jira subtask status. Responsible people are tagged, and important items have specified deadlines. And all this is conveniently gathered in a single view of a parent subtask.
How Can I Add a Checklist to My Jira Project?
The best part is that the process is very simple and only takes a few minutes. Moreover, there’s no learning curve – the solution is easy to use and suitable for agile teams with different backgrounds.
- Install Smart Checklist from the Atlassian marketplace. Follow the onscreen instructions to add it to your Jira instance.
- Add your checklist to the subtask. Open your subtask (or another work item) and navigate to the Smart Checklist section under the description block. If it’s not showing, click Apps under the work item summary (task title) and select Smart Checklist in the drop-down menu. Type or paste your checklist items – those are what you wanted to add as a Jira subtask of a subtask. As a result, you will get a list of such mini-subtasks.
- Use the Markup editor to make your checklists more readable and informative. Add variety with rich formatting, structure the checklist with headers, tag responsible team members, and specify deadlines. Don’t forget you can also add extra context for each checklist item in the expandable fields. Include links to useful resources, list steps to take, add images, and so on.
That’s it! The checklist items will serve as subtasks of a parent subtask.
Smart Checklist works with Jira Cloud and Jira Data Center. Moreover, it can be used in both team-managed projects and company-managed projects.

But What if You Still Want an Actual Jira Subtask of a Subtask?
If, for some reason, using a checklist as a substitute doesn’t work for you, there is another workaround you can try.
As I mentioned earlier, there’s no native functionality that would allow you to add a subtask to another subtask in Jira. The default option is that you can only create subtasks for tasks. However, it’s possible to change the out-of-the-box work item hierarchy with the help of Jira Plans (formerly Jira Advanced Roadmaps). You should have access to it if you’re using Jira Premium or Enterprise.
Jira Plans, among other things, allow you to create custom hierarchies. For example, you can add new work types above epics, such as Initiatives or Programs. It’s also possible to integrate other custom work types anywhere in the hierarchy. This allows you to shape new relationships between child issues and parent issues (work items).
So, as a result, you can configure a work hierarchy where adding a Jira subtask of a subtask will be real. However, you will need to come up with other names – obviously, you can’t have two different work types both called “subtask”. It will be necessary to add a new subtask issue type – for example, you can name it a sub-subtask.
For more details, see our Advanced Roadmaps Hierarchy Configuration Guide.
Is a Checklist a Good Substitute for a Jira Subtask of a Subtask?
I would say yes. But, of course, it depends on how you want to use Jira subtasks and why exactly you want to add a subtask to another subtask. In most cases, it’s needed to better structure work within a team. Once you start working on a subtask, you realize it’s comprised of smaller pieces of work, and you want to incorporate them into the parent task structure.
As I explained earlier, Smart Checklist provides you with all the key features of a subtask (except maybe for being a standalone work item). In addition, you get some perks you wouldn’t have with a Jira subtask of a subtask, such as creating reusable checklist templates.
- If your ToDo list contains many steps, using a checklist is much more convenient than creating multiple subtasks. With a checklist, it’s enough to type in (or paste) the list of your ToDo items – and they are good to go! In contrast, if you add subtasks, you need to fill out all the work item details, assignees, reporters, and custom fields for each of the new issues (work items). So I would say it doesn’t make much sense to use subtasks if you have a dozen of them – it’s simply inefficient.
- Another advantage of a checklist, compared to a Jira subtask of a subtask, is that it keeps the work hierarchy simple. You can see all your checklist items at a glance from a task view/subtask view – without diving into deeper levels of work hierarchy. In addition, smart checklist progress is displayed directly from your Jira board. This is a way better visibility than when you have to search for a needed work item among the subtasks of subtasks.
- Last but not least, Smart Checklist works with all types of Jira Software, all project types, and all Jira plans. So I definitely recommend you give it a try!
Looking for more ways to improve your work in Jira? Take a look at our article about best practices of Jira workflows.


