


 Jira
Jira monday.com


Add-ons, especially smaller ones, can be “behind the scenes”, meaning people may not remember the brand or the add-on name. Sometimes, we have cases of people contacting our support, but they are using another checklist add-on.
That said, there will be times when you’ll feel the need to migrate between different add-ons, as some may offer specific bits of functionality your team requires. Maybe the add-on you were using is not supported anymore. Perhaps your team requires more customizable permissions. Or there’s a need for certain specific integrations like JMWE or Deep Clone. Or maybe you are looking for an add-on that’s available on Jira Data Center? Whichever the case, you can migrate your checklists into Smart Checklist.
This article will cover migration from:
- CSV
- Trello
- Issue Checklist
- My ToDo and Elements Checklist
Please note that you will need Jira Admin permissions to export and import checklists.
Importing work items (issues) from CSV
Please note that you must have the Checklists custom field in your instance before the import.
- Prepare a proper CSV file containing checklists. Either manually or by exporting from Jira.
Manually: Make sure that the formatting keeps new lines. You can download a CSV import example here.
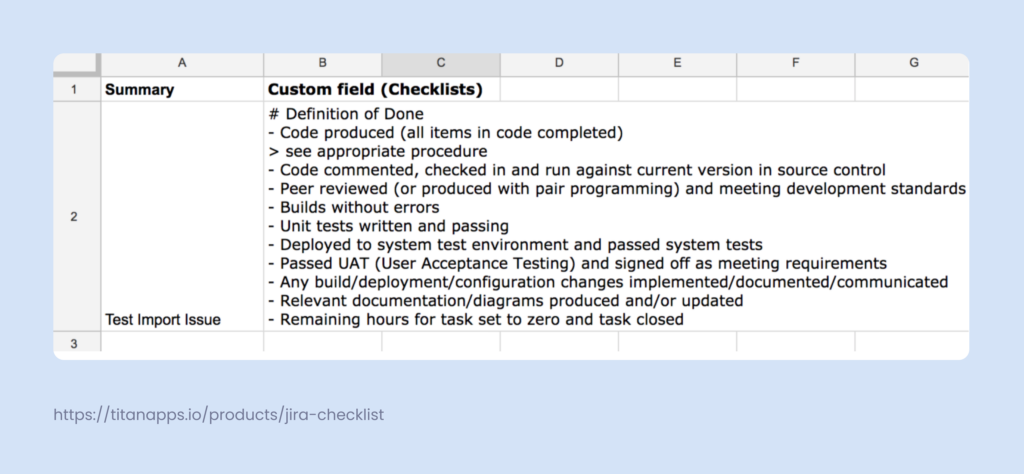
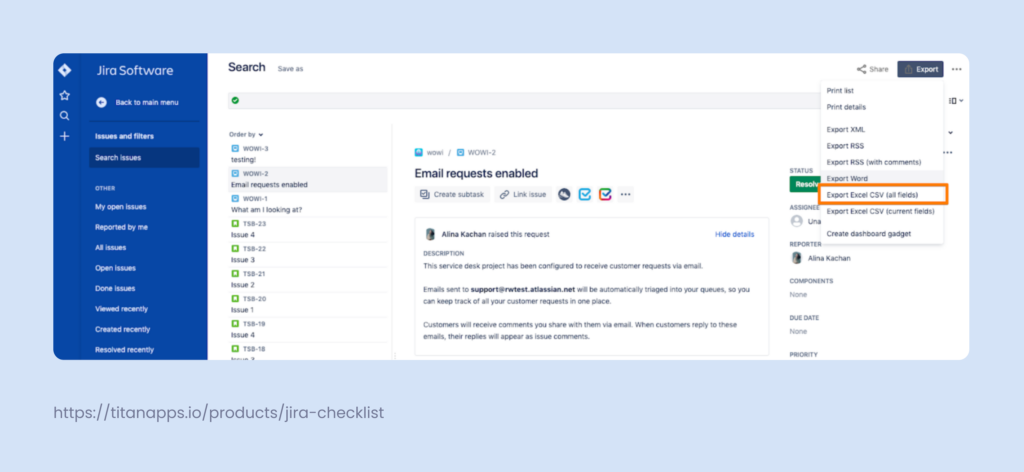
Exporting from Jira: You can do it via the Work Items Search form.
- Clean up CSV, leave only needed columns (fields), e.g., Work Item Key (for future mapping Jira work items (issues), Summary, Checklists, Smart Checklist Progress.
If work items from more than 1 project are to be imported – then leave the Project column in CSV.
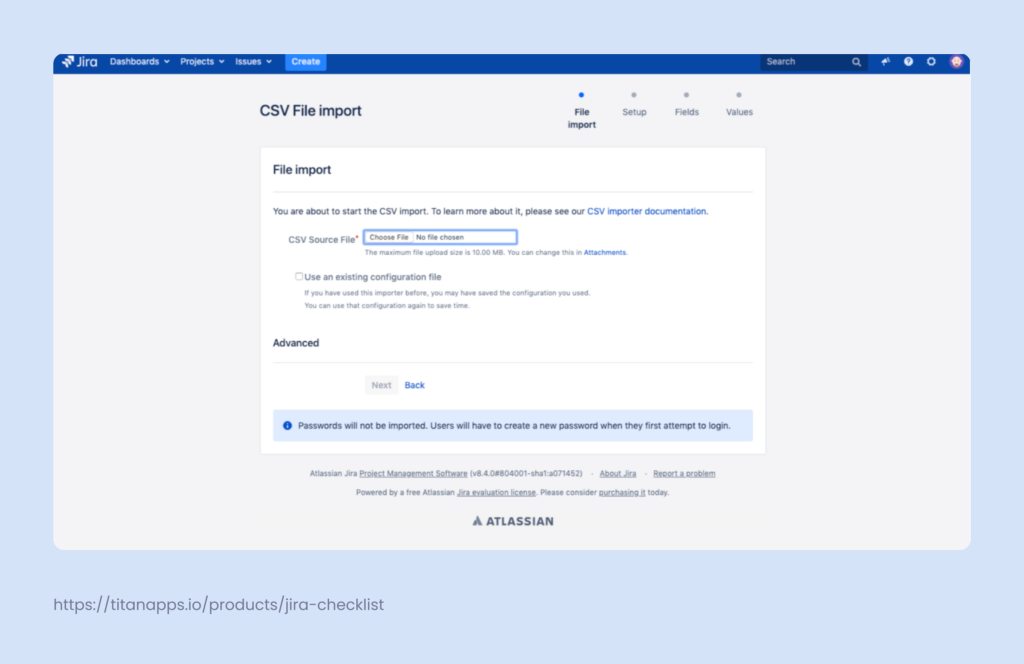
- Go to System – Import and Export – External System Import – CSV.
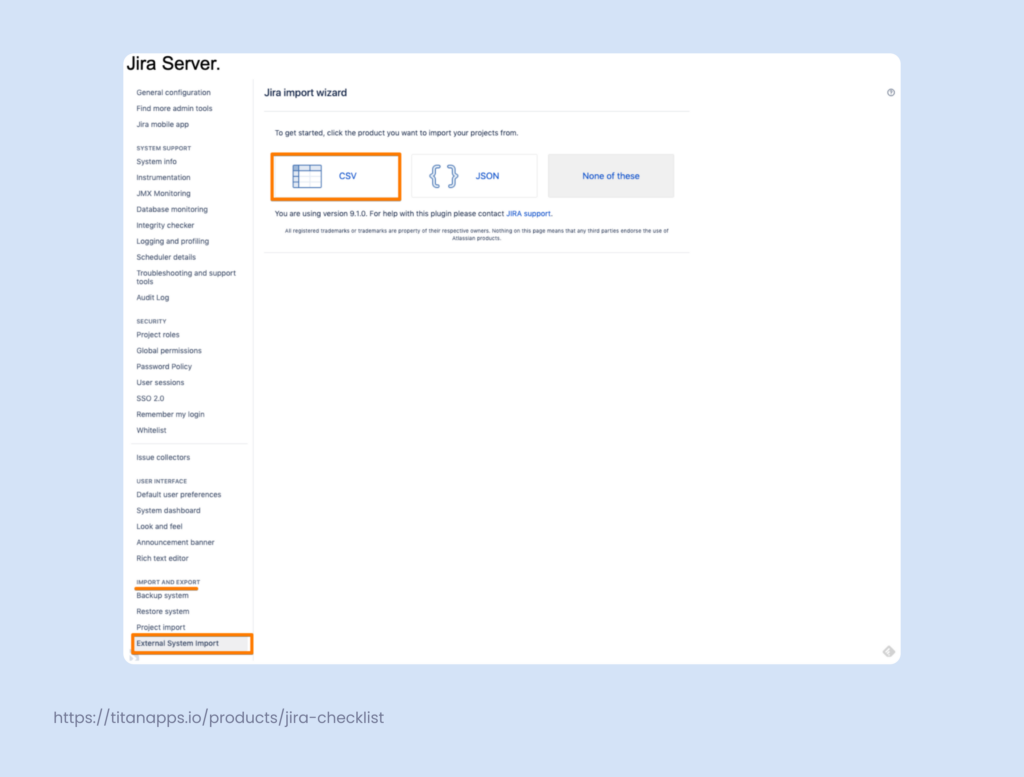
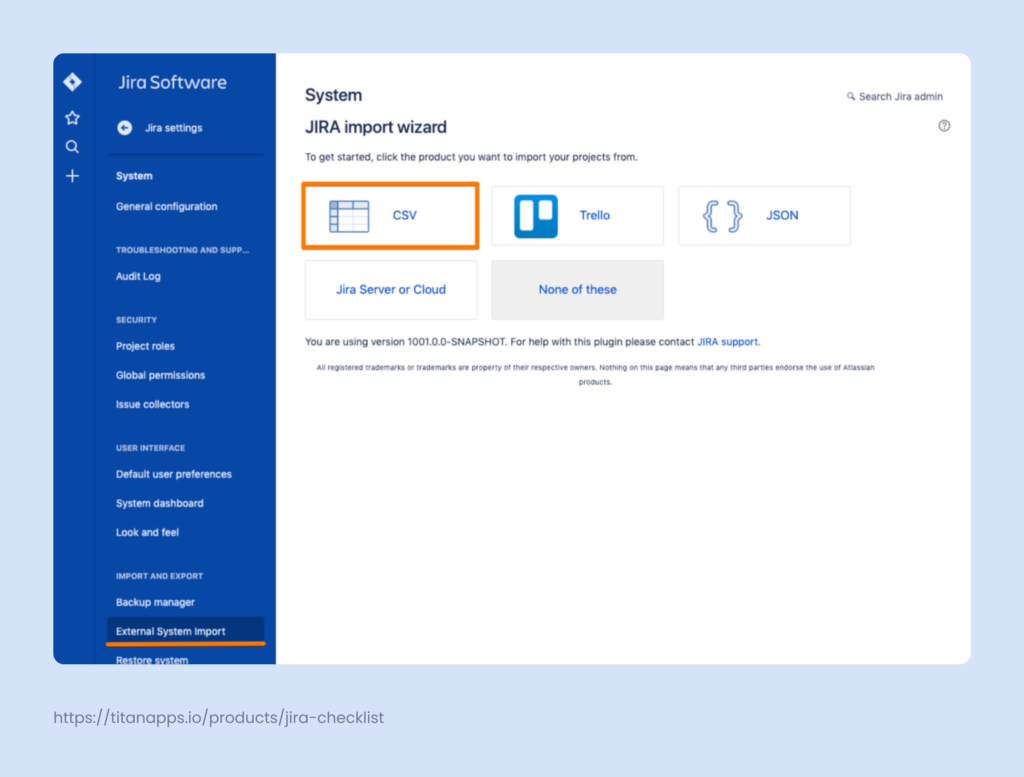
- Choose a CSV file.
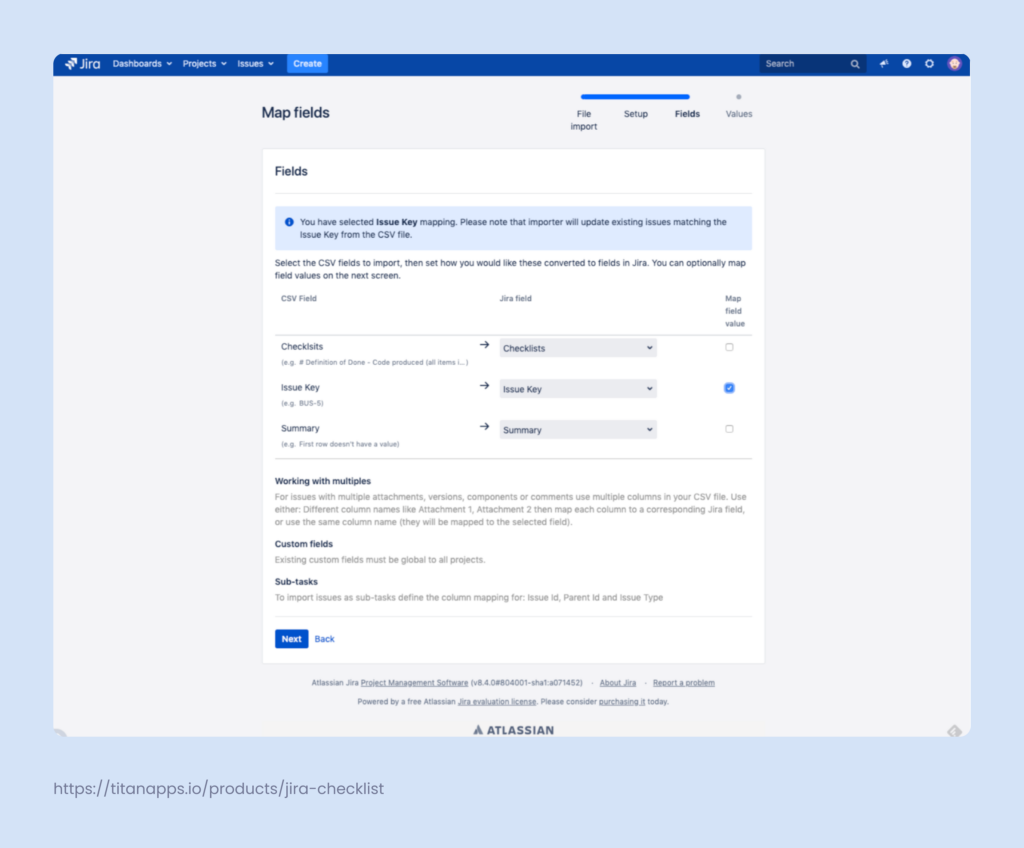
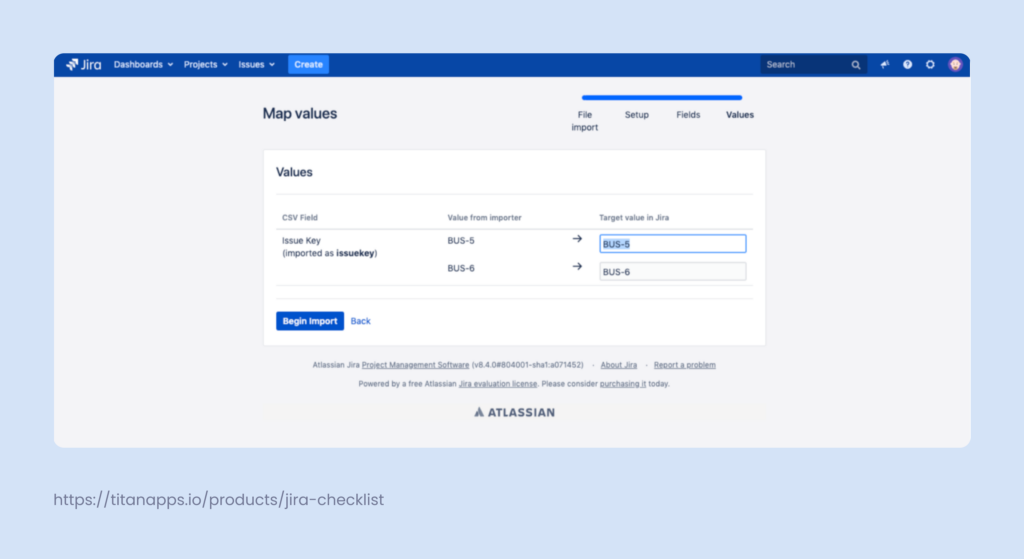
- Map fields.
- Map Work item Key CSV field to Work item Key Jira field and check ‘Map field value’ (by that, field values will be taken for updating a ticket).
- Map Summary CSV field to Summary Jira field.
- Map Checklists CSV field to Checklists Jira field, however, make sure to leave the ‘Map field value’ checkbox empty! Otherwise, checklist value won’t be imported.
- Begin import.
Always do test runs on test work items/values!
- Once the import is finished – the “Checklists” custom field in proper Jira Work items will get updated with Checklists values from CSV.
Importing checklists from Trello
Here’s a fun bit of random trivia: We developed Smart Checklist when our team outgrew Trello, and the checklist functionality was missing from Jira. Therefore, we needed both the tool and a way of importing our data.
The Smart Checklist exporter power-up for Trello allows you to convert your Trello Checklists into either CSV or TXT – both formats are supported by Smart Checklist – and then migrate them into Jira.
We already have a detailed guide on integrating Jira and Trello. You can take a closer look at the process of exporting your checklists there, or look at this video for more tips.
Migrating from Issue Checklist to Smart Checklist
Smart Checklist allows you to import your checklists from Issue Checklist in a few steps.
NOTE 1: Issue Checklist custom field must be available for the migration to succeed. You can check whether it is available or not by accessing Issue Checklist settings from your Global Settings. From there, you’ll see if the Save checklist data to Jira custom fields setting is disabled or not.
NOTE 2: It’s highly recommended to manually create the same custom statuses you had in Issue Checklist in Smart Checklist before the import. If, during import, some statuses are missing, they will default to the TODO status.
Once you are sure that the Save checklist data to Jira custom fields setting is enabled, follow these steps to migrate your checklists into Smart Checklist.
- Navigate to Apps > Manage your apps > Smart Checklist Settings.
- Click on the “Import Checklists” tab.
- Click on the Projects link to redirect you to the “Projects” tab.
- Toggle Smart Checklist on for the projects for which the import needs to be done.
- Come back to the “Import Checklists” tab.
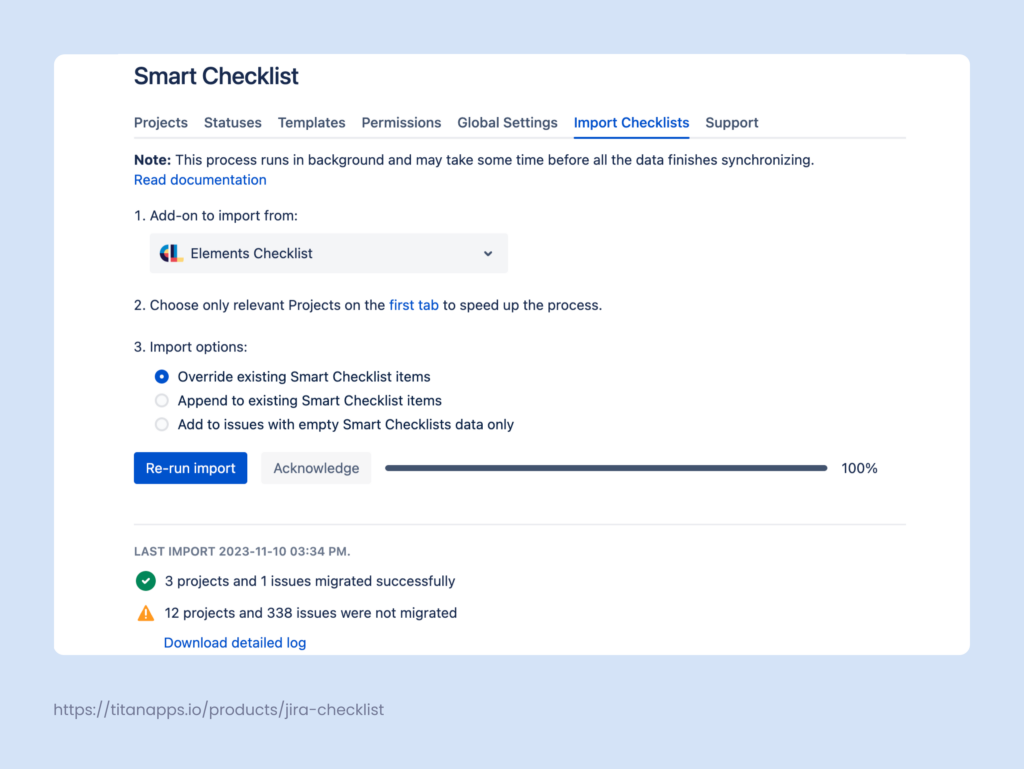
- If you want to replace checklist items with the new imported values – Select the checkbox “Override existing Smart Checklist items”.
- Click “Read more” to get more details on the import process and formatting conversion.
- Click “Import”. The confirmation pop-up will be shown.
- Click the “Import” button in the pop-up, and a pop-up with the message “Import has started successfully” appears. The “Import” button will be disabled, and a tooltip “There’s already an import in progress.” will be present.
- The importing process will take some time. Reload the page manually to see the import result.
- Once it is completed, the date and time of the last import will be displayed. A message with the number of successfully imported checklists will be shown. Additionally, a link to the detailed log is present.
Formatting differences
There’s a slight difference between the syntaxes of Smart Checklist and Issue Checklist. We will convert the syntax automatically when importing data. You don’t need to convert anything yourself. But just FYI, here are the main differences. Perhaps this information will come in handy if you use syntax in some third-party automations.
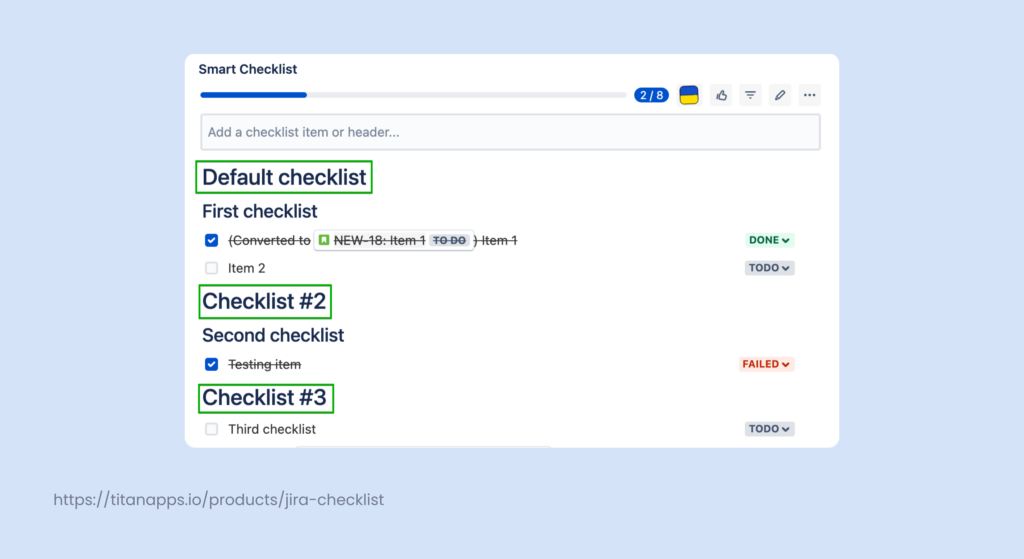
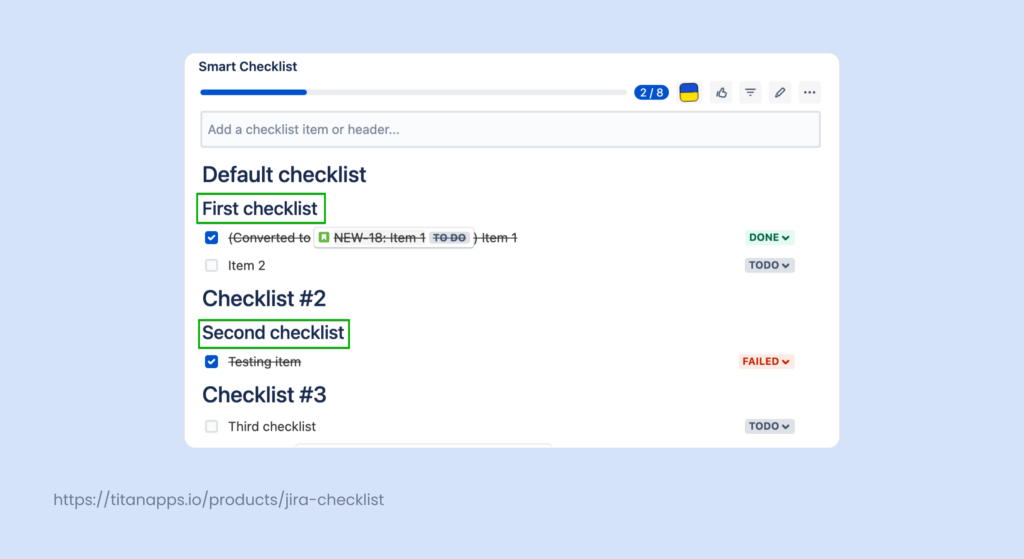
Multiple checklists
As I mentioned, Smart Checklist does not have multiple checklist functionality. Our team is working on adding this feature at the moment. However, if you wish to migrate now then the different checklist names will be formatted into the <h1> header during the migration.
Separators
The separators used by Issue Checklist are similar to Smart Checklist’s header functionality. They start with —.
These separators will be formatted into the <h2> header tag during the migration.
Statuses
As mentioned before, we suggest that you create the same custom statuses you had in Issue Checklist in Smart Checklist before the import.
In case you choose to ignore this step, all of the statuses will default to the ToDo status during the migration.

Links
If additional mailto data (subject, body, etc.) is available in the brackets, <> will be added at the start/end of each link with a space.

Migrating from Issue Checklist: FAQ
Q: What happens when an import fails?
A: Each project imports independently. So, whenever an import fails, it will fail only for that specific project. Then, also, we halt the importing for that project.
Q: One of my imports failed in the middle of the process. Is it possible to roll back?
A: No.
Q: Only one of my projects failed to import. Is it necessary to re-run the importing on all of them?
A: No, you can enable only the projects you want to import. Remember that.
Q: If I try to re-import, will I have duplicates?
A: Yes. However, there is an option to check “Override existing Smart Checklist items” that will replace all existing checklist items with the new imported values.
Q: What to do if the app says that migration has finished, but my custom fields aren’t updated yet?
A: Custom fields are updated in a background job after importing, so it might take a little longer than the importing itself. However, you can always “Synchronize storages” to sync custom fields.
Migrating from My To Do and Elements Checklist
My To Do checklist app is no longer available on the Atlassian Marketplace as part of Atlassian’s commitment to stand with Ukraine. This means that My to Do users are no longer able to renew their subscriptions. Our support team has received several requests regarding assistance with migration.
The Elements Checklist has been deprecated, and we have also received requests for assistance with migration from several users.
We’ve implemented dedicated functionality that allows for as painless a migration experience as possible.
- Navigate to Administration, Manage apps, Smart Checklist Settings.
- Click on the “Import Checklists” tab.
- Select an app to import from the list:
- My ToDo;
- Elements Checklist.
- Click on the first tab link that redirects you to the “Projects” tab.
- Toggle Smart Checklist for the projects for which the import needs to be done.
- Come back to the “Import Checklists” tab.
- Select an app to import from the list one more time (My ToDo/Elements Checklist)
- Choose one of the three options for import:
- Override existing Smart Checklist items: This replaces the checklist items that you already have in Smart Checklist with the ones from another app.
- Append to existing Smart Checklist items: This adds the checklist items from another app to the bottom of the checklist that you already have.
- Add to work items with empty Smart Checklists data only: This will run import only for the work items where Smart Checklist is empty. Checklists from the other app will be added.
- Click “Run import”.
- You will see the progress bar for the import. The importing process will take some time.
- Once the import is completed, the date and time of the last import will be displayed. A message with the number of successfully/not migrated checklists will be shown. Additionally, you’ll see a link to the detailed log that can be downloaded.
The option to migrate using API is available as well. You can learn more about this option for migrating from another app on a project basis from our documentation.
Formatting differences
Despite certain similarities of checklist apps, most differ in various aspects of functionality. This can slightly impact the way data is imported into Smart Checklist.
My ToDo
It is highly recommended to recreate the custom statuses you had in My ToDo before the migration. If some statuses are missing during the import, they will be created in Smart Checklist with an unchecked state and a similar name.
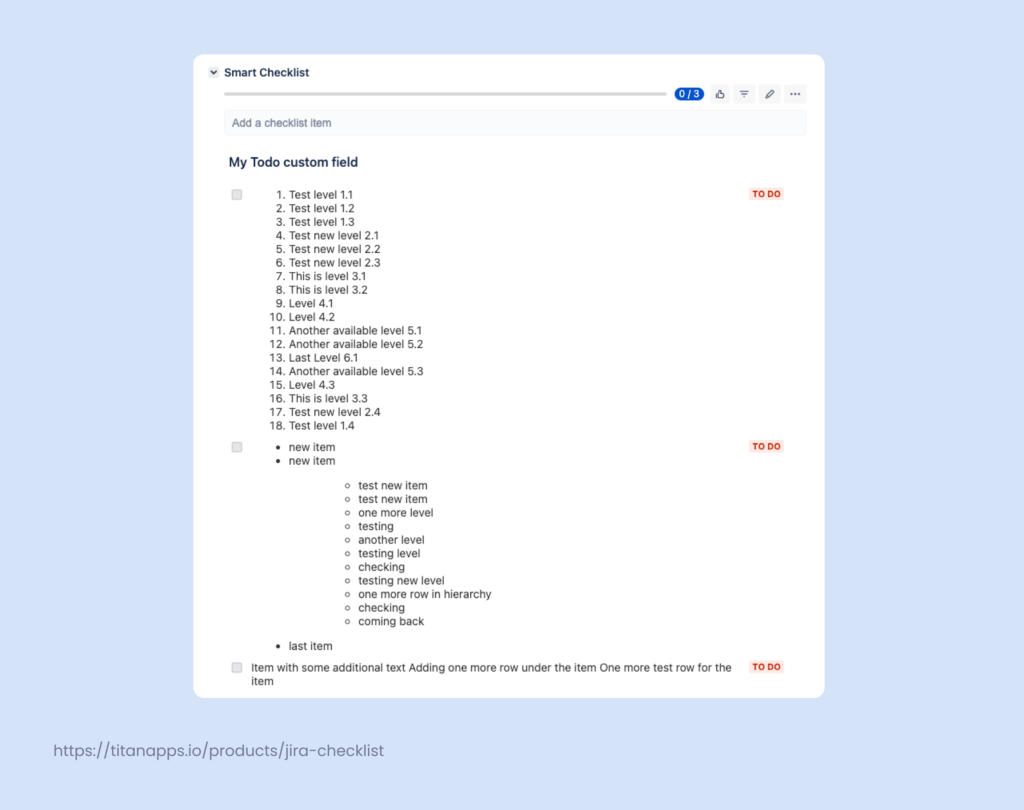
Additionally, Smart Checklist doesn’t support hierarchical lists. These lists will be migrated into our app as one item with a numbered list rendered inside.
You can learn more about the differences in formatting from our documentation.
Elements Checklist
Elements Checklist supports multiple checklists. This is a feature we do not support. Therefore, multiple checklists will be converted into checklists that are separated with <h3> headers during the import.
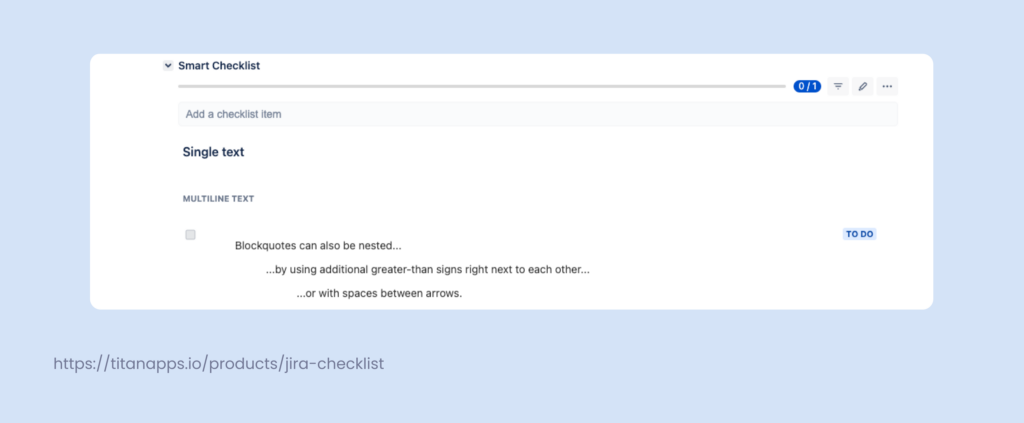
Tables, blockquotes, and ordered/unordered lists will be rendered as one item.
Files will be rendered with an ID and filename after the import, but the files themselves are not supported in Smart Checklist.
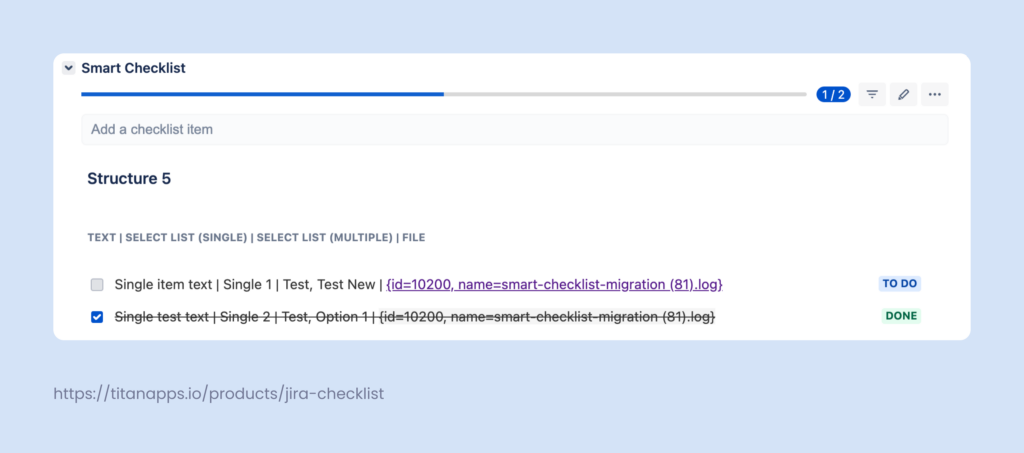
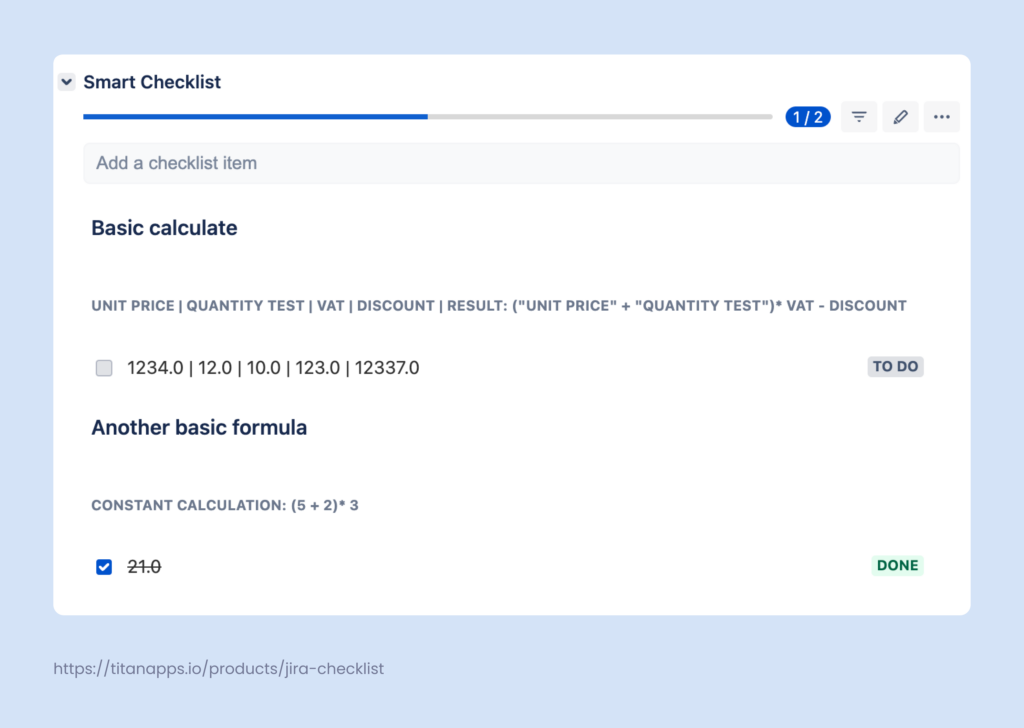
Lastly, we only support basic formulas. All the number attributes, as well as the result field, will be rendered in a row and separated with the “|” sign.
You can learn more about the differences in formatting as well as Elements Checklist’s Attribute Types from our documentation.


