Jira
Jira monday.com


“If everyone is moving forward together, then success takes care of itself.” Henry Ford
Most of Ford’s ideas were based on simple, tried, and tested truths. A single team, regardless of their passion, experience, or expertise can not run a successful project on a larger scale. That’s why they hold up even today.
It takes the combined efforts of multiple teams from developers, QA engineers, marketing, sales, HR, and business operations departments to run a sustainable business.
Each team relies on a separate set of tools in its arsenal. Project management solutions are not an exception.
A marketing team, for example, is reliant on developers, QA engineers, and designers when it comes to making website changes, developing and releasing new landing pages, or requested features and functionality.
Business analysts can use Trello to prioritize new feature releases based on ongoing feedback loops, competitor research, or data analysis. All while the dev team is still heavily reliant on Jira.
An integration between Trello and Jira, in this case, brings everyone to a common denominator.
How does the integration help?
- Jira work items (issues) are linked with Trello cards. Everyone can keep their finger on the team’s pulse as well as on individual performance.
- Detailed info is visible from Jira tickets and the back of the Trello card.
- Non-dev teams don’t need to log into Jira to make or assign new tickets to the dev team.
- Trello boards and Jira projects are interlinked.
How to integrate Trello and Jira?
Before we begin, I have to note that the integration of the two products is not the same as importing a Trello board into Jira. The latter process is slightly simpler yet it will yield different results. For example, you won’t have Jira work items (issues) pop up as Trello cards. Additionally, you’ll be using Jira’s interface rather than Trello.
How does one import a Trello board into Jira?
- Click on the gear icon in Jira to open the options menu and go-to system.
- Navigate to the Import and Export section and click the External system import button.
- Select Trello.
- Authorize your account.
- Create a new Jira project for each board you are importing.
- Select the Trello boards you’d like to import;
- Name the new project;
- Enter a new project key for the project.
- Import the users from Trello.
- Select Trello board users to import from the interface;
- Or enter the email addresses of users you’d like to import with the board. If they are existing Jira users, they’ll get the link to the board. Otherwise, they will receive an invite.
If you are looking for more functionality and automation capabilities – importing a board won’t do the trick. You’ll need to integrate the two products. Here’s how you do that:
Trello and Jira integration
Please note that the integration process is done exclusively on Trello’s side. You will not be able to set up a connection from Jira using conventional means.
- Open Trello and locate the power-up button in the top right corner of the screen.
- Alternatively, you can visit the power-ups page.
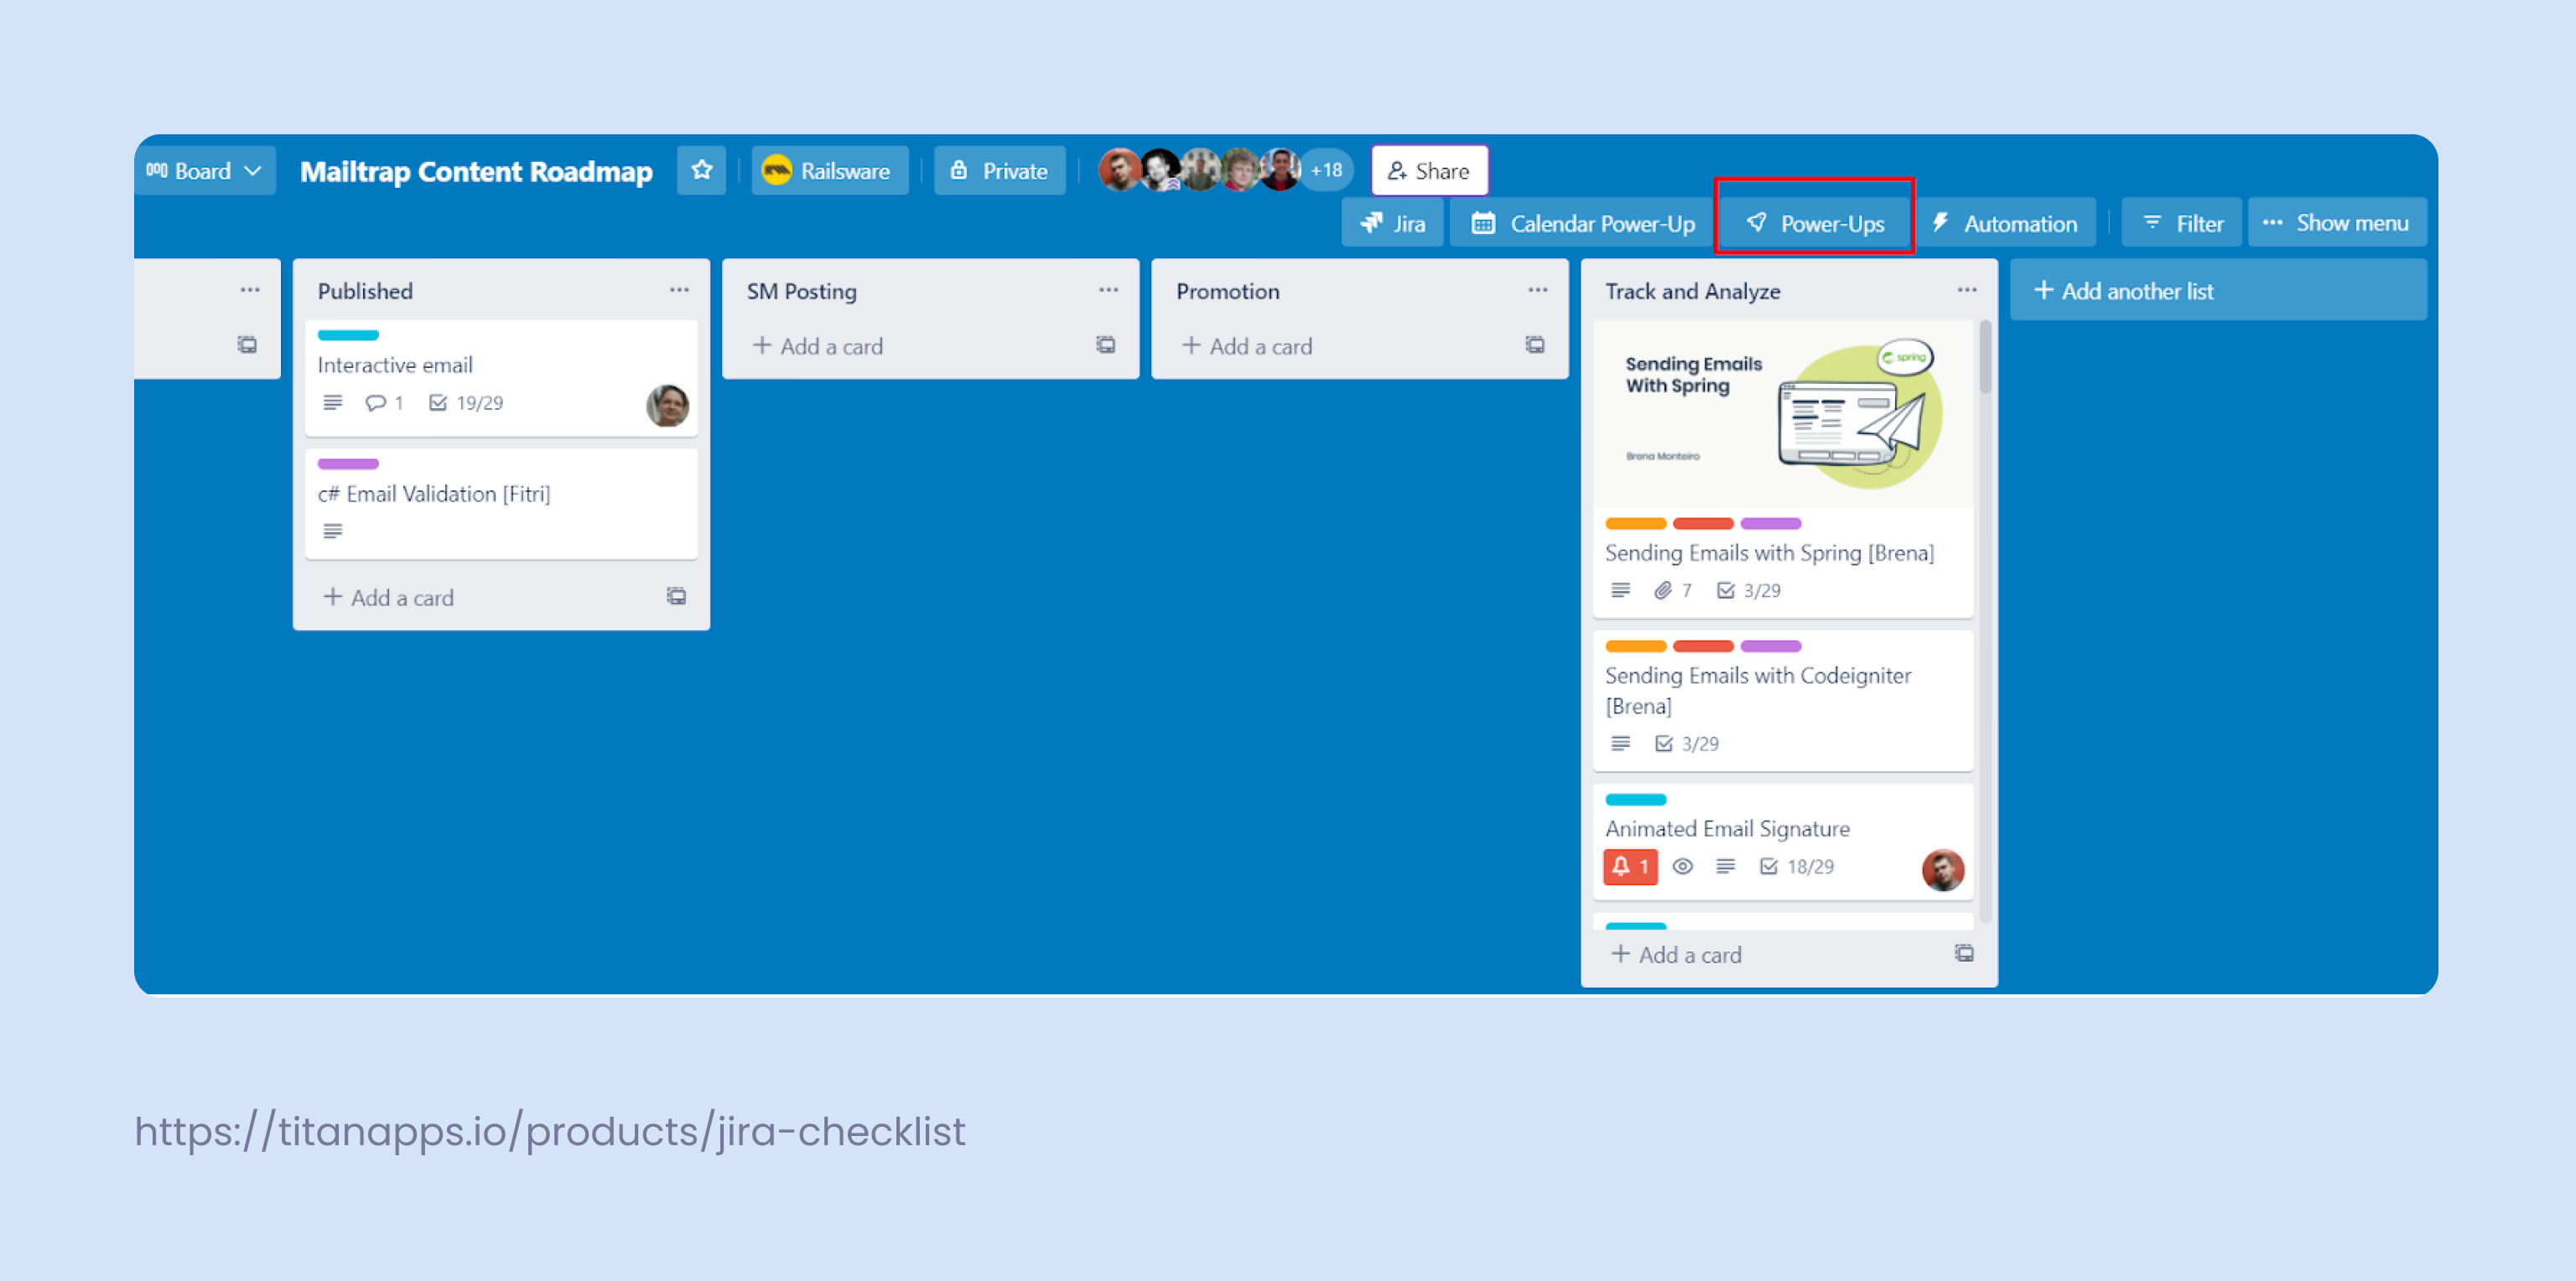
- Click on the power-ups button.
- Click on add a power-up.
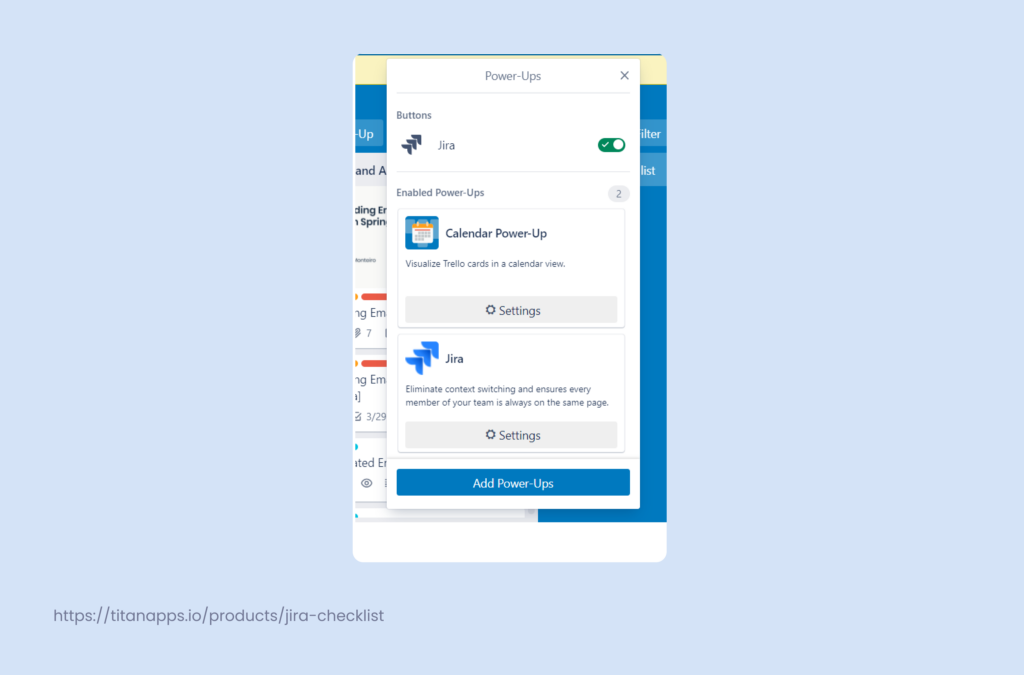
- A new screen will appear in the place where the Kanban board typically is. Look for the Jira power-up.
- If you have difficulties finding Jira in the list, use the search bar and type in ‘Jira’.
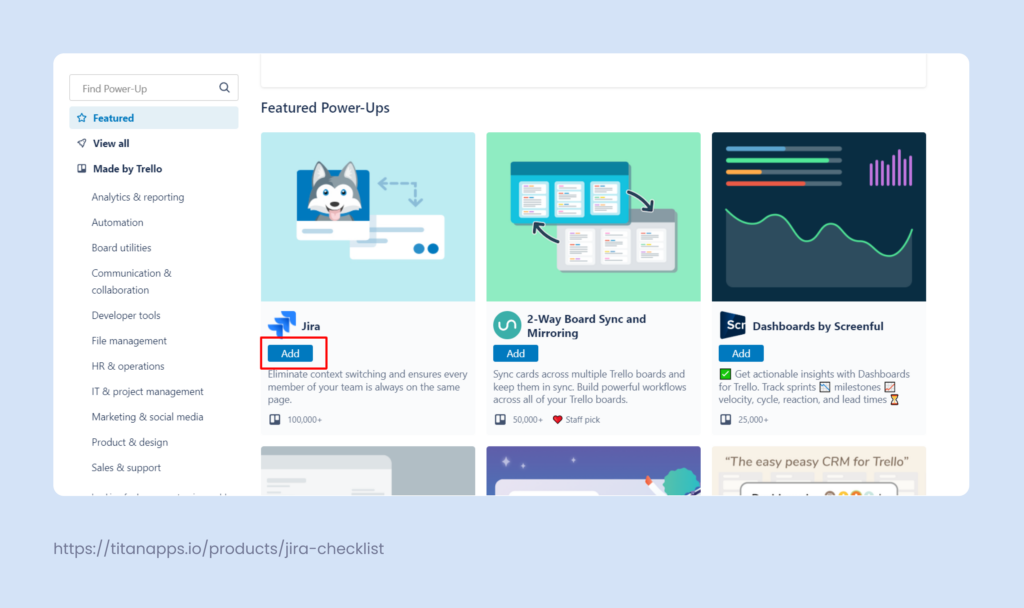
- Click on the ‘add’ button under the power-up.
- Once you’ve clicked on the ‘add’ button, you’ll be rewarded with a screen that says the power-up has been added successfully.
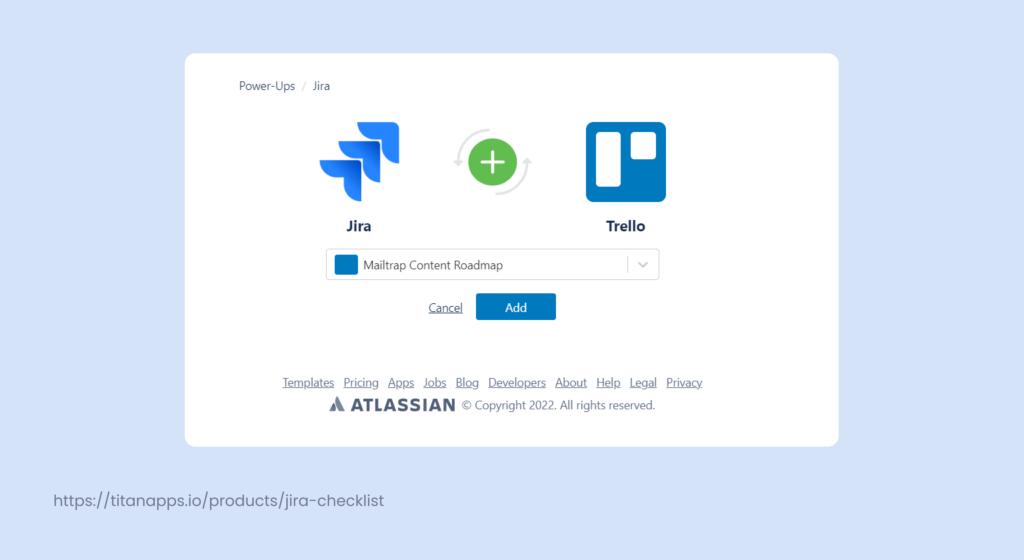
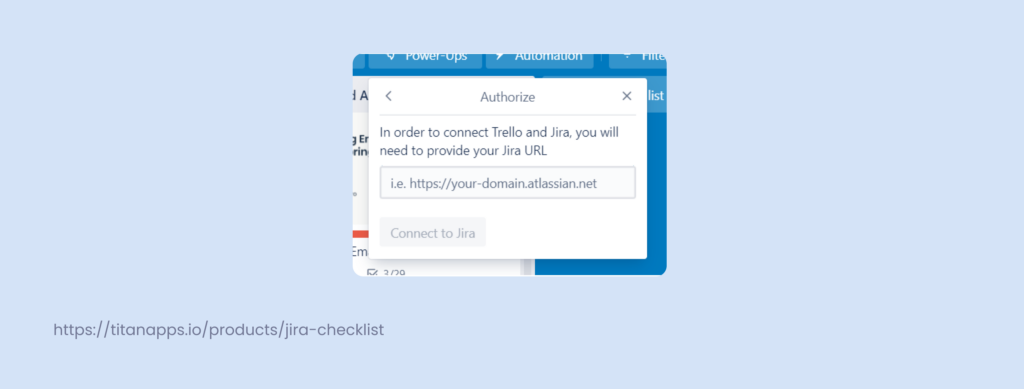
- Find the power-up button again, locate the Jira power-up and select ‘edit power-up settings’ from the submenu and click ‘connect to Jira’.
- Authorize the connection.
- Enter the URL of your Jira board;
- Make sure to Include atlassian.net in the URL;
- Connect;
- Authorize in the new browser window pop-up.
Boom – Trello, and Jira are now sharing information. The whole process shouldn’t take longer than a couple of minutes.
But what about the extra bells and whistles?
Checklists
Being an adopted child to the Atlassian family, Trello differs from Jira in terms of functionality. There are certain features of the Kanban board cards you’ll most likely miss in Jira. Checklists are a prime example of such functionality.
These checklists are quite useful for keeping tasks and tickets in order, following streamlined and repetitive processes, or simply knowing who is responsible for individual aspects of a work item.
Jira does not support these kinds of checklists by default, but there are certain third-party extensions like the Smart Checklist you can use to achieve these goals.
Moreover, you can use the Smart Checklist extension to export existing checklists from Trello to Jira via the Smart Checklist Exporter power-up.
How does the Smart Checklist Exporter work?
The Smart Checklist Exporter converts existing Trello card checklists into a format that Smart Checklist add-on understands. To be more specific, you’ll be able to export your checklists in CSV and TXT formats.
How do I add the Smart Checklist Exporter Power-up?
The process is quite similar to adding any Trello power-up.
- Go to the Trello power-ups option.
- Find the Smart Checklist power-up in the listing or via the search bar.
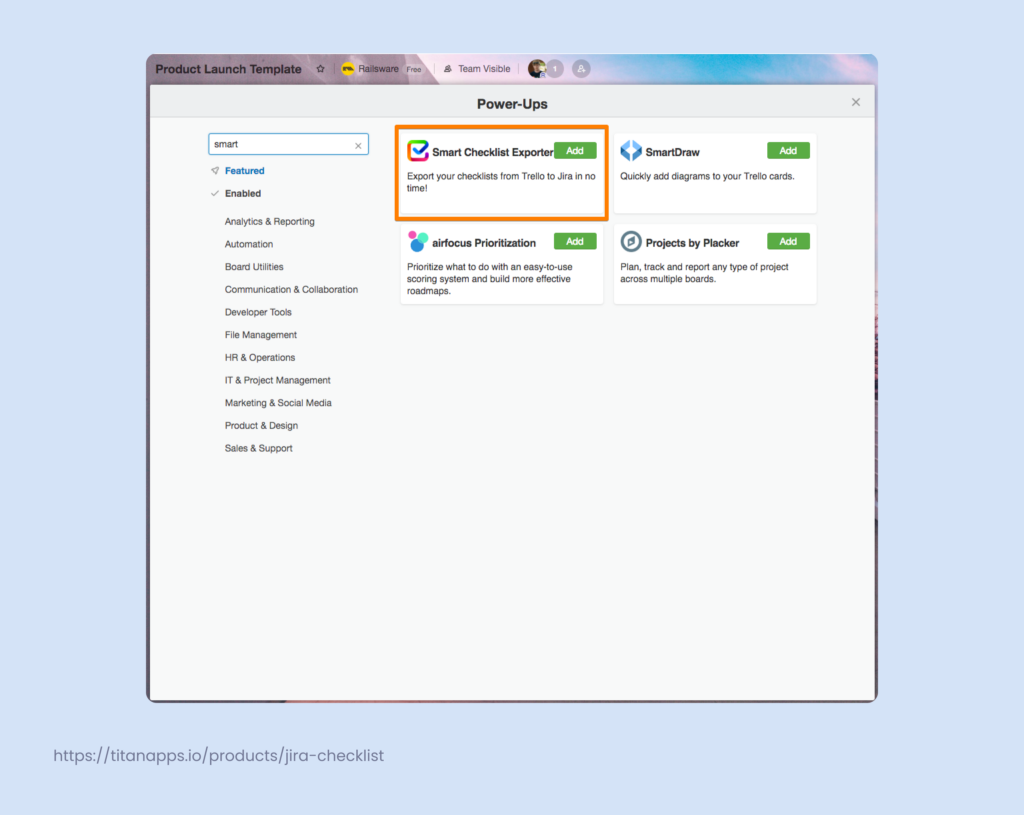
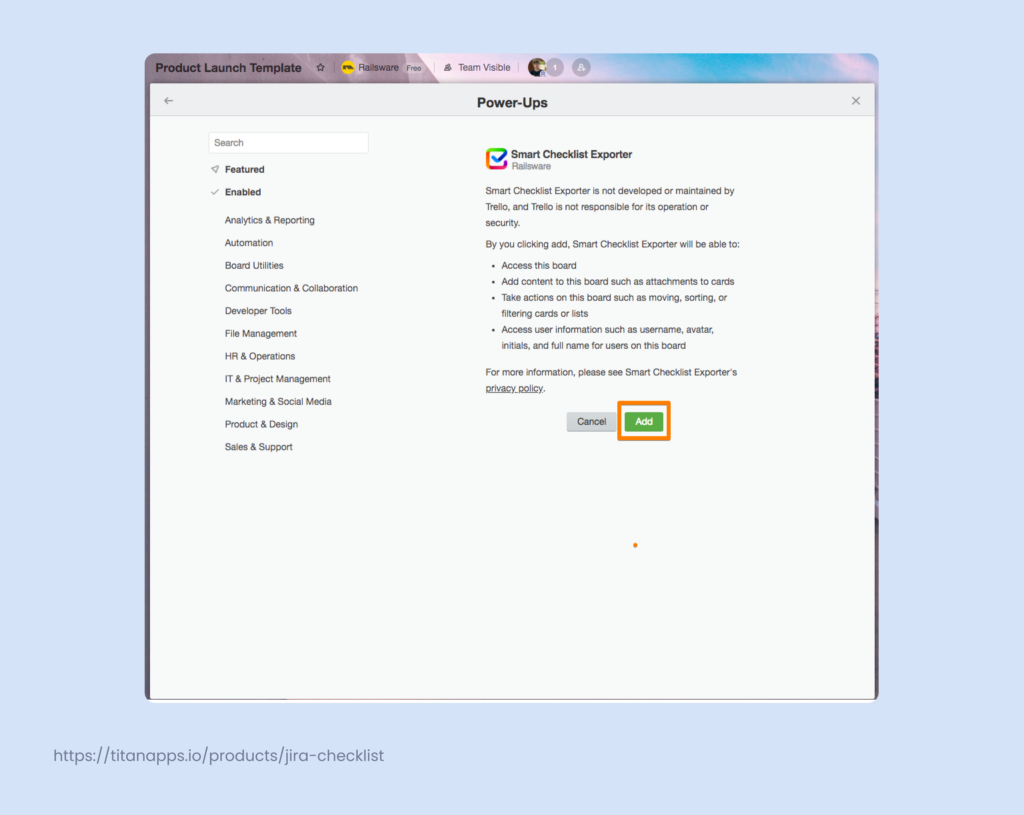
- Click the ‘add’ button.
- You’ll see a new button appear in your Trello cards – ‘Export Checklists’.
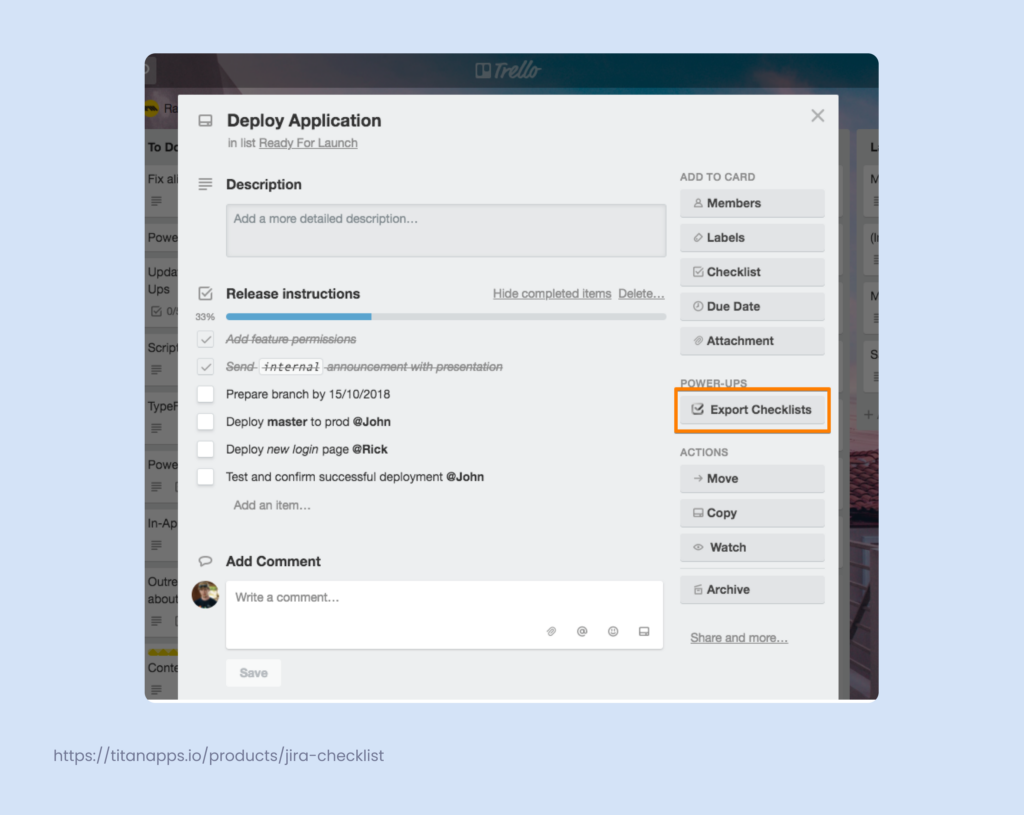
How do I use the Smart Checklist Explorer?
- To get all checklists from your Trello board in Smart Checklist format – click on the “Smart Checklist” button and then “CSV”.
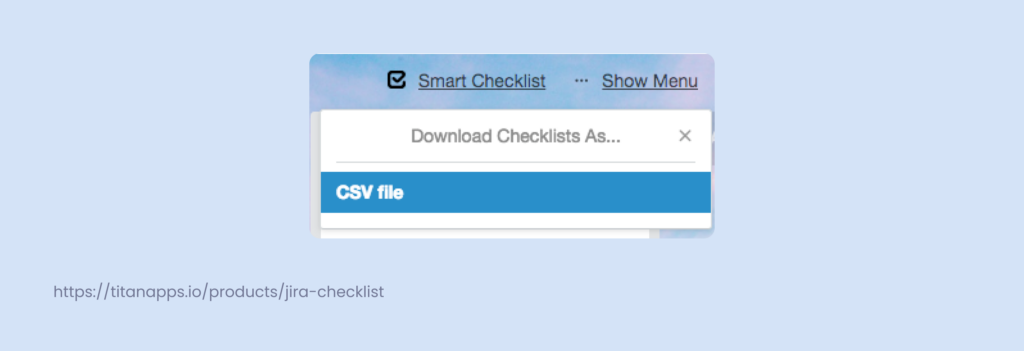
- CSV file will be downloaded to your computer and checklists will be formatted properly.
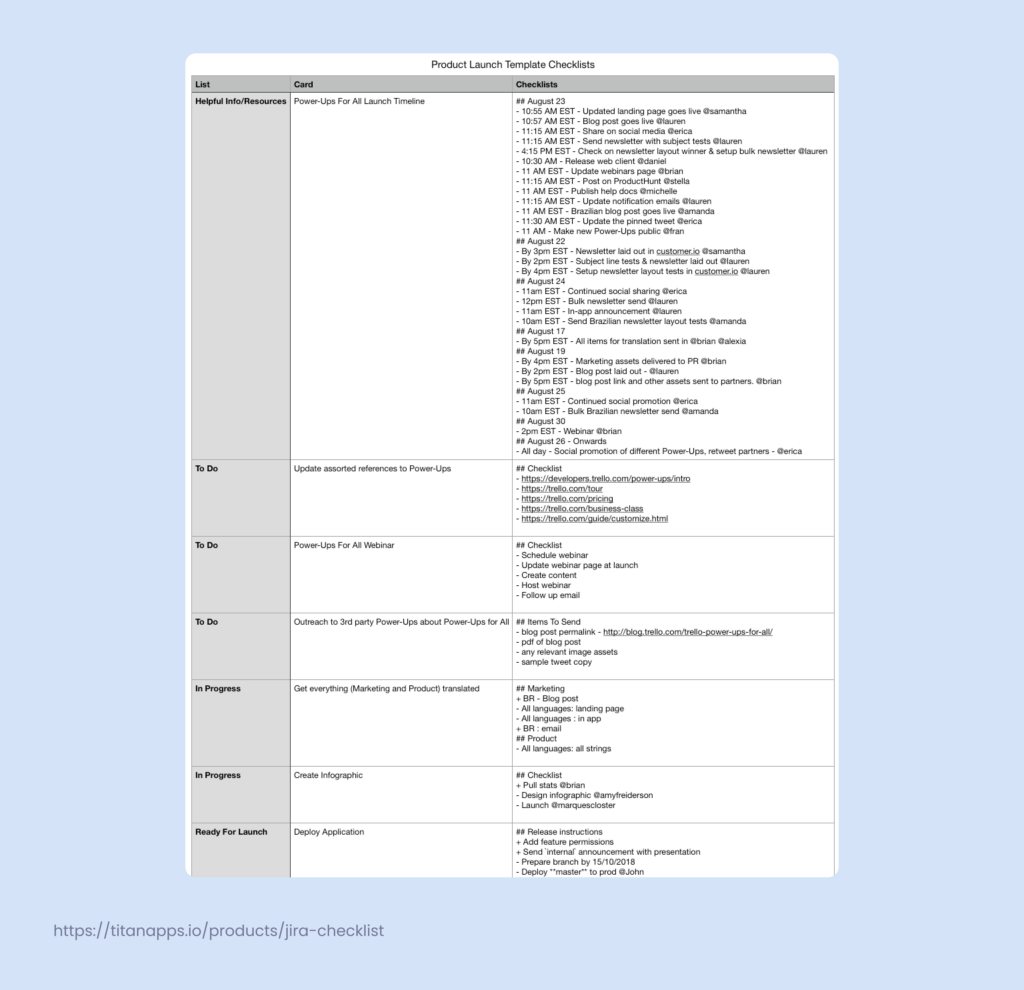
- Then either use bulk import into Jira from CSV or copy & paste checklists right into your ticket.
Pro tips
- Please make sure to map Summary CSV field to Summary Jira field and check ‘Map field value’ while importing your CSV file to Jira.
- Also, map the Checklists CSV field to Checklists Jira field, however, make sure to leave the ‘Map field value’ checkbox empty.

These are the basic requirements for the checklists to get rendered successfully. You can also take a look at the video below.