Jira
Jira monday.com


Jira components are a project-level field that groups work items (issues) by a stable area of ownership, such as a product module, service, team, or workstream.
Use them when one Jira project contains many work items and you need consistent categorization, routing to the right owner, and reliable reporting.
Components reduce label chaos, speed up triage, improve dashboards, and make dependencies easier to spot inside a single Jira project.
Jira components are a practical way to organize work when “everything lives in one project.” They help teams classify issues in a controlled way and assign ownership through a component lead and default assignee.
Use Jira components when you need:
- Stable grouping for software development work (Frontend, Backend, API, Billing, Mobile)
- Faster routing for bugs and requests to the right development team or owner
- Cleaner filters, dashboards, and metrics by module or workstream
- Less noise from ad-hoc labels and inconsistent naming
Do not use components for everything. Labels fit flexible tagging. Epics fit initiative-level grouping. Fix versions fit release packaging and timing.
Next, let’s define what components are in Jira and how they work in practice.
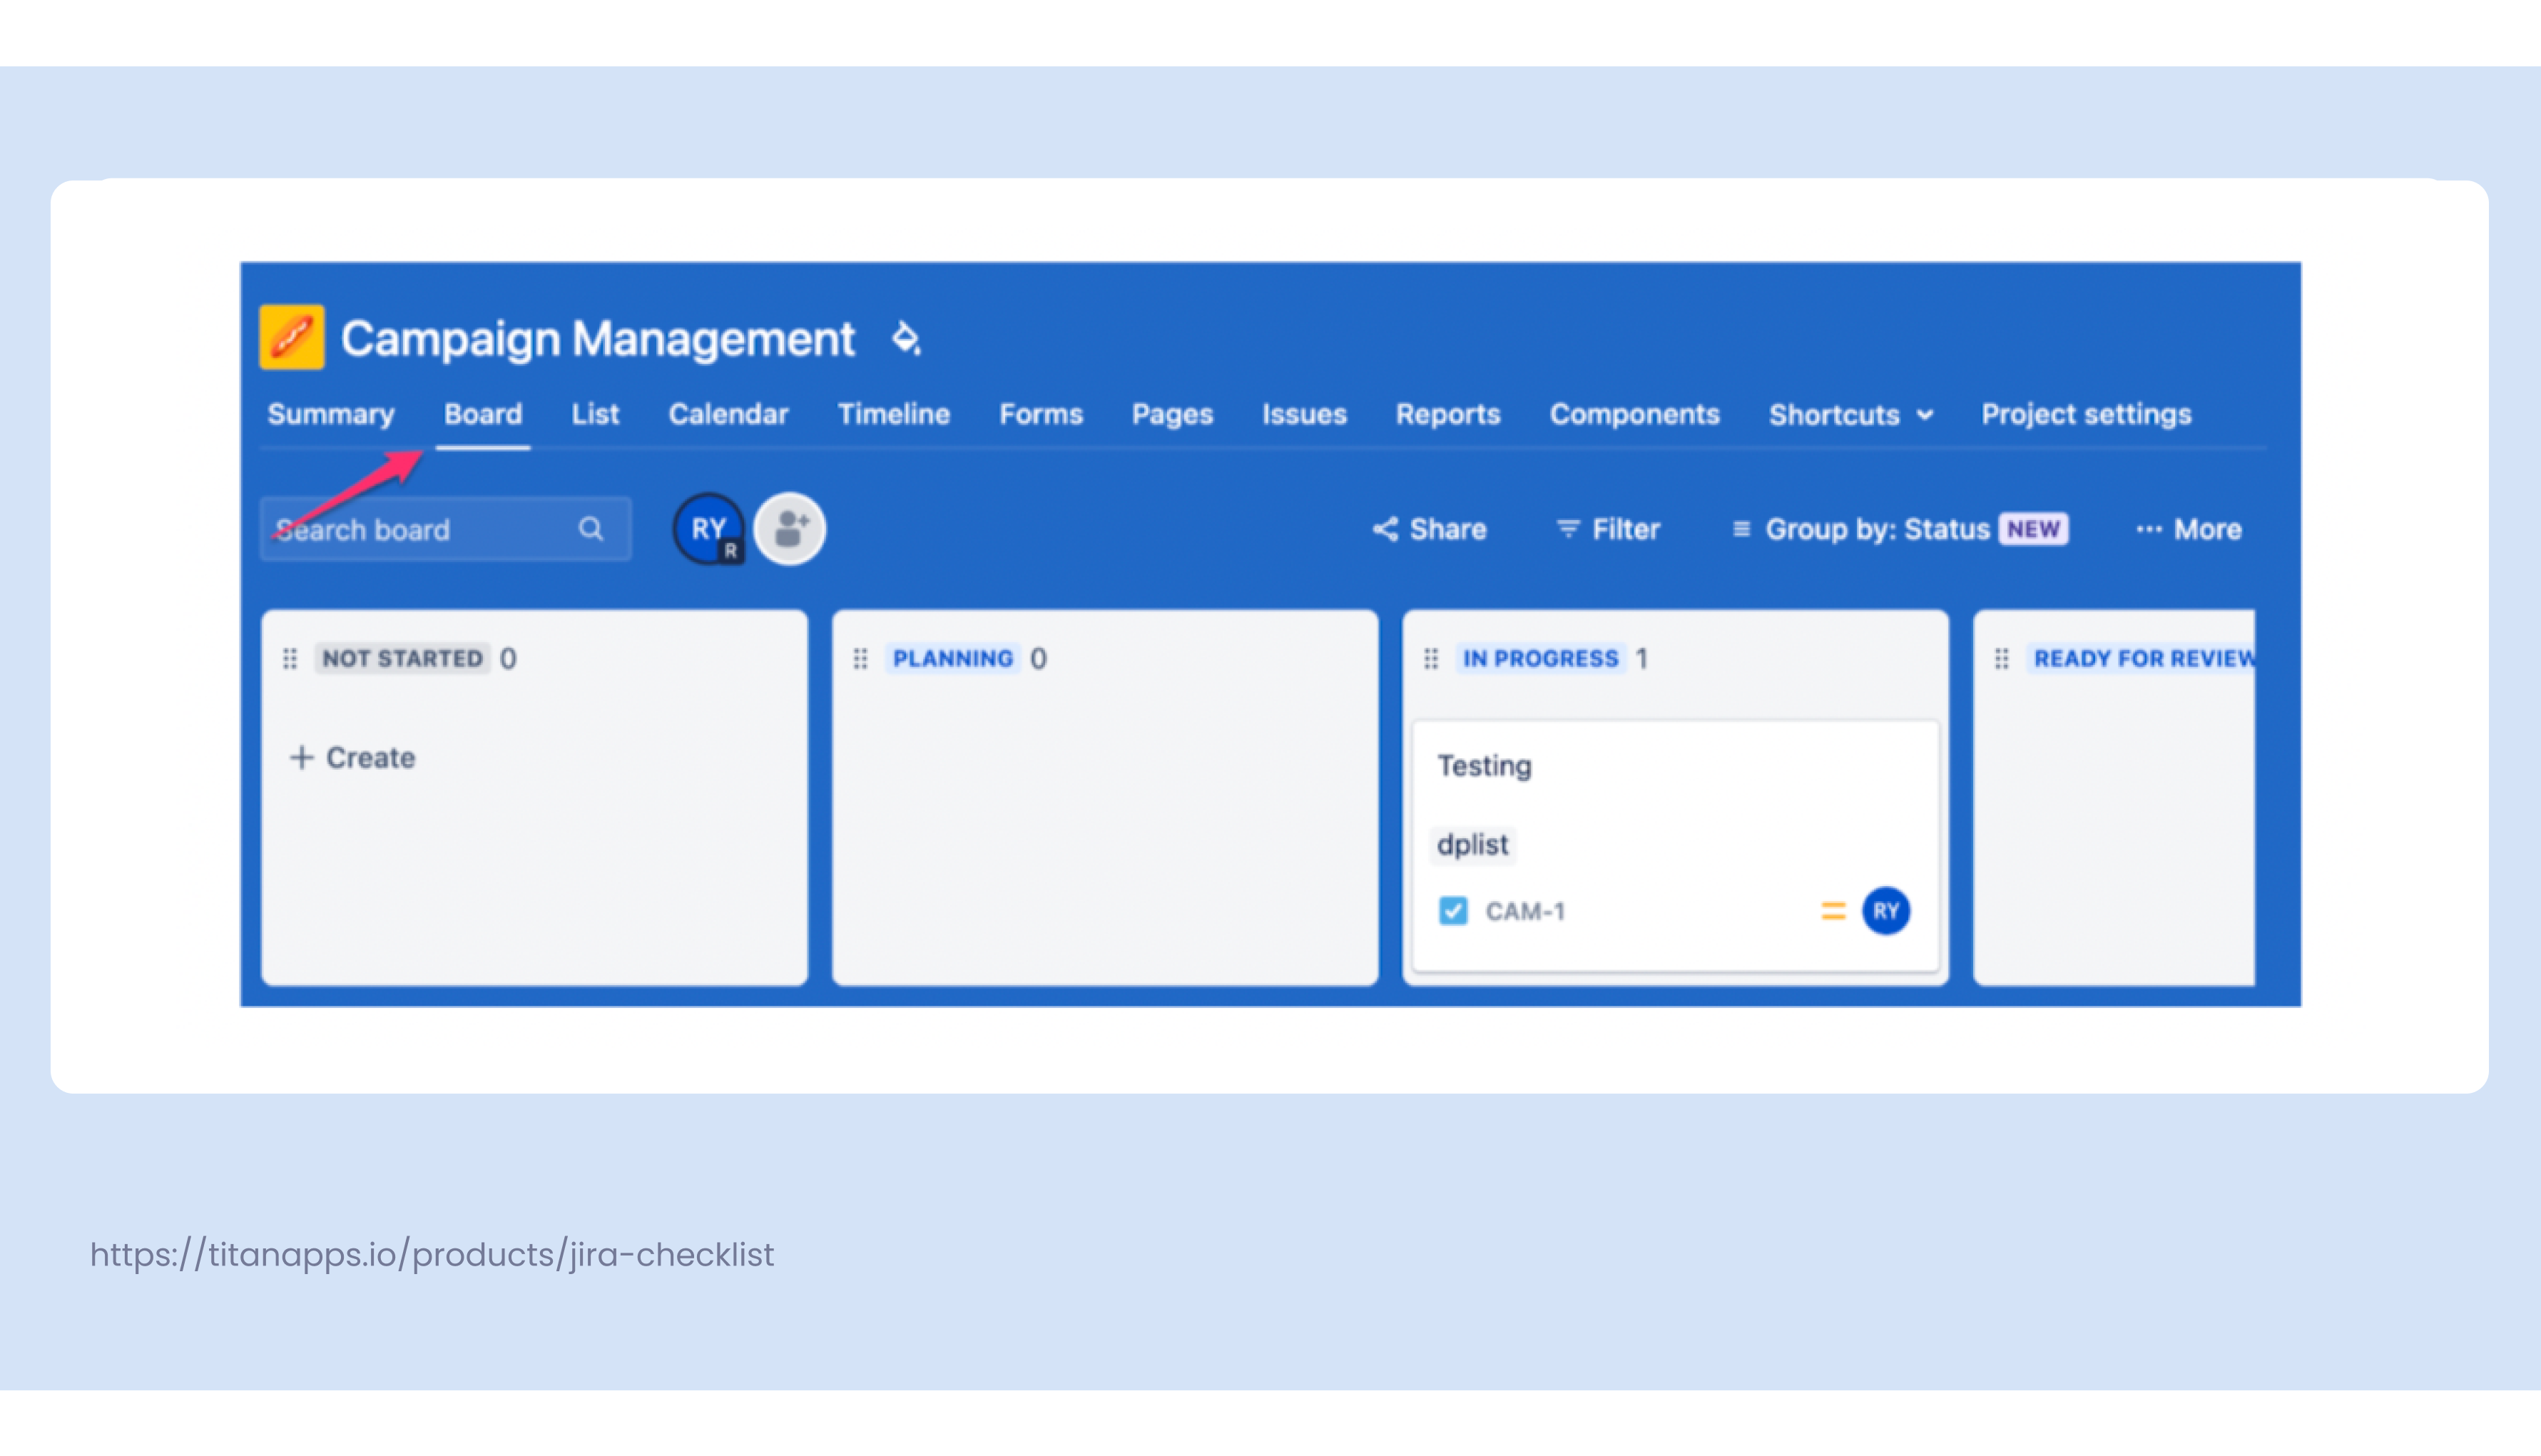
What are components in Jira?
A component is a custom field in Jira software. It is used to categorize and group issues together under one project. In Jira Cloud, components are available in company-managed projects (Atlassian now calls them “spaces”) and are scoped to one project. Components help you group Jira issues around features, teams, or workstreams. They also support ownership, since you can set a component lead and a default assignee for new issues.
For example, a website design project could have multiple issues related to either Web development or UX Design. By using components, you could group all web development issues in one component naming it Web Development and the same can be done for UX Design issues.
It’s majorly helpful to break work into smaller sections which eventually helps teams to organize various issues/tasks by reducing cross dependencies.
Here are a few ways to use Jira Components effectively:
- Use Jira components for tracking bugs by adding a component to all bug related issues.
- Use Jira components for adding tasks related to a new app feature.
- Use Jira components in marketing projects for grouping social media campaign related tasks to one component and advertising tasks to another.
- Use Jira components to increase transparency among teams to have visibility over the progress of issues/tasks.
- Jira Components are used to create groups of issues that share a common theme or purpose. If you have a lot of issues that need to be grouped together into a single category, then components may be the solution for you.
Developer-first use cases for Jira components
Components work best when they represent something stable in your software development workflow: a module, a service, or a part of the product that has a clear owner.
Group Jira issues by module or layer
Set components like Frontend, Backend, API, Billing, or Mobile. This makes it easier to categorize work, spot dependencies, and keep the backlog cleaner in a single Jira project.
Route work to the right owner
Assign a component lead and default assignee for each component. Bug reports and change requests reach the right team faster, and Jira admins don’t need to manually triage every incoming issue.
Improve filters, dashboards, and reporting
Components make JQL queries more reliable than free-text labels. They also make dashboards easier to maintain when you need metrics by module (for example: bug volume for Backend, cycle time by component, or workload by component owner).
Make Definition of Done consistent per component
Some teams maintain different Definition of Done expectations by component (Frontend vs Backend, or API work vs UI work). A practical pattern is to use checklist templates for Definition of Done and apply the right template based on component. This keeps quality requirements consistent inside Jira issues without creating extra subtasks.

Check Definition of Done in Jira with Examples
Where Smart Checklist fits (lightweight)
If your workflow already relies on checklist templates (DoD, acceptance criteria, release steps), components can act as the “routing layer” that decides which checklist template should appear for this type of work.

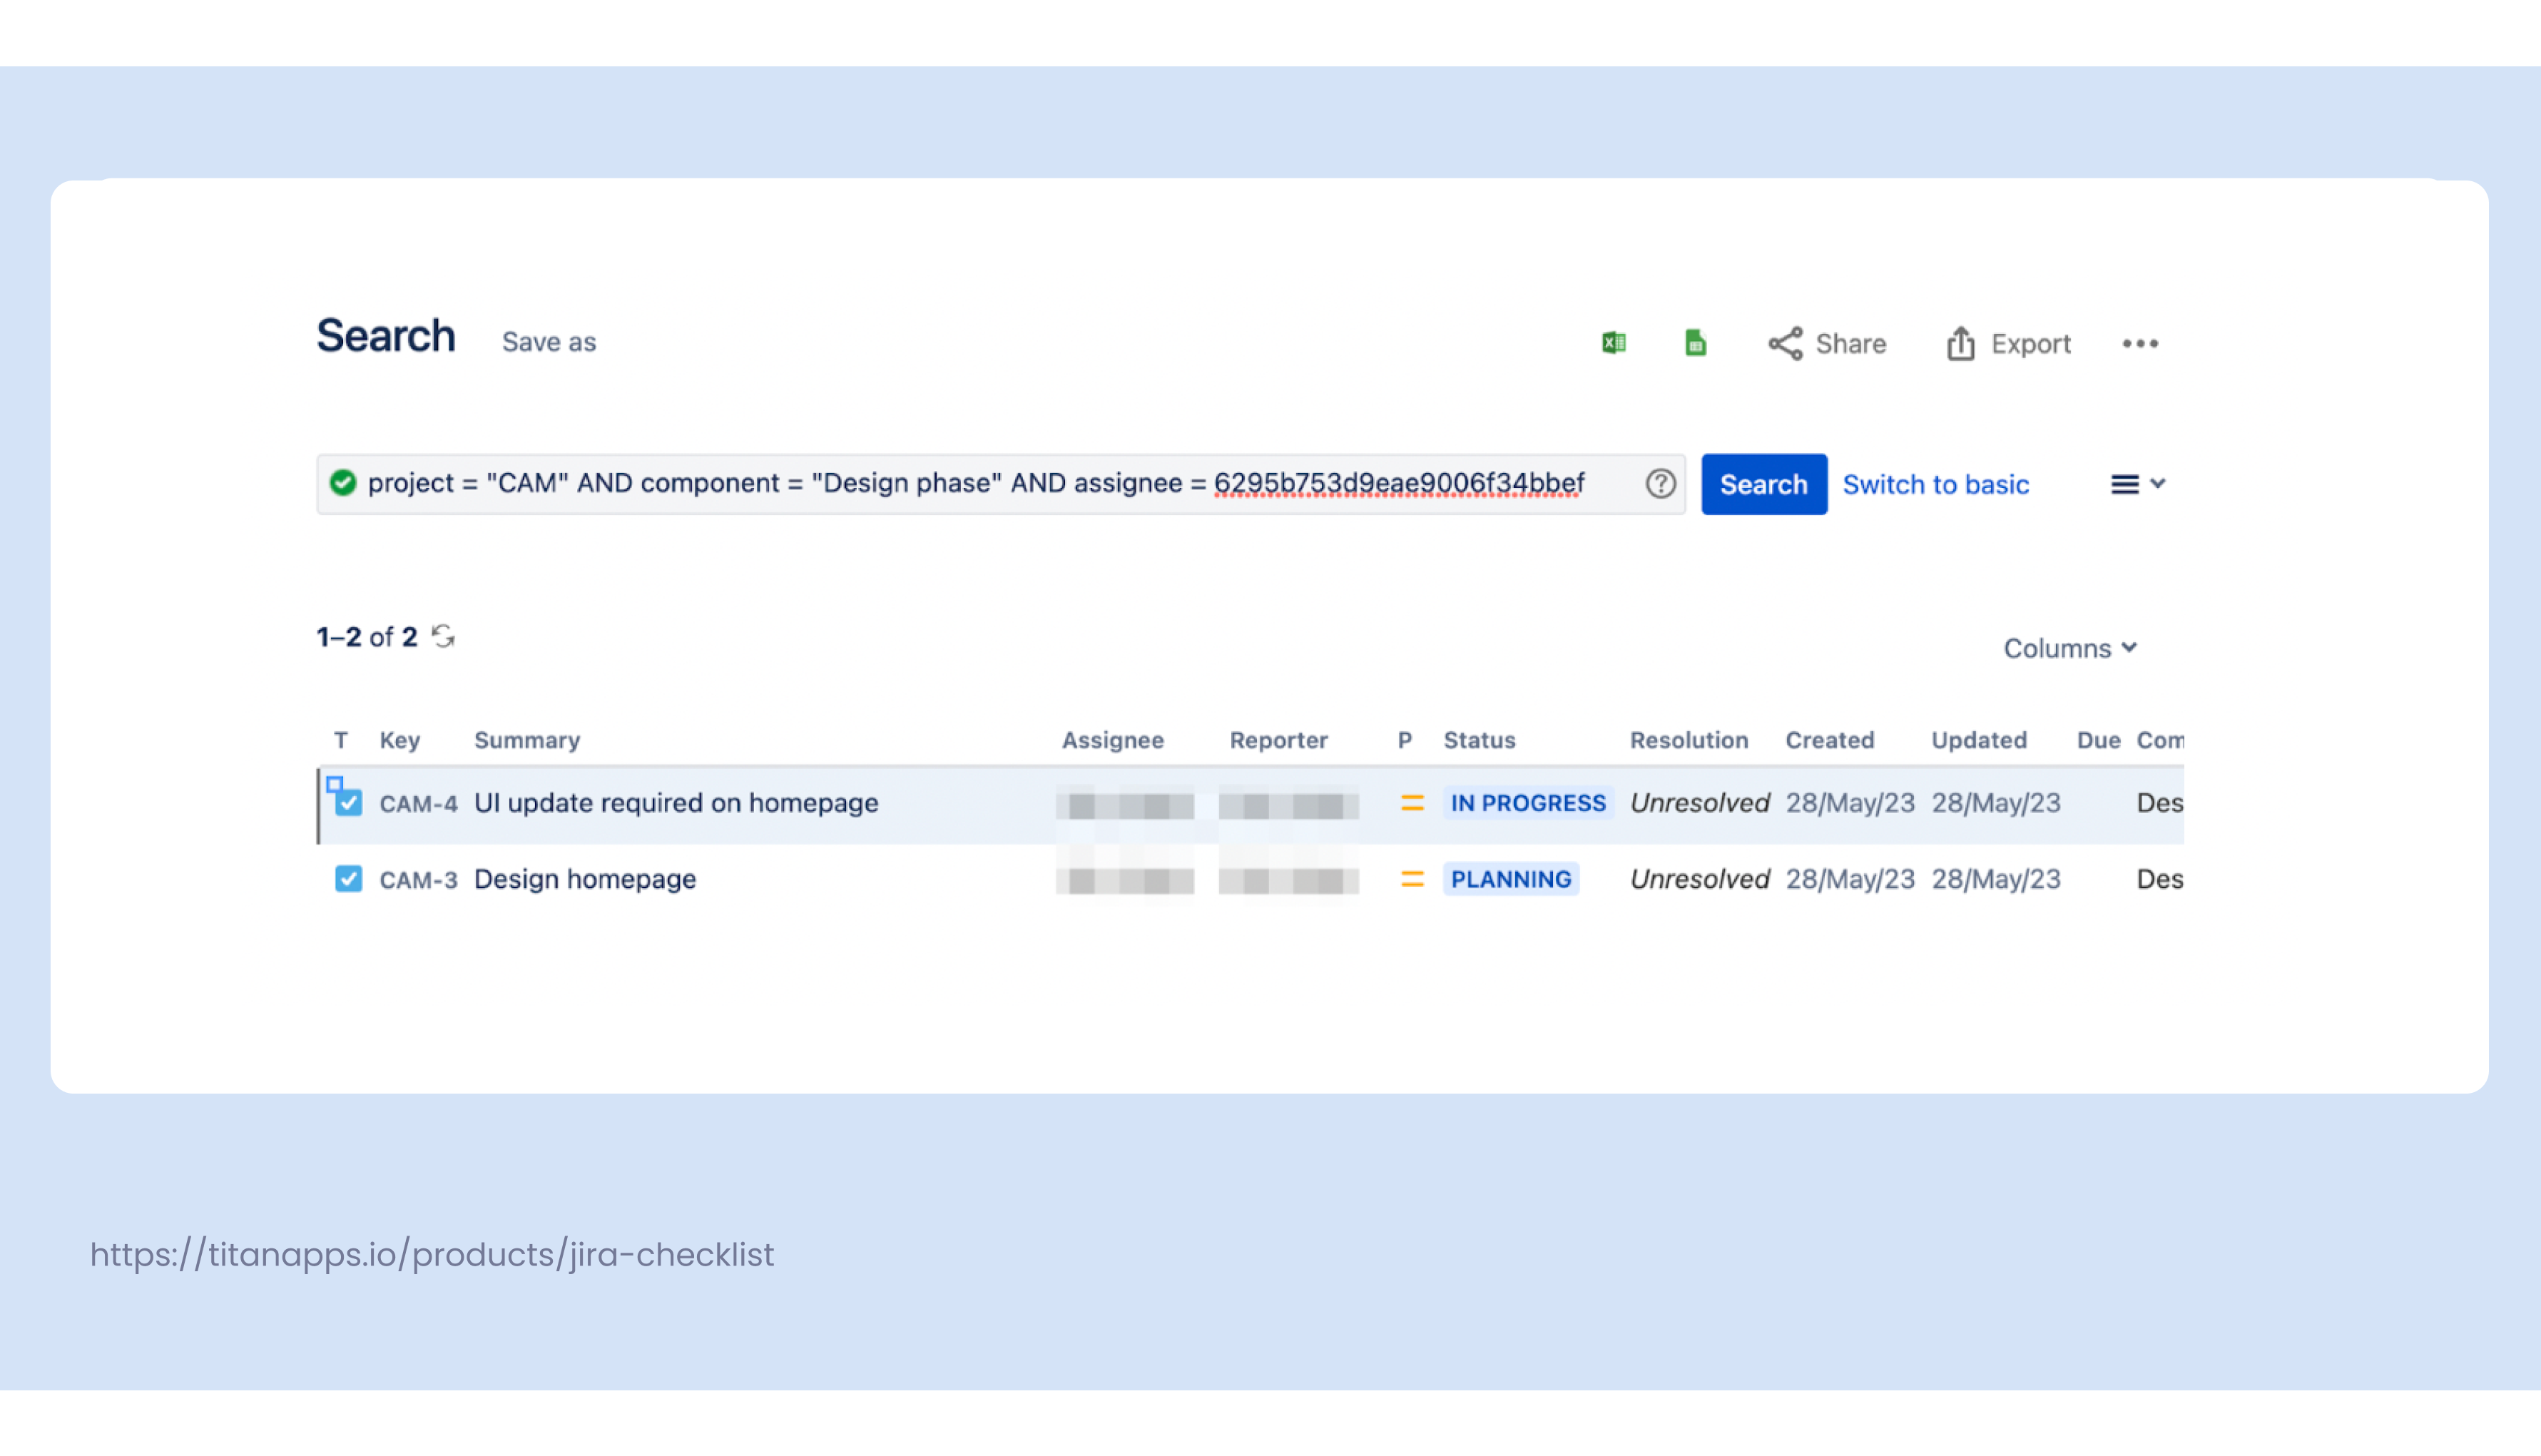
You can also use components as a way to track different phases of a project—for example, you could have one component for “the design phase,” another for “the development phase,” etc., and then assign each issue to the appropriate phase (component). To see the progress of one component, you could also use a JQL Query like the one shown here:
Default assignee in the components field
The Components custom field has something that sets it apart from other fields you can typically find in a Jira issue – it has a default assignee. What this means is that any issue added to a component will be automatically assigned to the default assignee of that component making them responsible for it.
Jira applies component default assignees over the project default assignee. If an issue has multiple components with different defaults, Jira uses the assignee from the component that comes first alphabetically.
This feature is quite handy when you have someone responsible for a certain aspect of the project like a team lead or a PM and they need to manage workload and prioritization.
Components as sub-projects in Jira
As Jira doesn’t have the concept of sub-projects, many teams tend to use components for this purpose.
This is especially handy in large projects as you can apply a filter by components to analyze certain aspects of the bigger picture individually. This helps with understanding performance and predicting the future state as well as with preemptive identification of blockers (design is taking longer than expected, etc.).
Components aren’t epics, fix versions, or subtasks
Components often get mixed up with other Jira fields. A quick rule helps:
- Epics group work by outcome or initiative.
- Fix versions group work by release packaging and timing.
- Subtasks break one Jira issue into execution steps.
Components categorize Jira issues by feature/module ownership inside a single Jira project.
How to create a Jira Component?
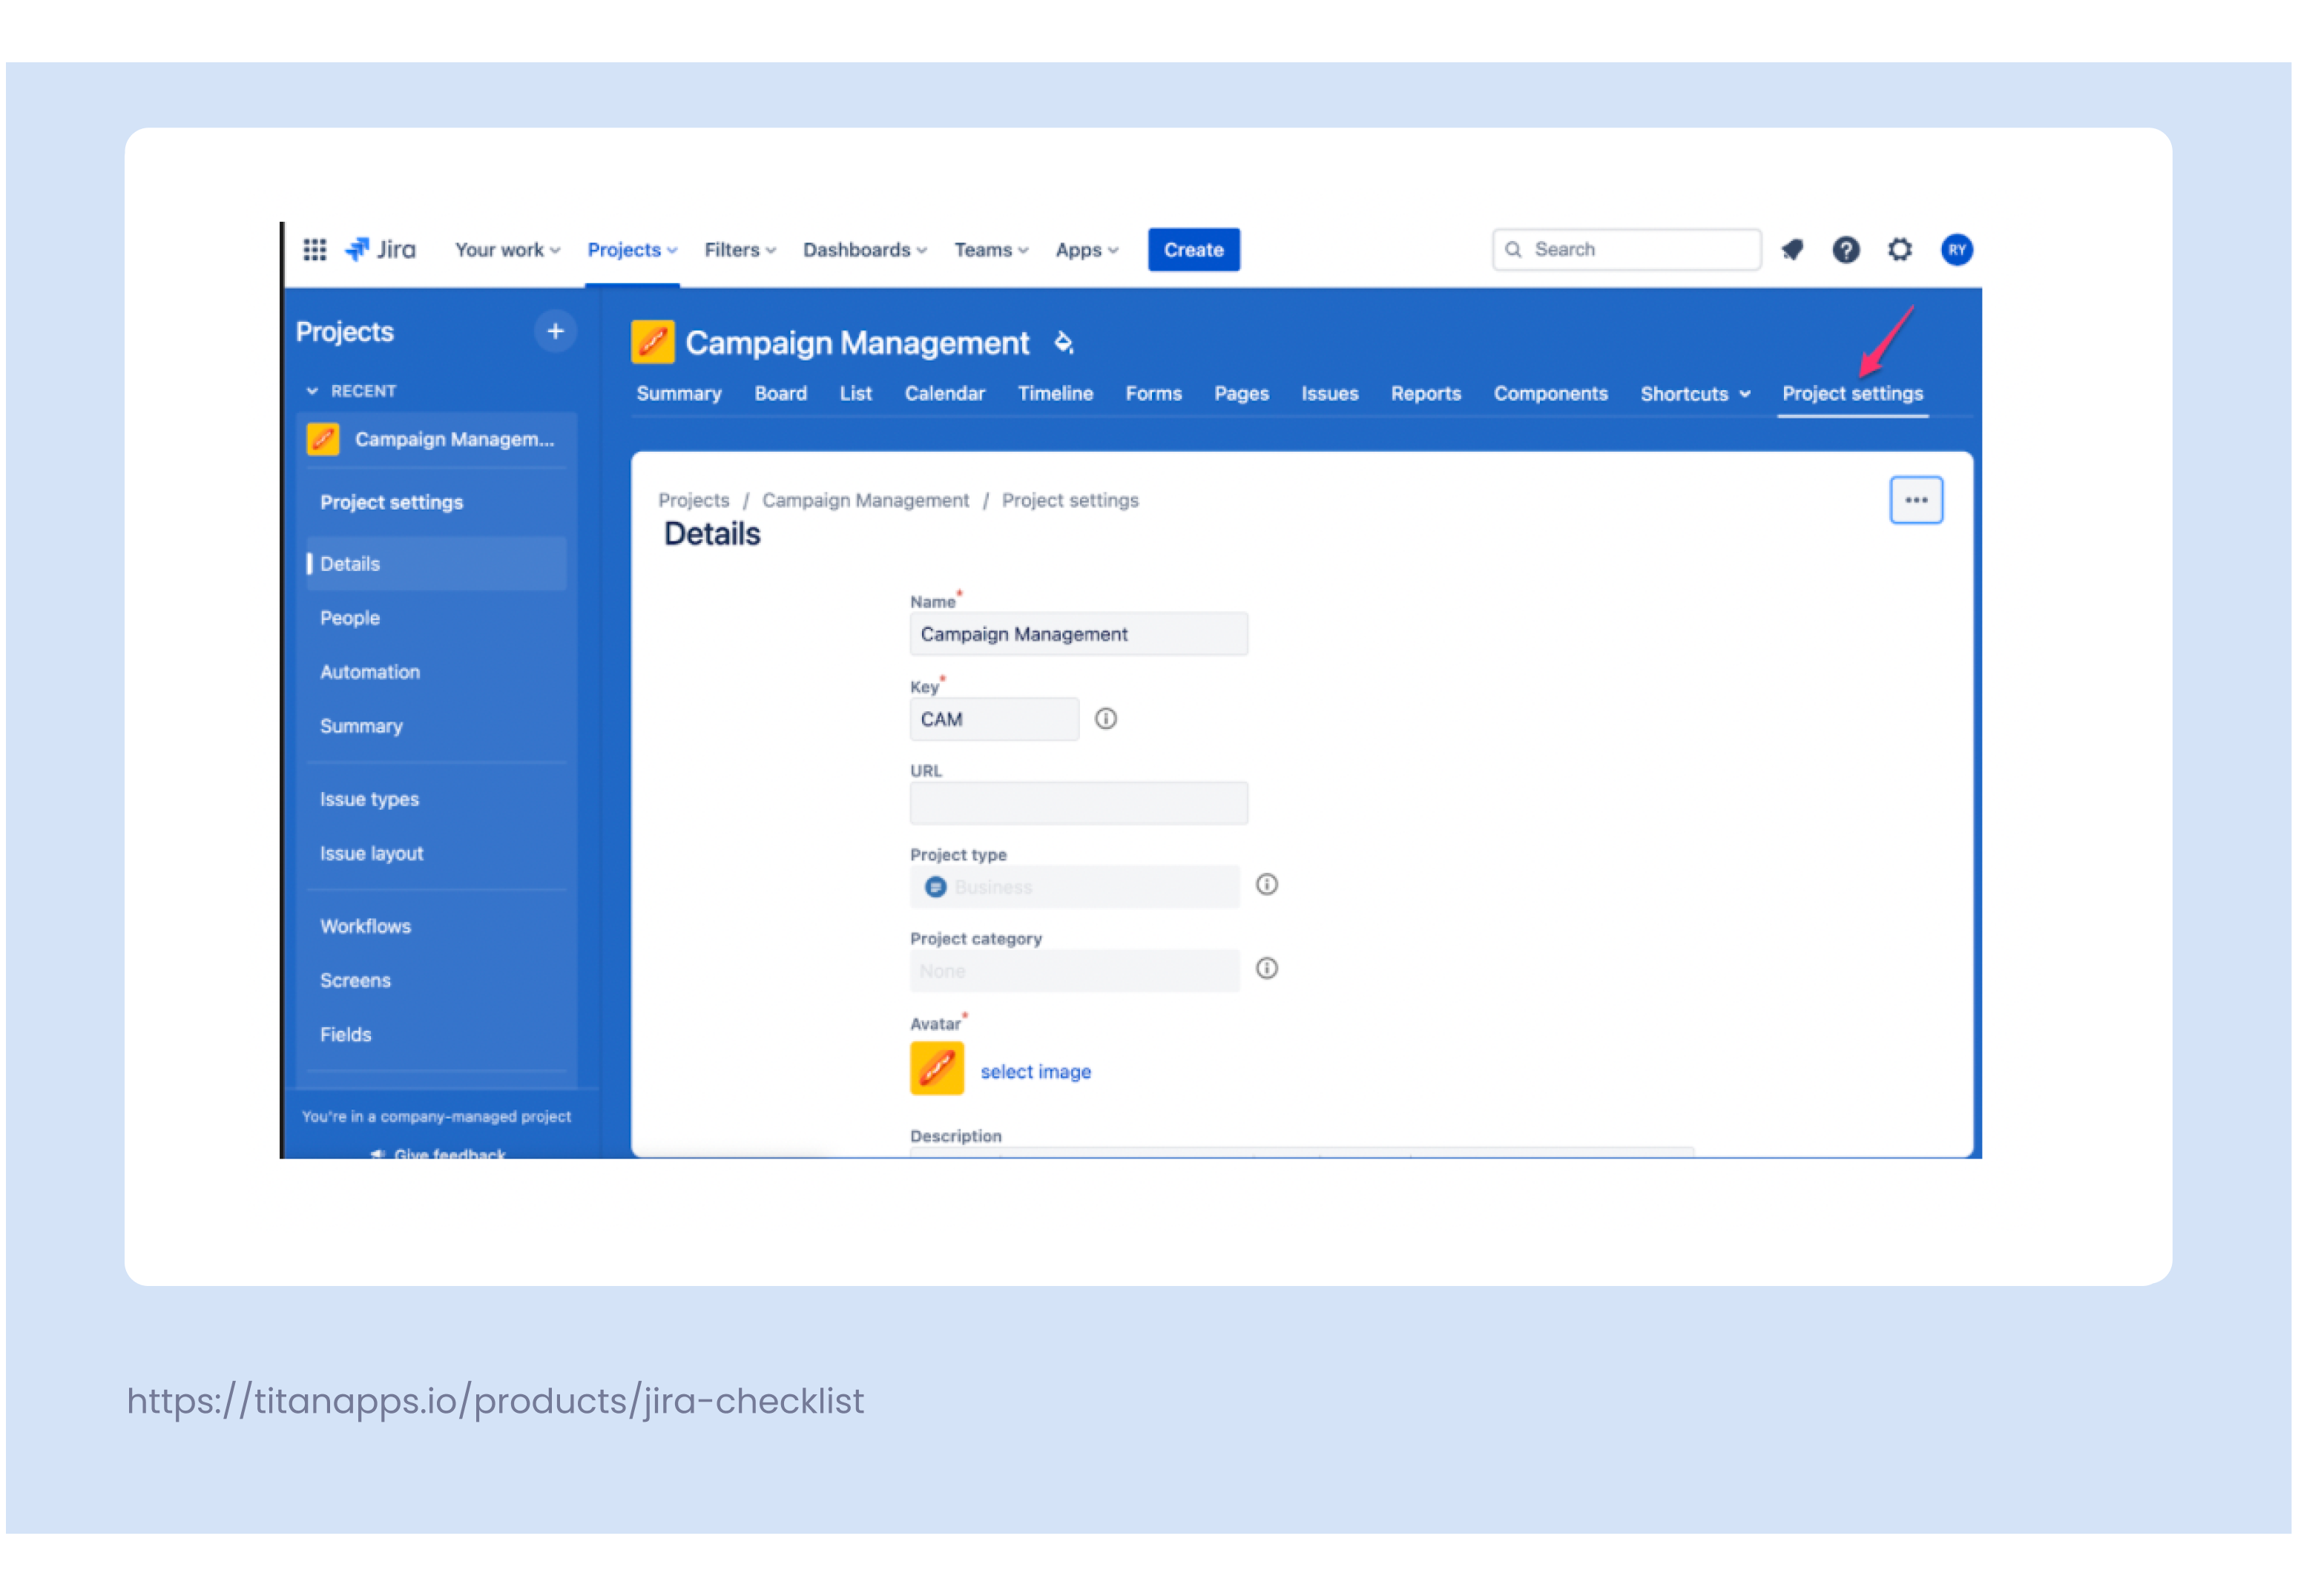
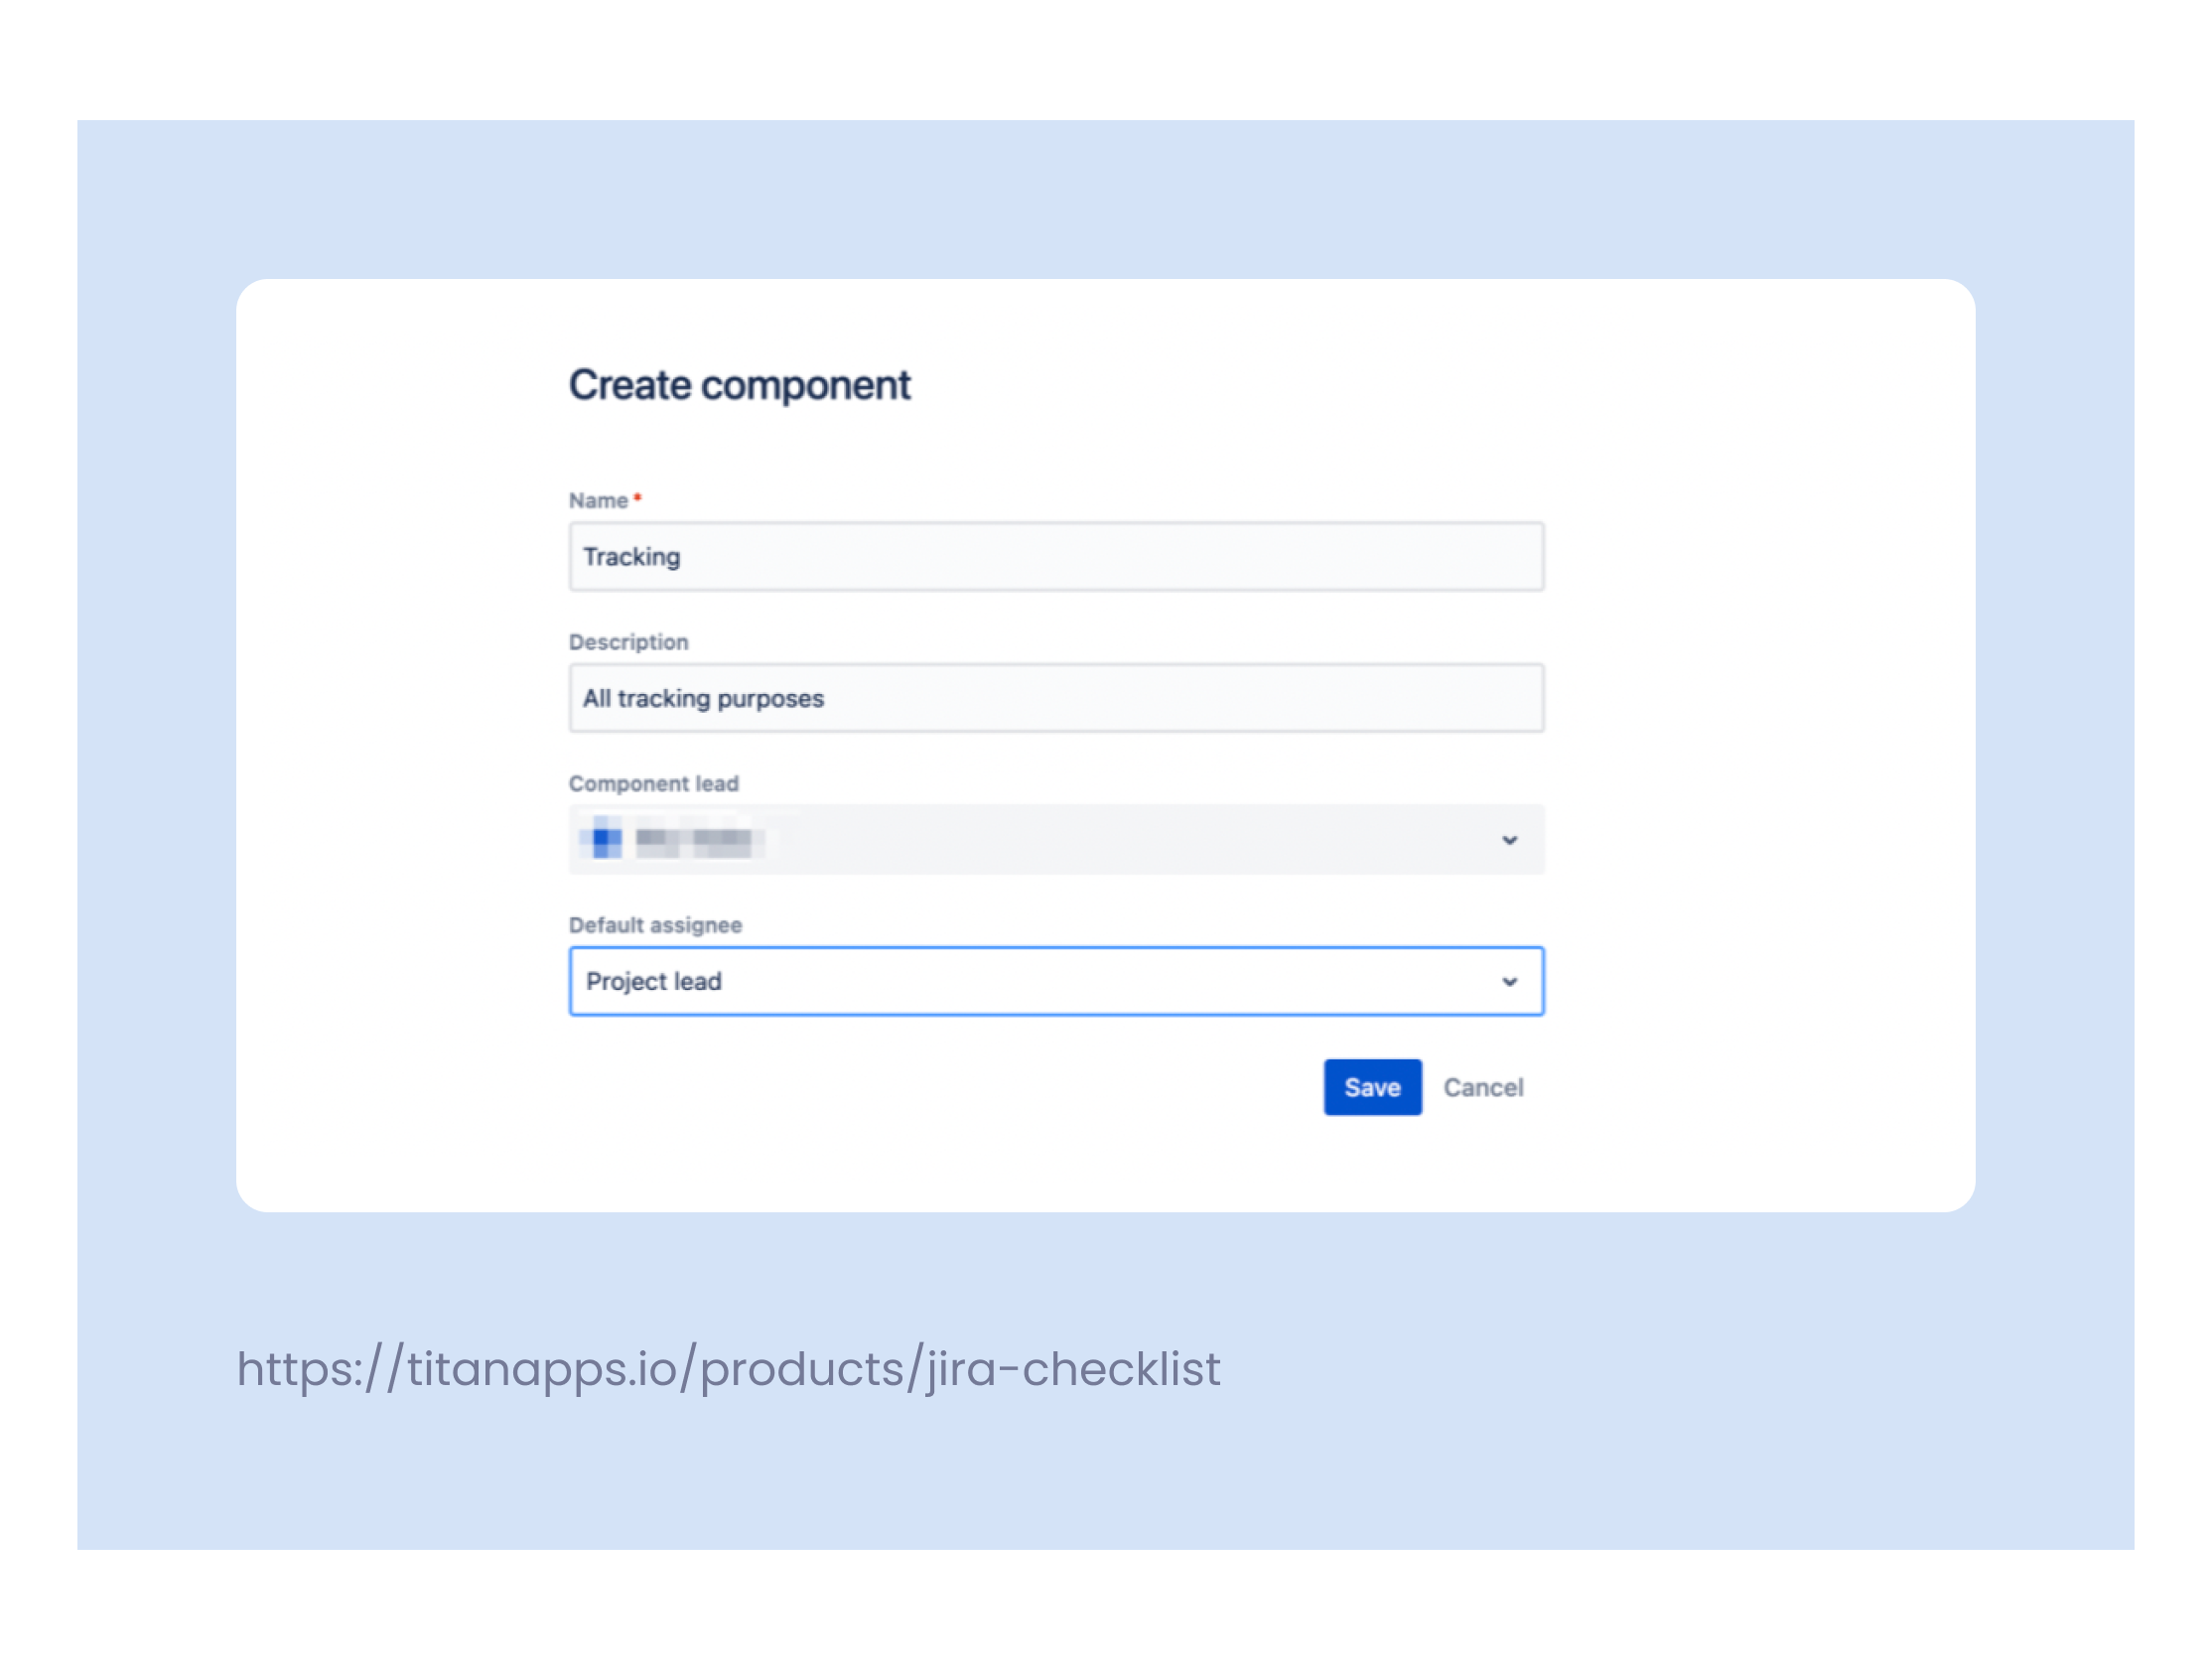
If you’re an admin and are on a Company-managed Jira project, you can create a Jira Component. To add components to your Jira project, follow these steps:
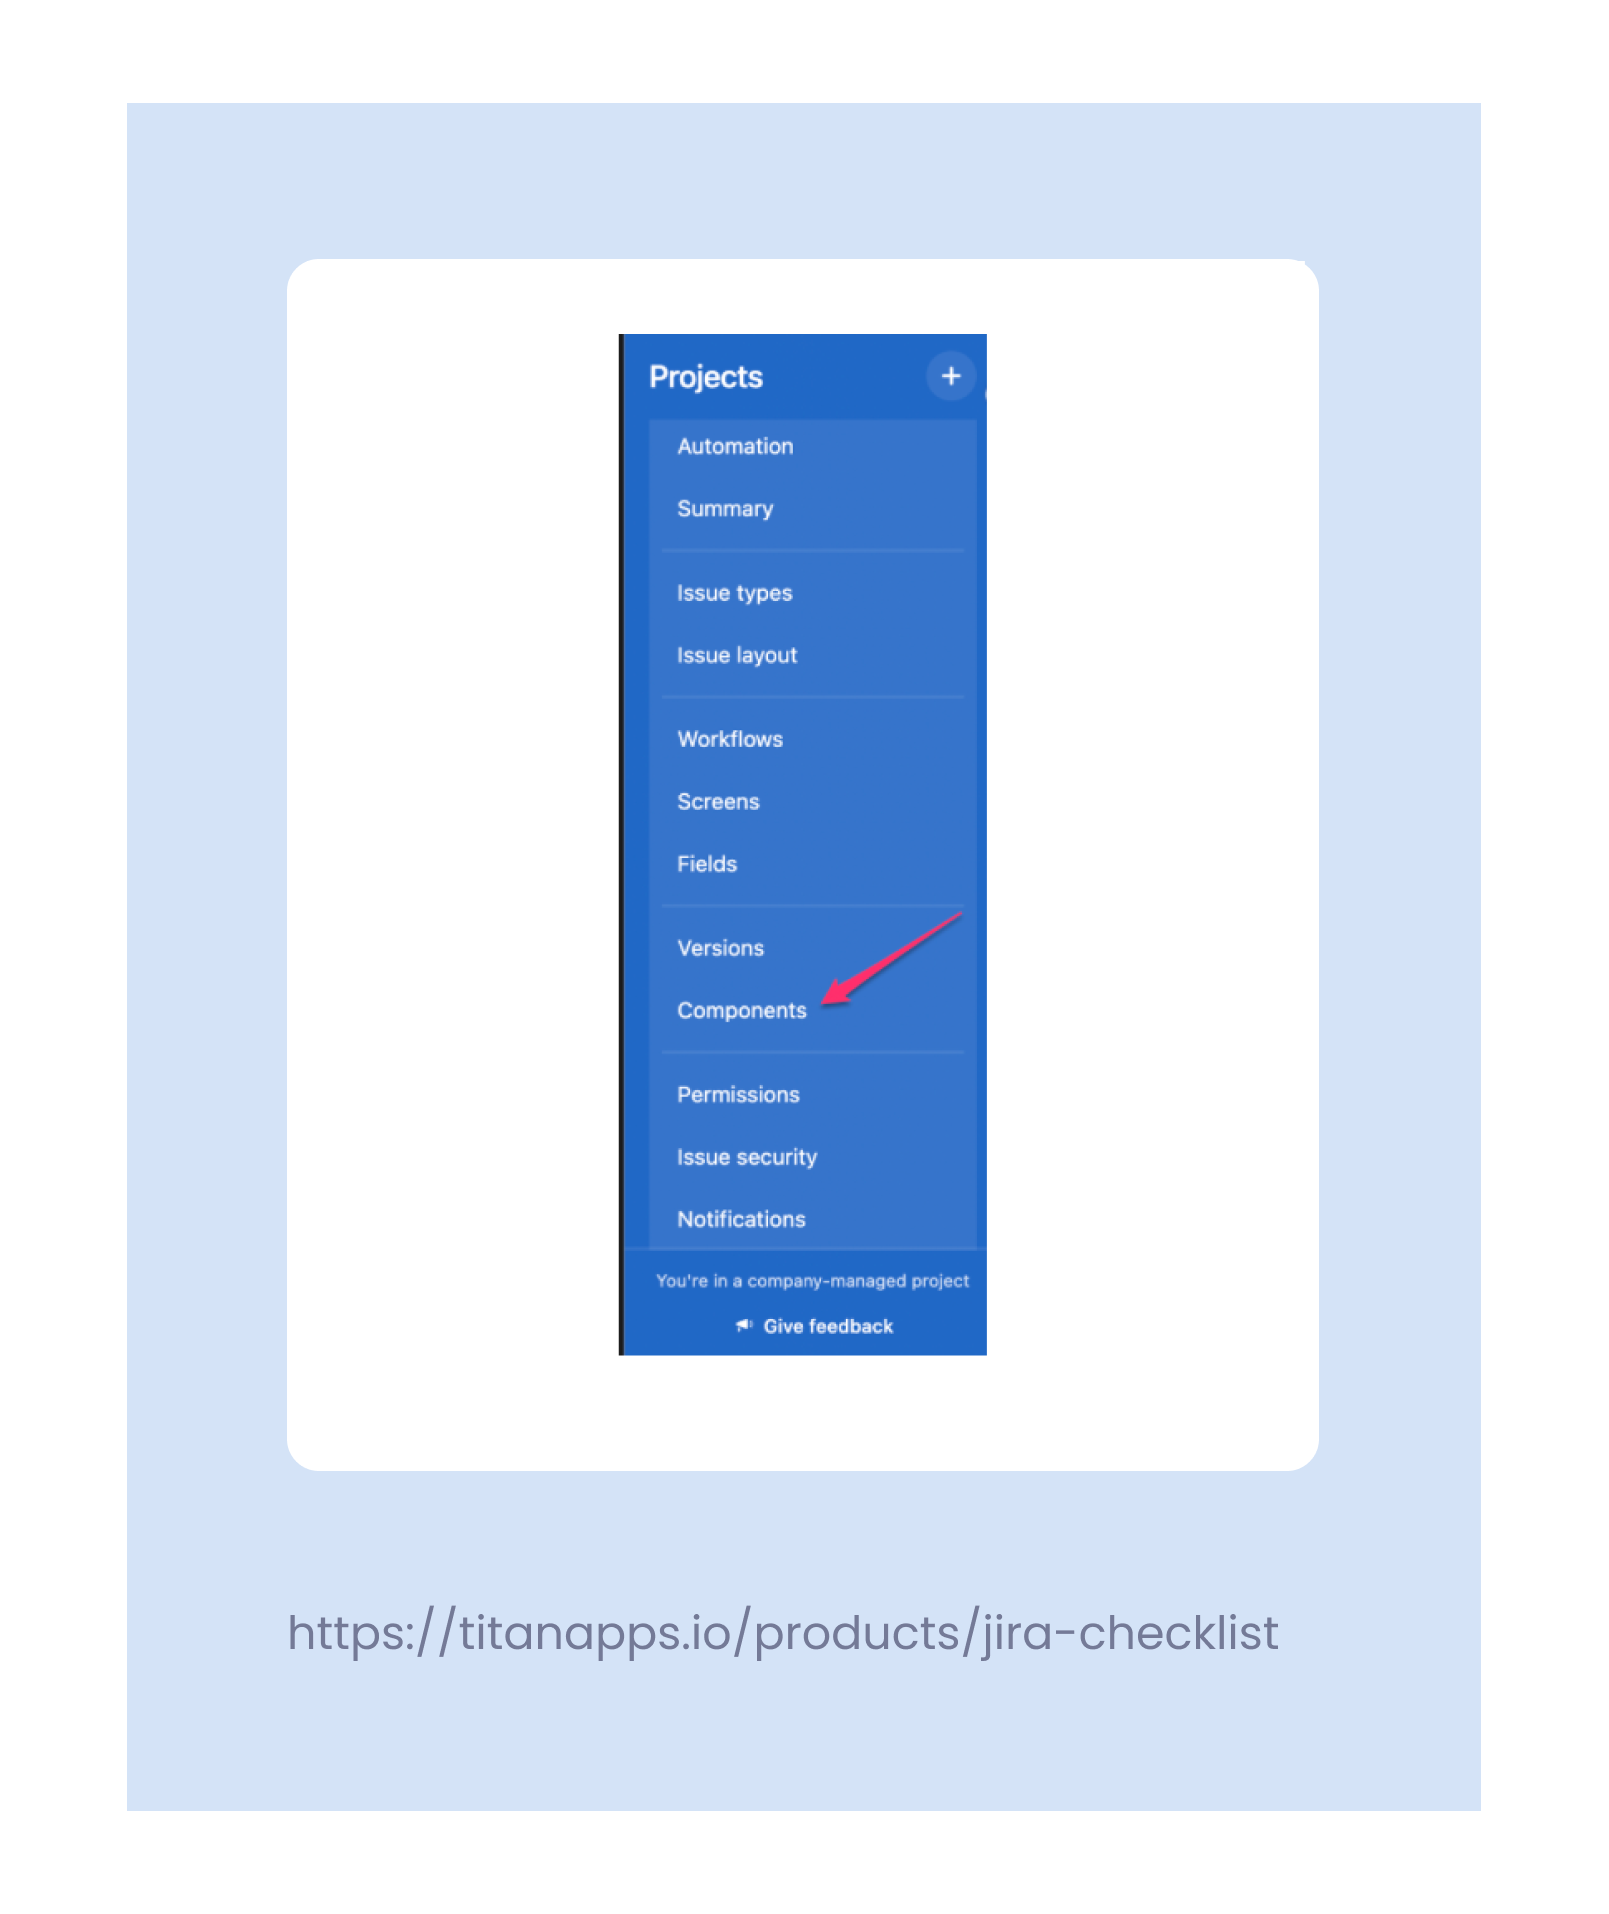
- Go to Project Settings.
- On the left sidebar, find Components and click on it.
- Click on Create Component.
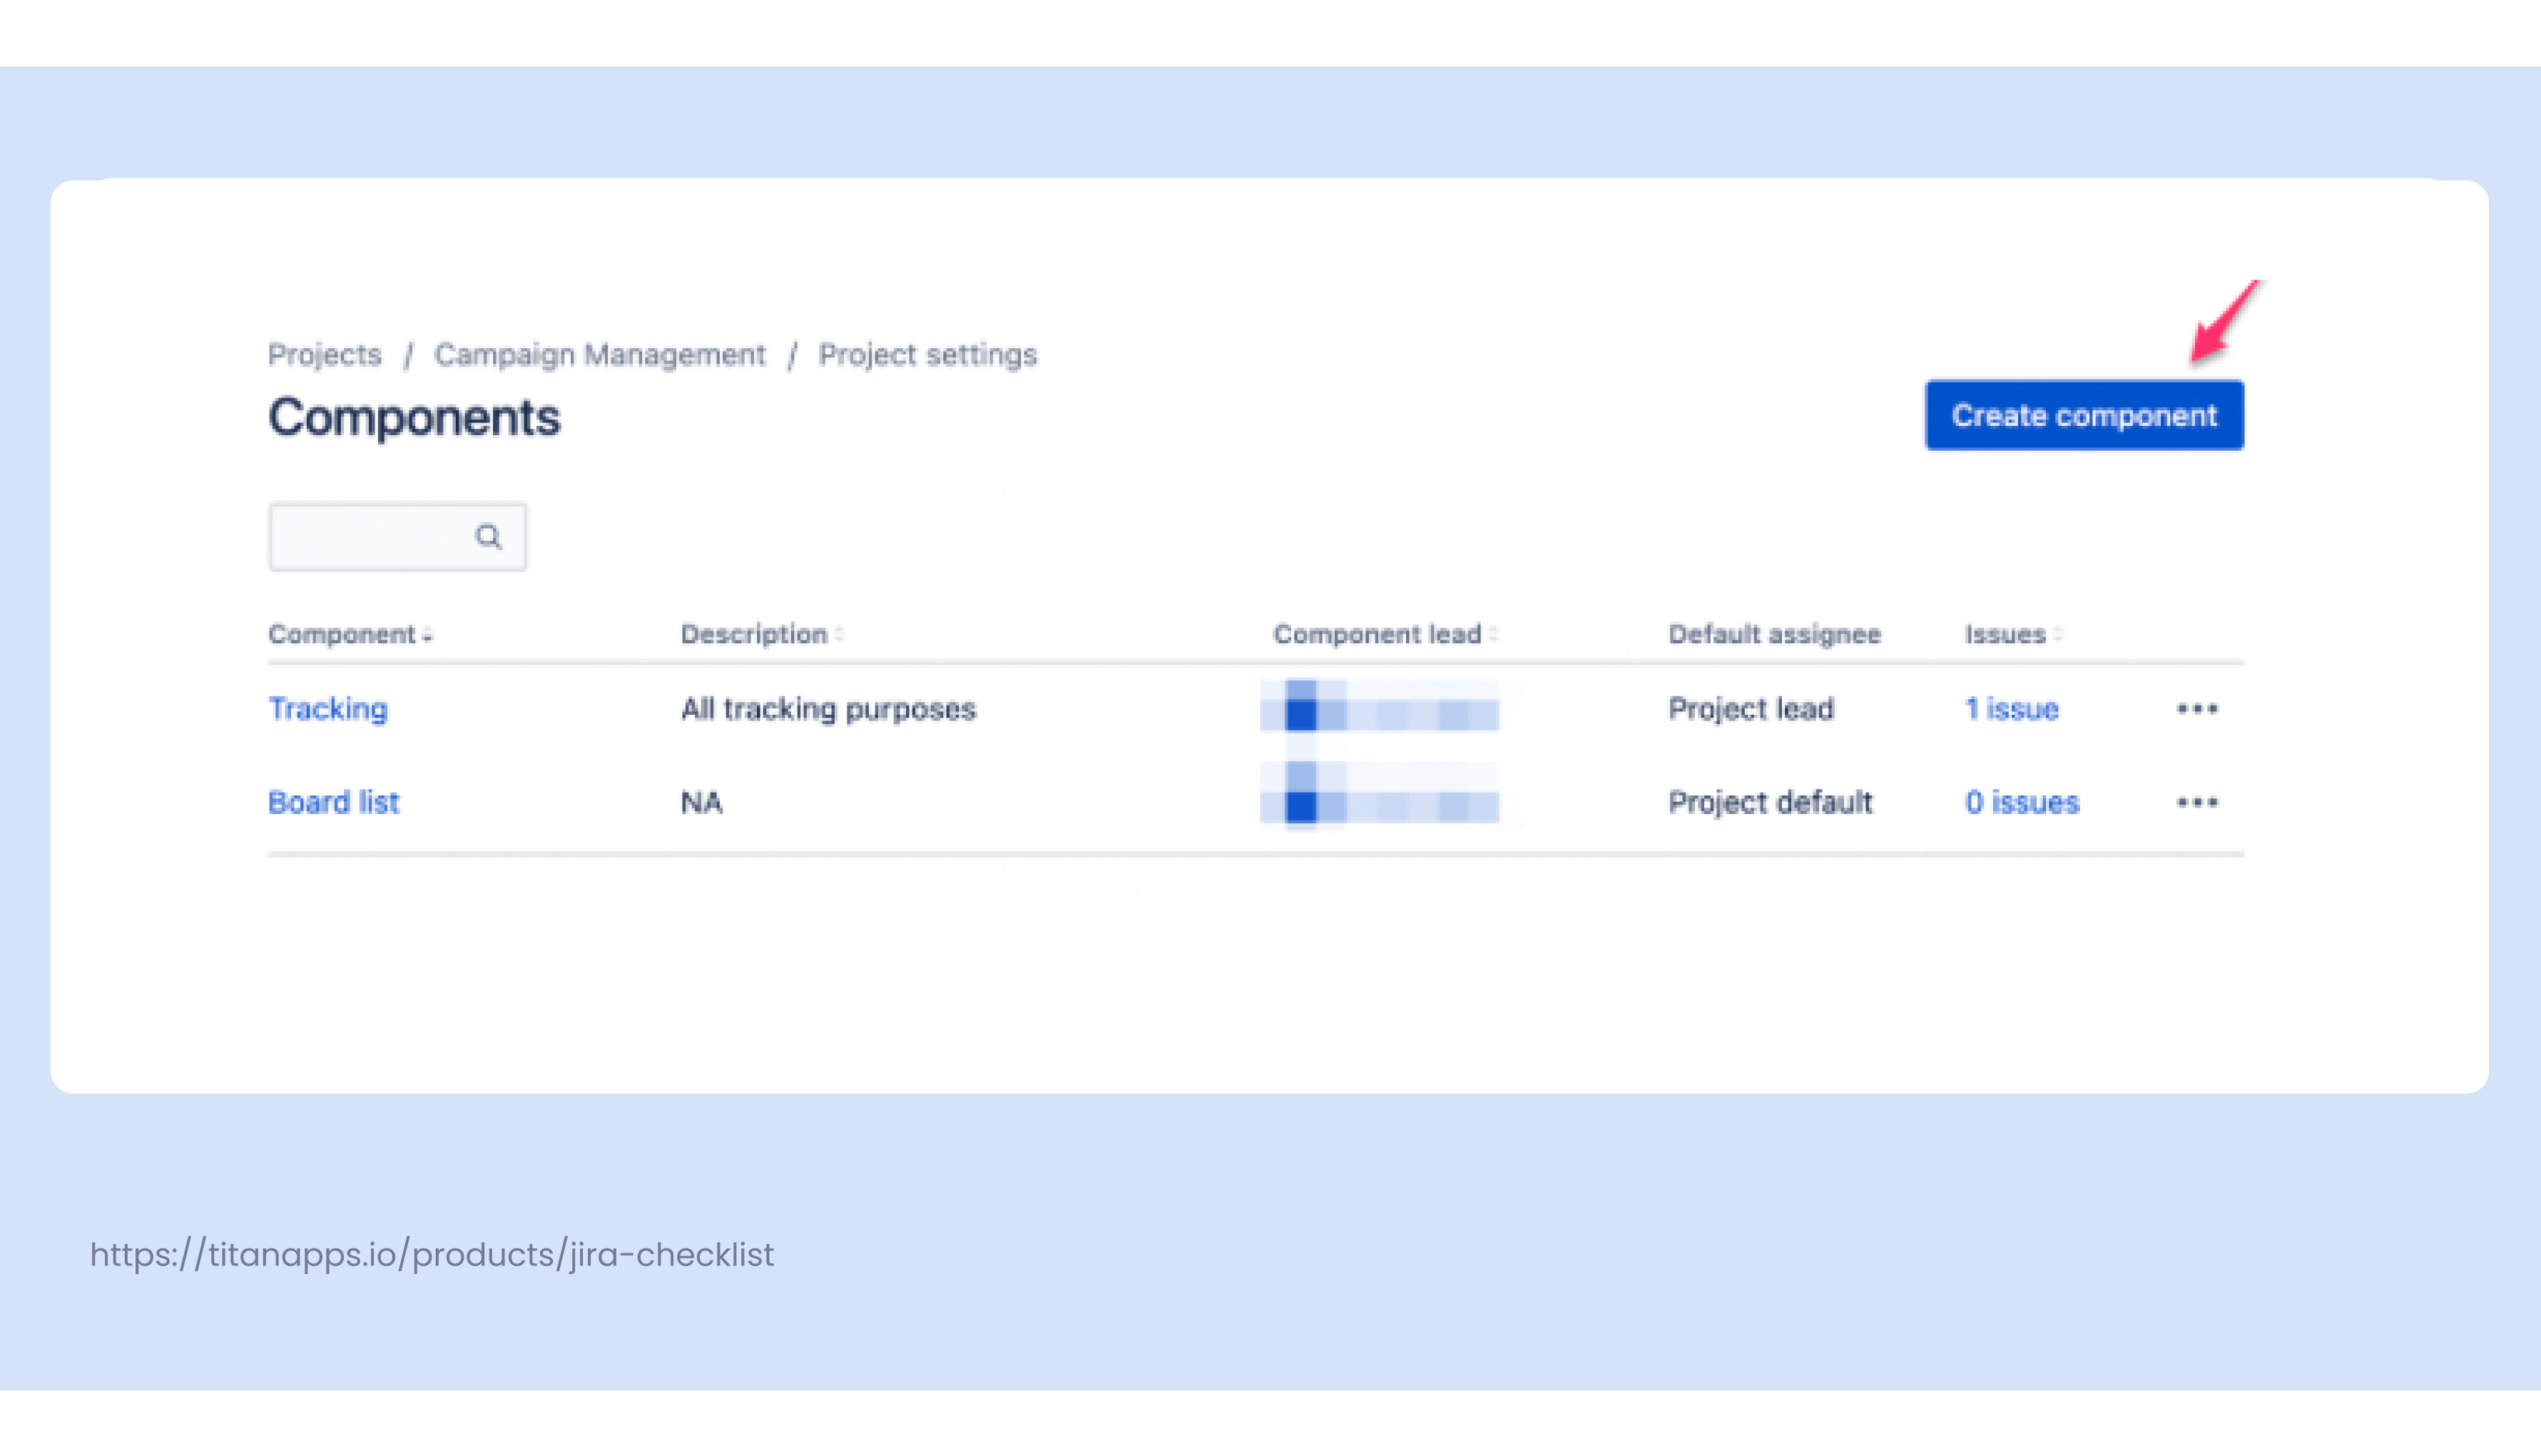
- Give it a Name (it can be anything but must be unique), write a Description (optional), select a Component lead, and then select the Default assignee. Finally, click on Save.
- Description – It’s used to describe the components for others to understand what it’s used for.
- Component Lead – A person designated as being responsible for issues that have the component.
- Default Assignee – A person who is automatically assigned to the issue if the component is added.
Now that we have created the component, we can start adding this component to issues.
How do I enable a component in Jira?
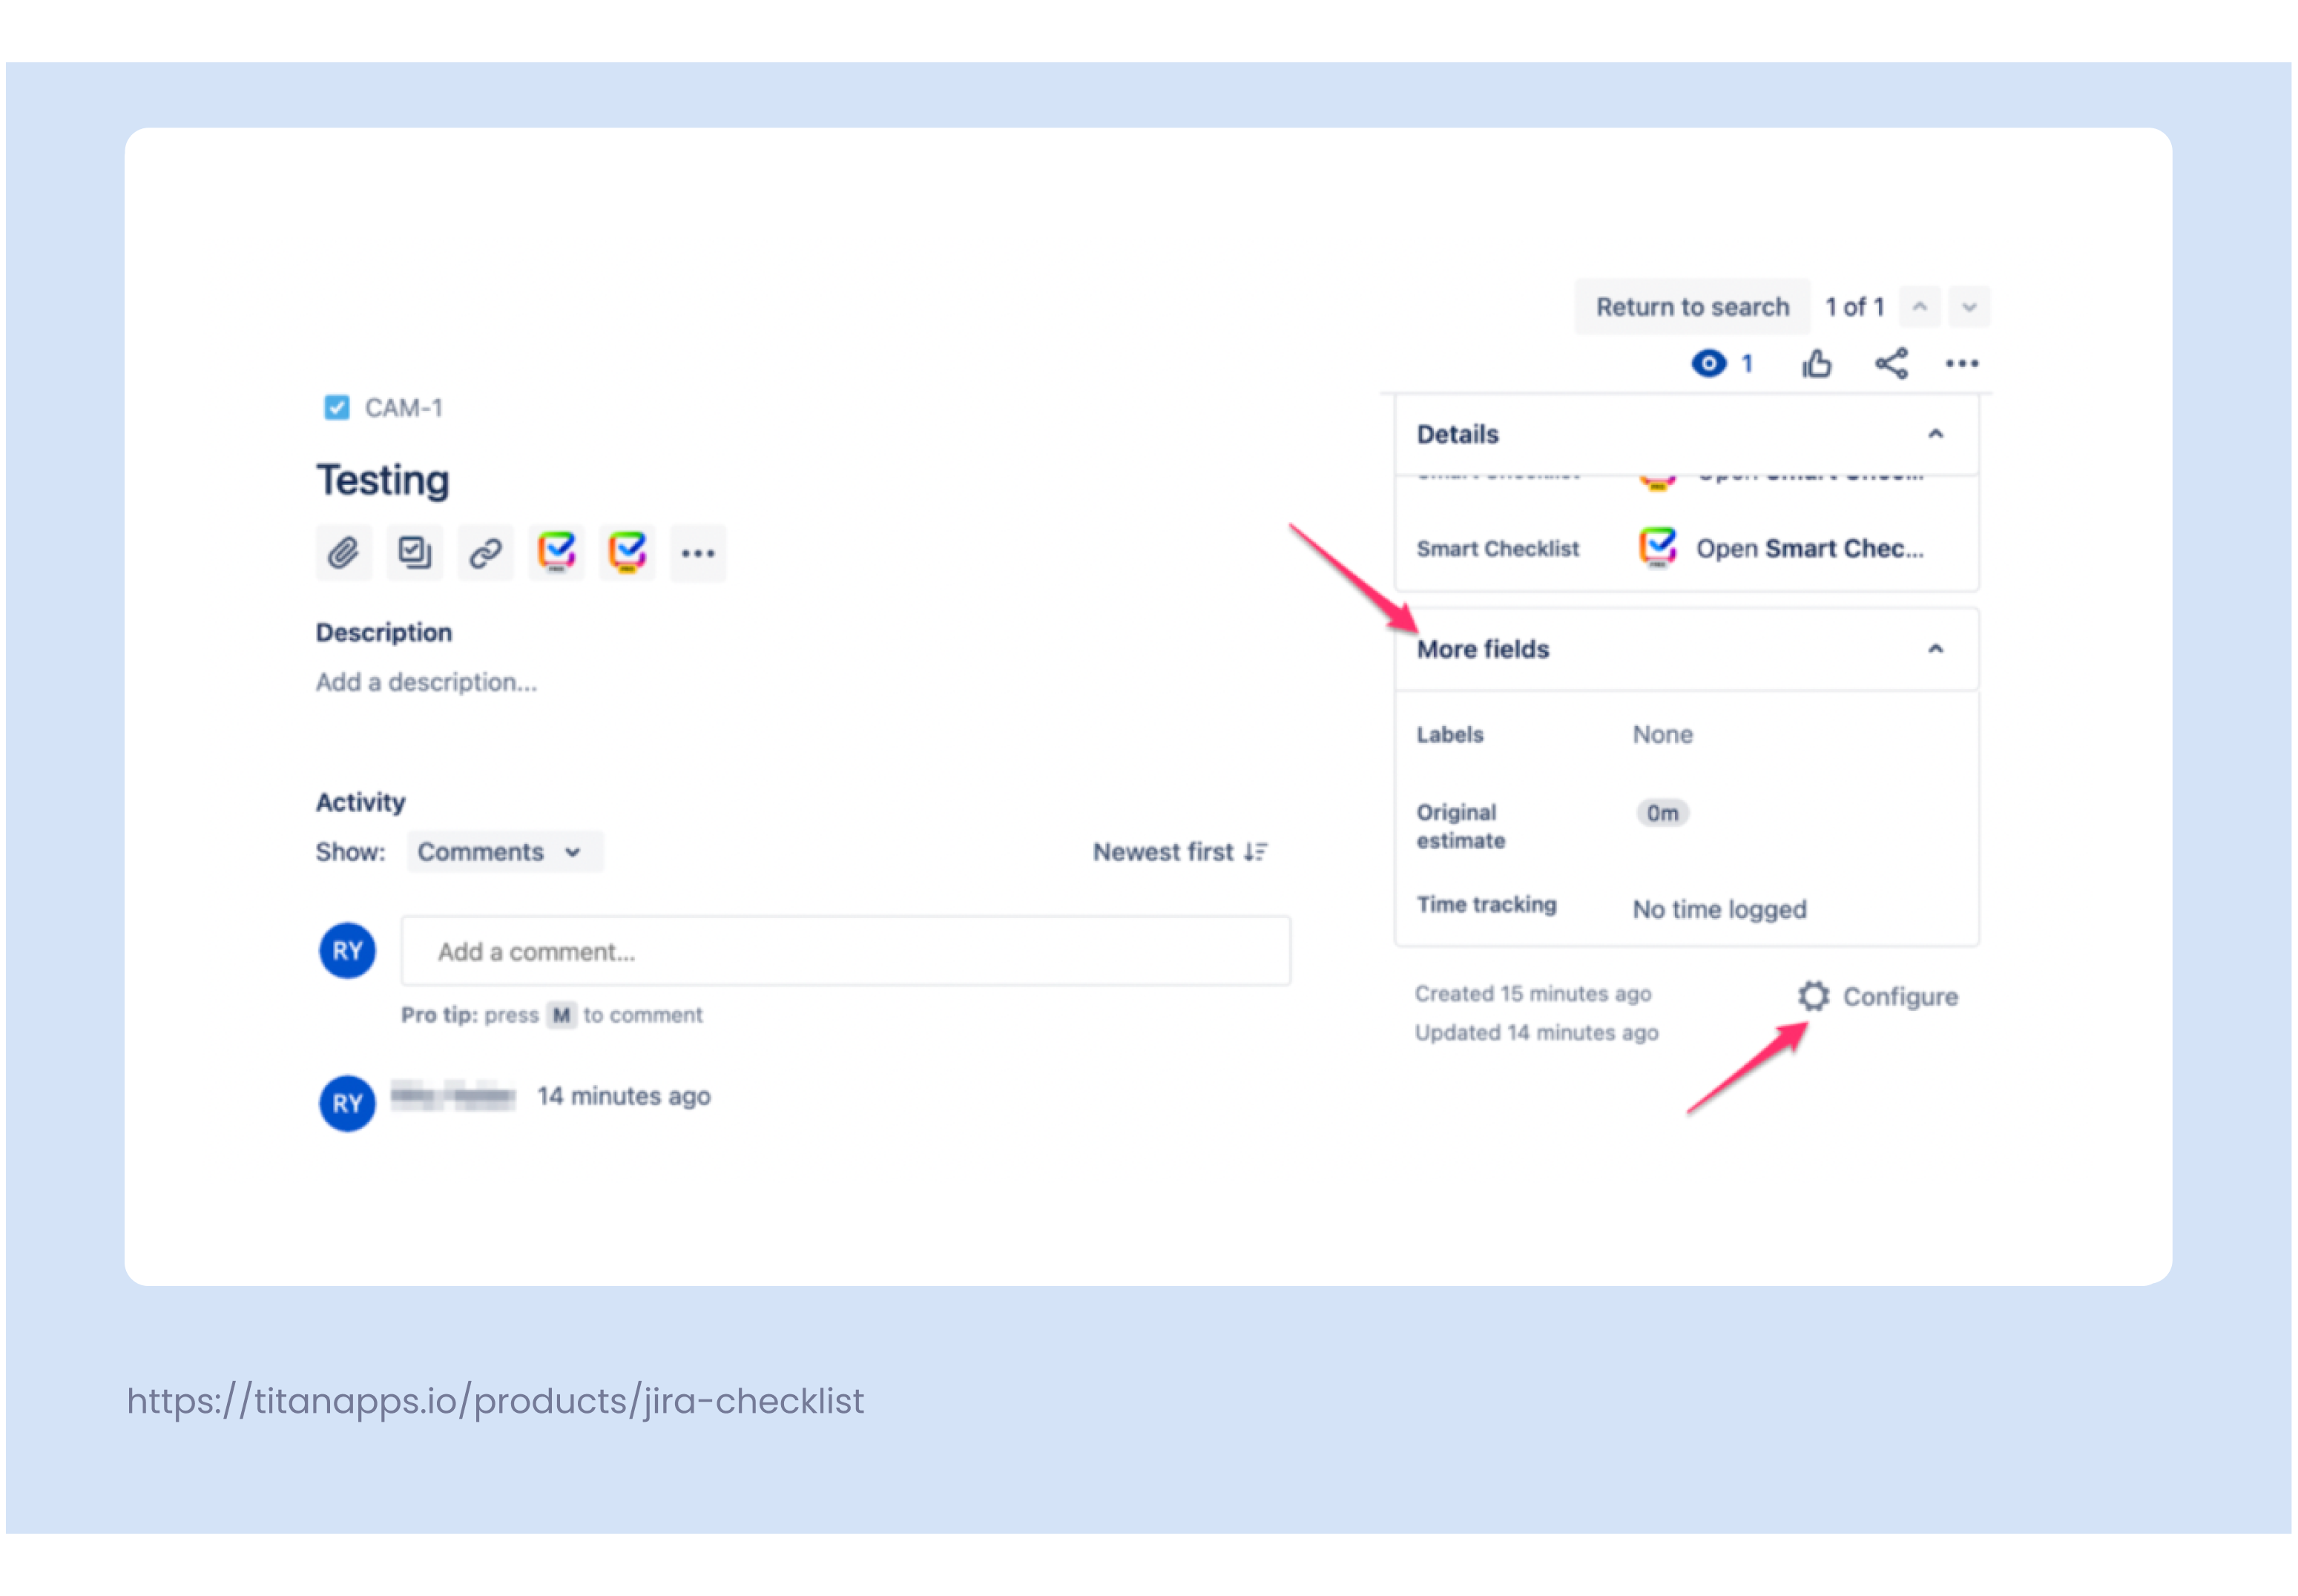
To enable Components in Jira, follow these steps:
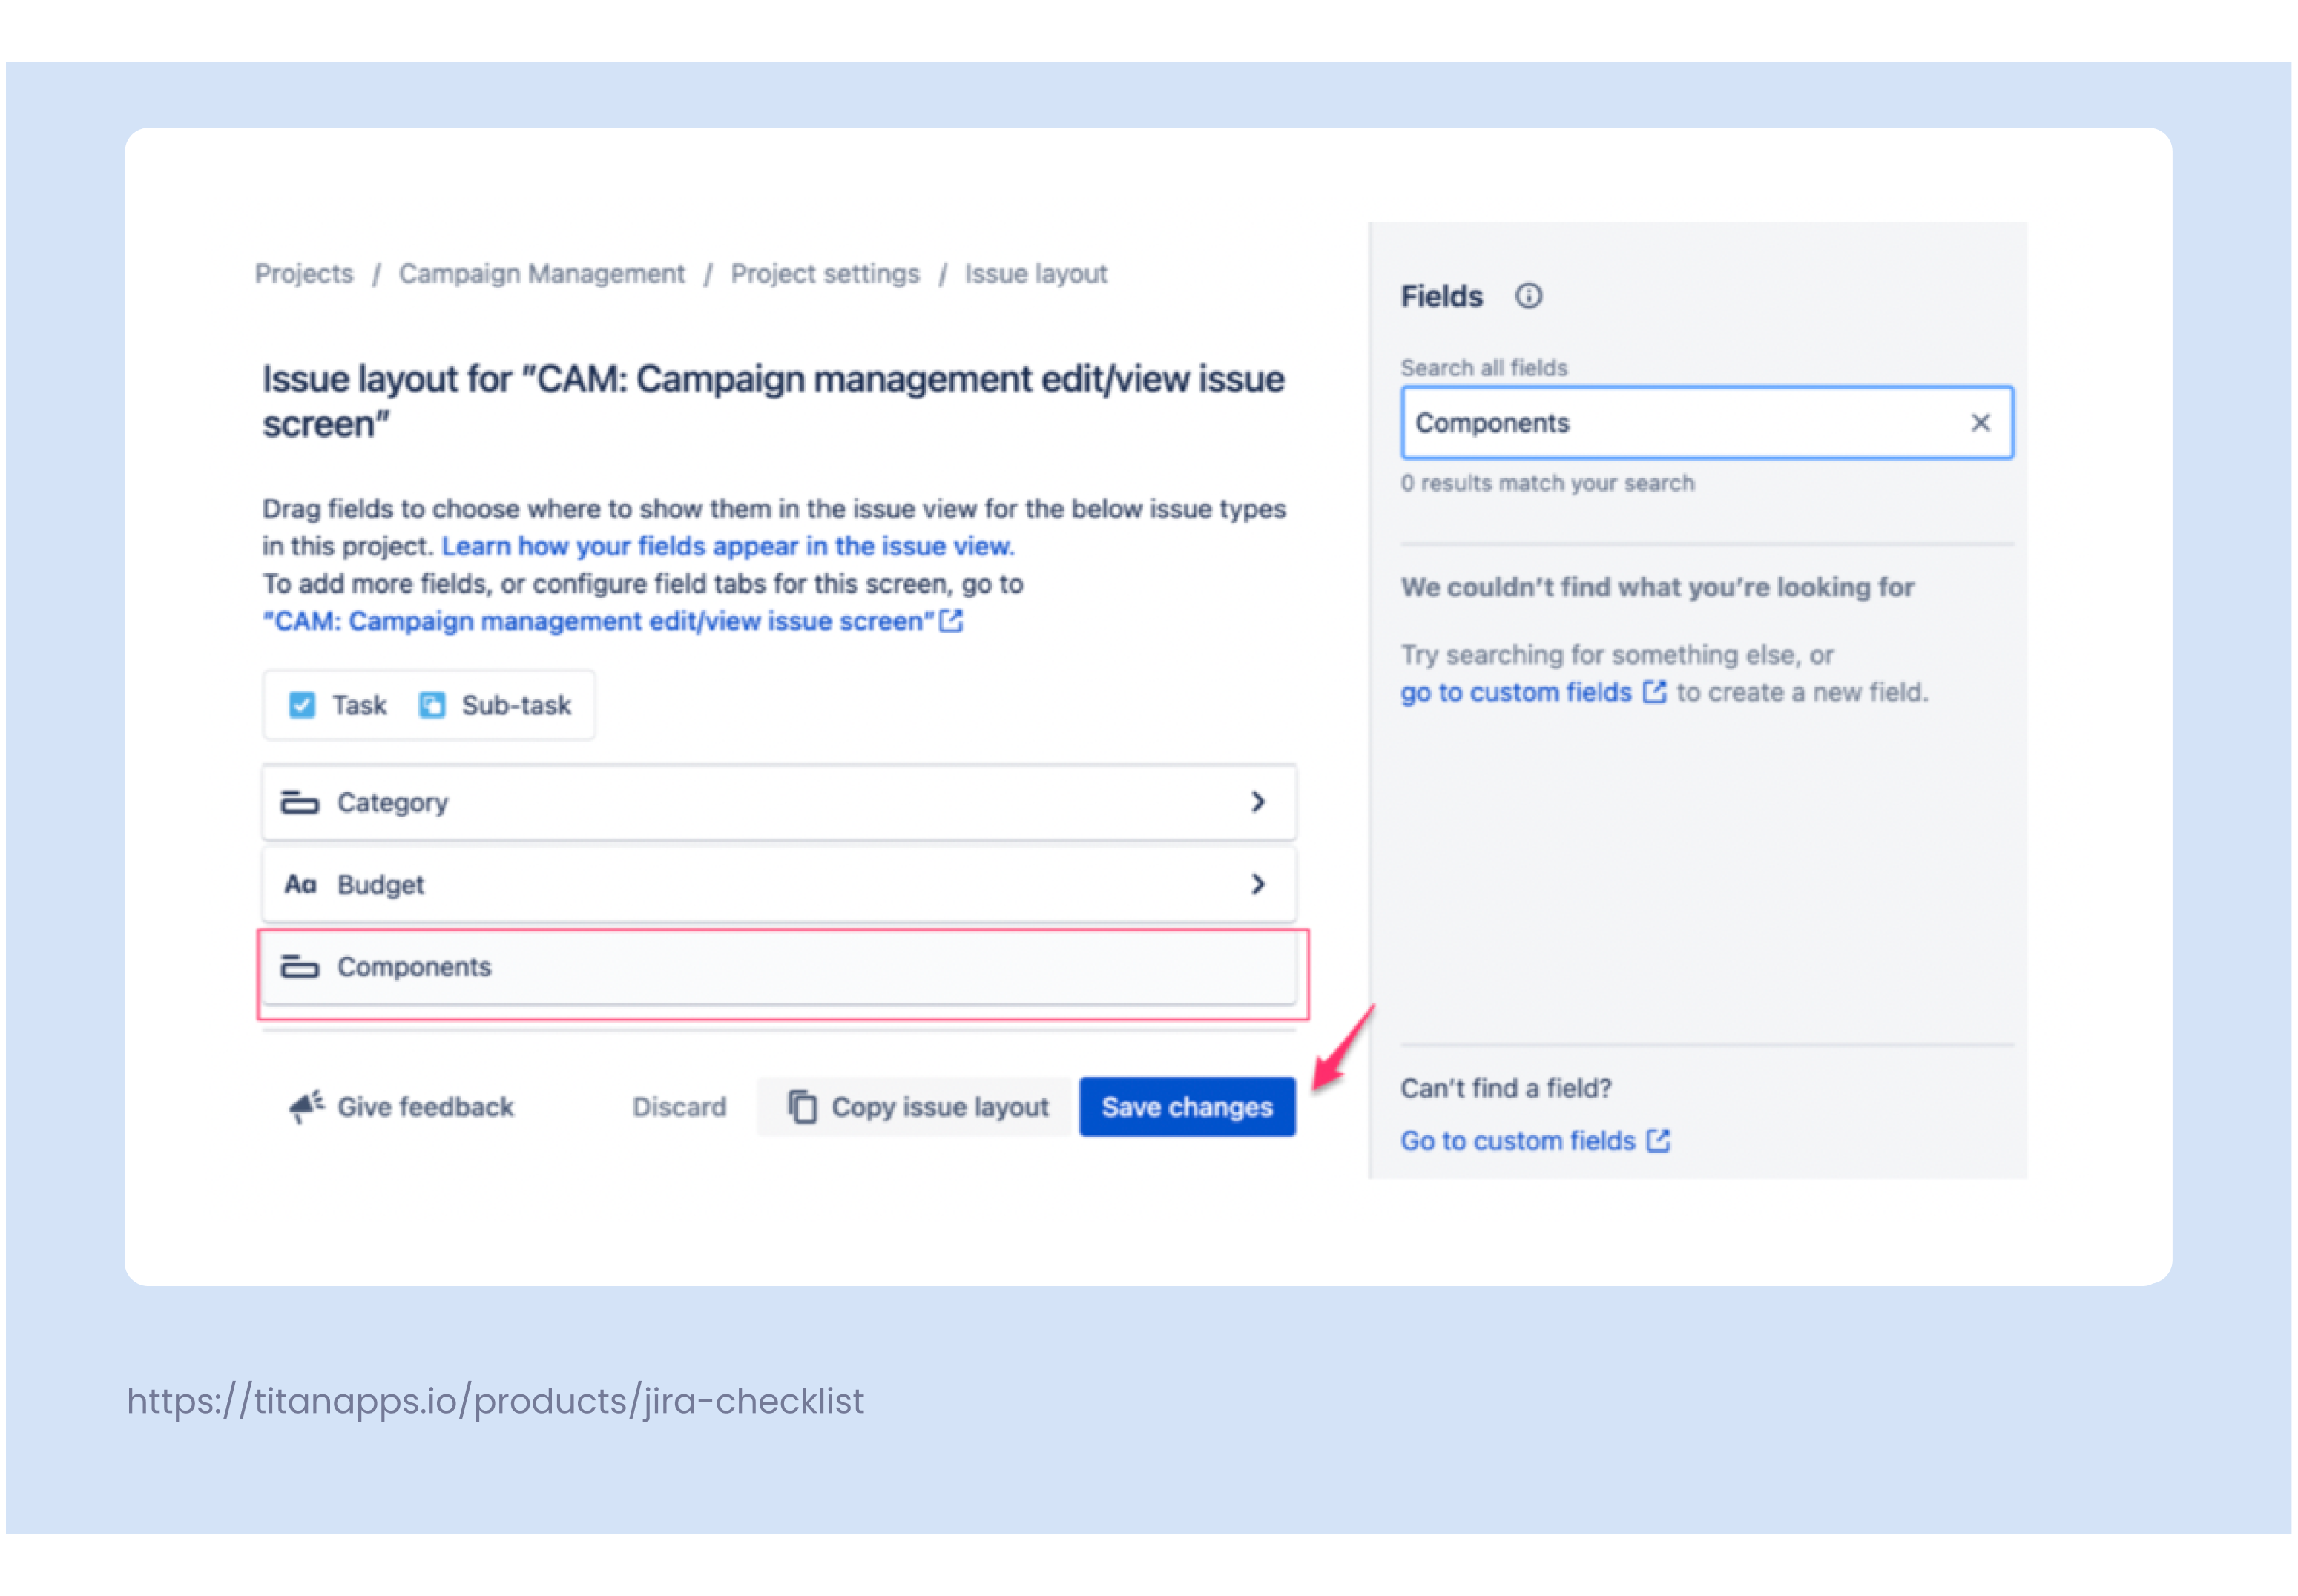
- Go to any Issue and click on Configure on the left sidebar under More Fields.

- Search for Components from the search bar in the right-side Fields menu.
- Then, drag the Components option to the right side under whichever field you want it (Description fields or Context fields). Finally, click on Save Changes.
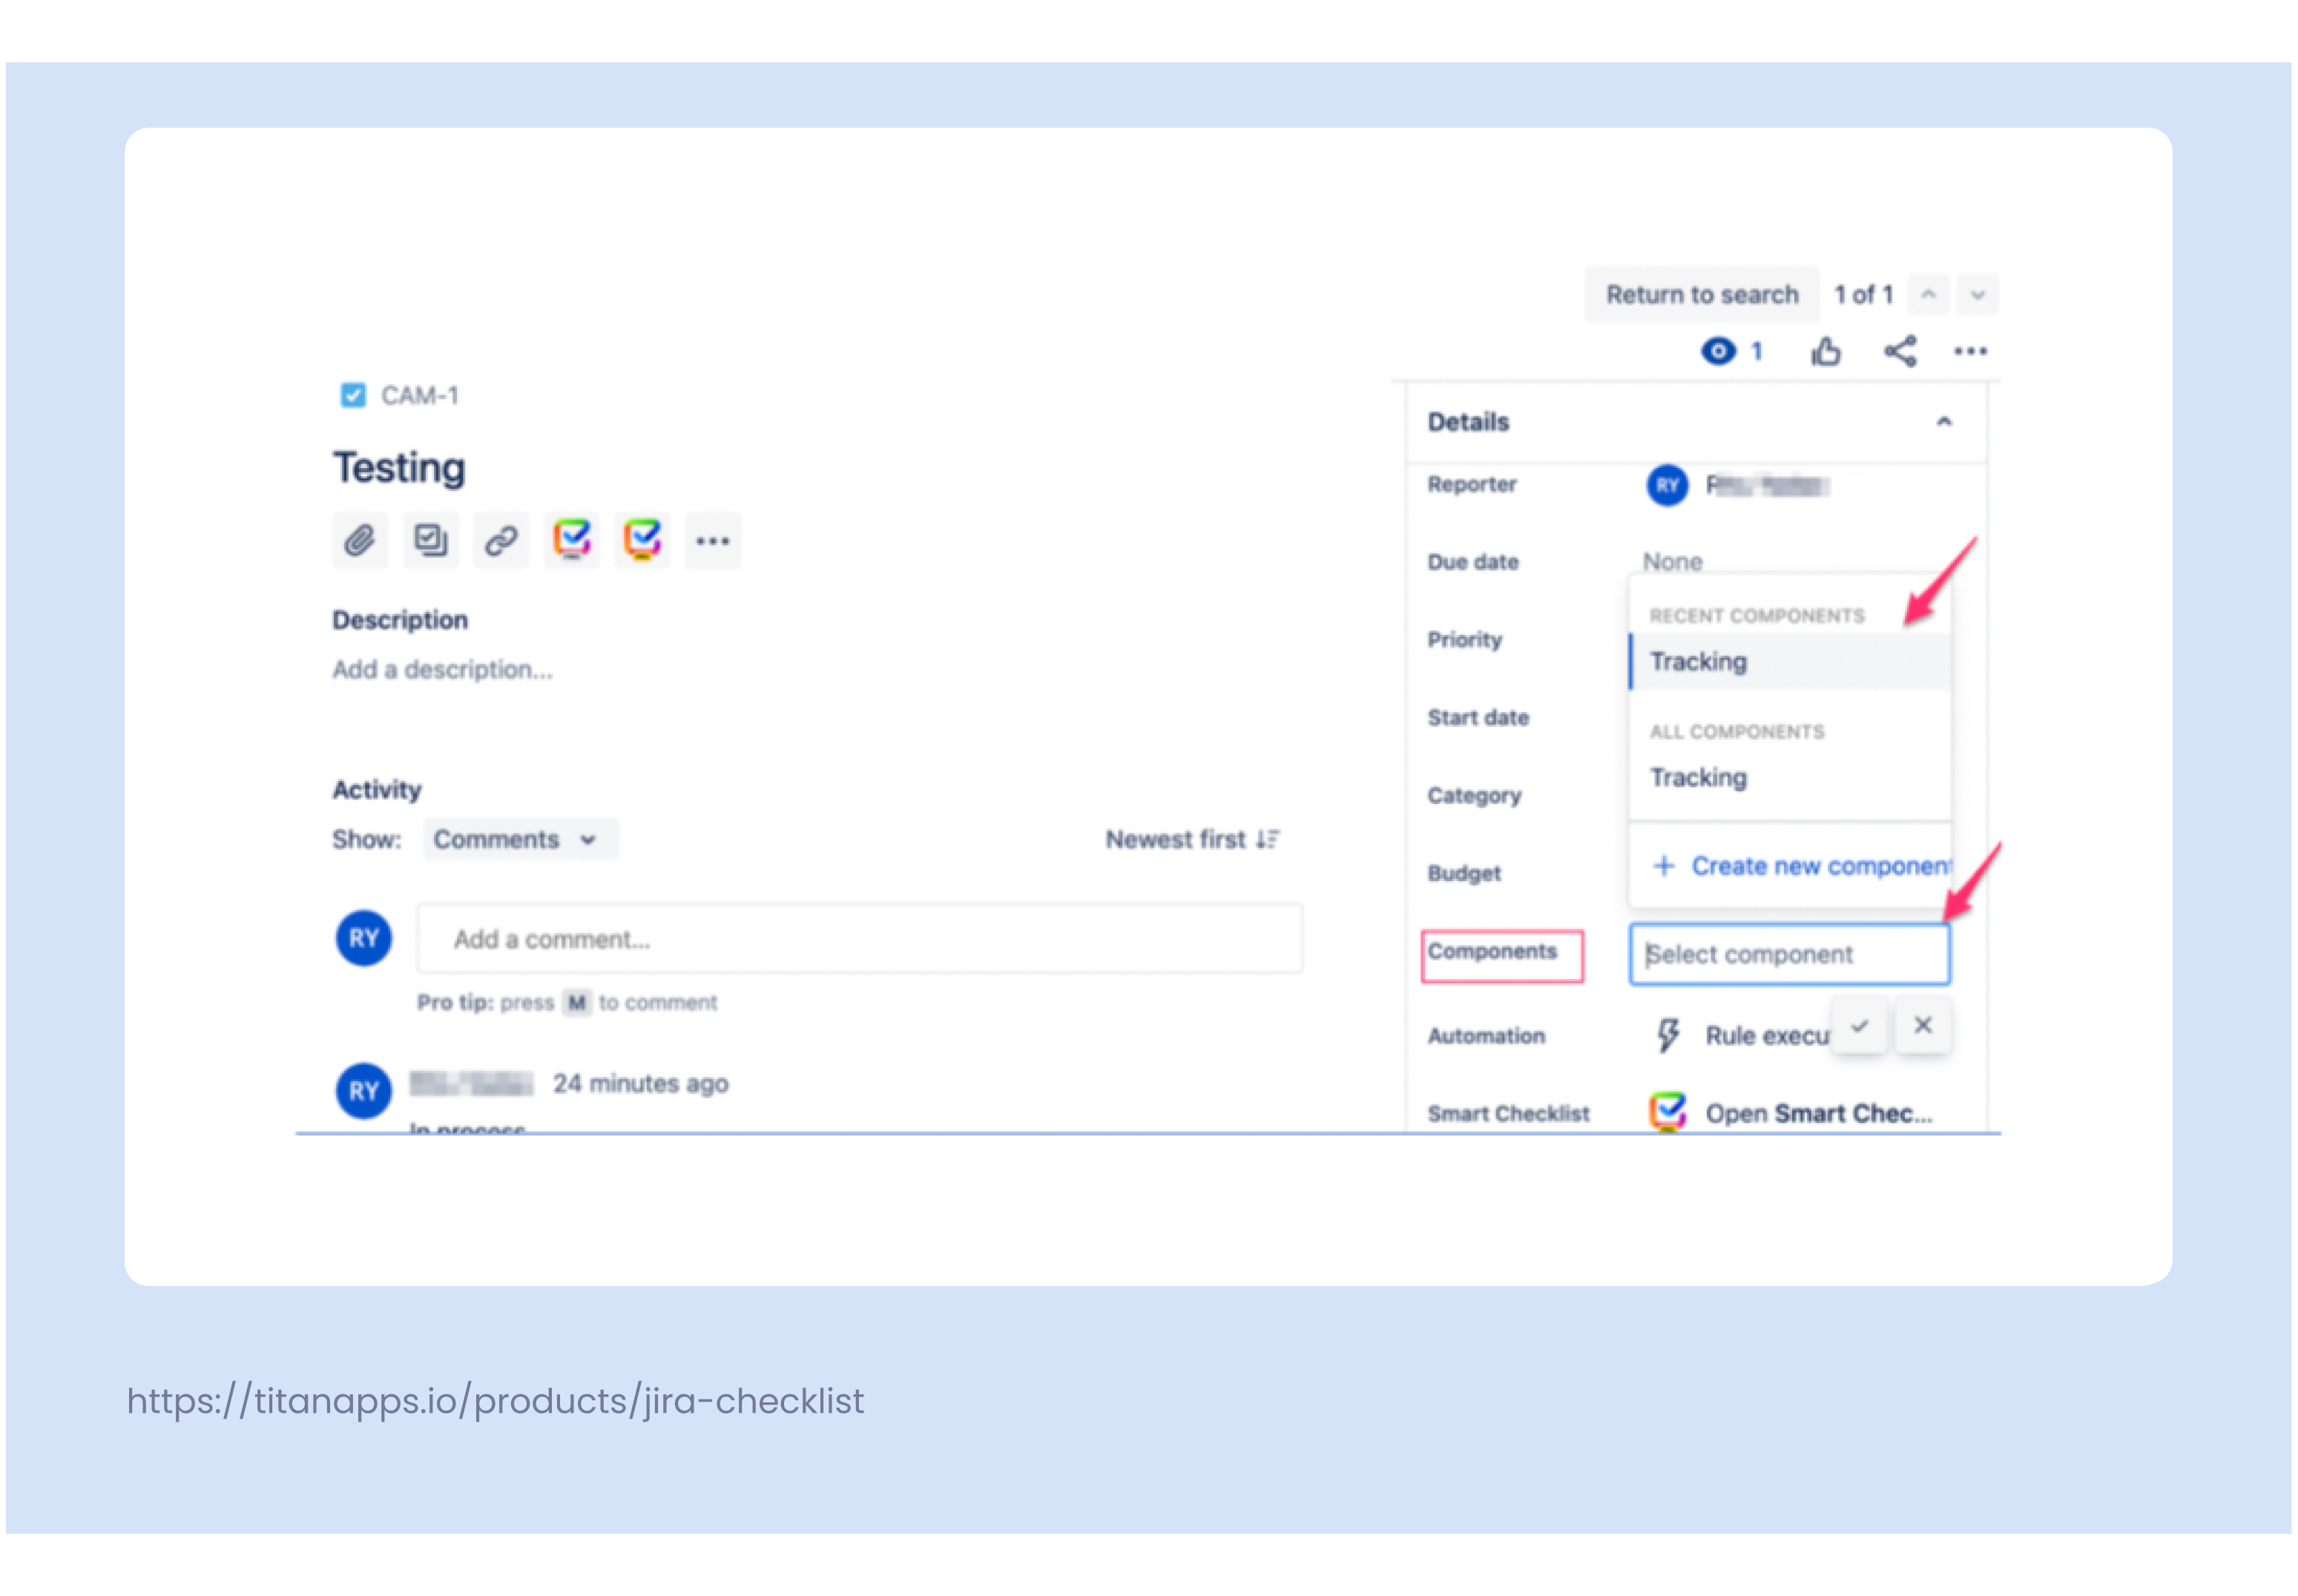
Now, all you have to do is select the Component under which you want to list this issue.
- Go to any Issue.
- On the left side menu, select Component (e.g. Tracking).
Jira components vs. Labels
Use labels for flexible tagging that any team member can add. Use components when you need stable categorization in a Jira project, ownership routing (component lead), and cleaner filters for boards and dashboards. Components reduce label chaos caused by typos and duplicate naming. See Atlassian Jira components documentation for details
With labels, users (not just admins) can create and customize them across projects. Any user can add or edit labels to issues and name the labels as they deem fit. This gives users the possibility to tweak labels whenever and however required.
In comparison, here are a few differences listed between components and labels:
Projects – Components are project-centric as they can’t be used for more than one project. However, labels are global and can be created to group issues from multiple projects.
Users – Any user can create labels but only admin users can create components. The possibility of labels being created by any user can create chaos in projects since there’s room for typos and duplicity. Let’s suppose two different users end up creating two labels for the same purpose, e.g. Tracking Phase 1 and Tracking Phase One. Now, we have two different labels for one purpose.
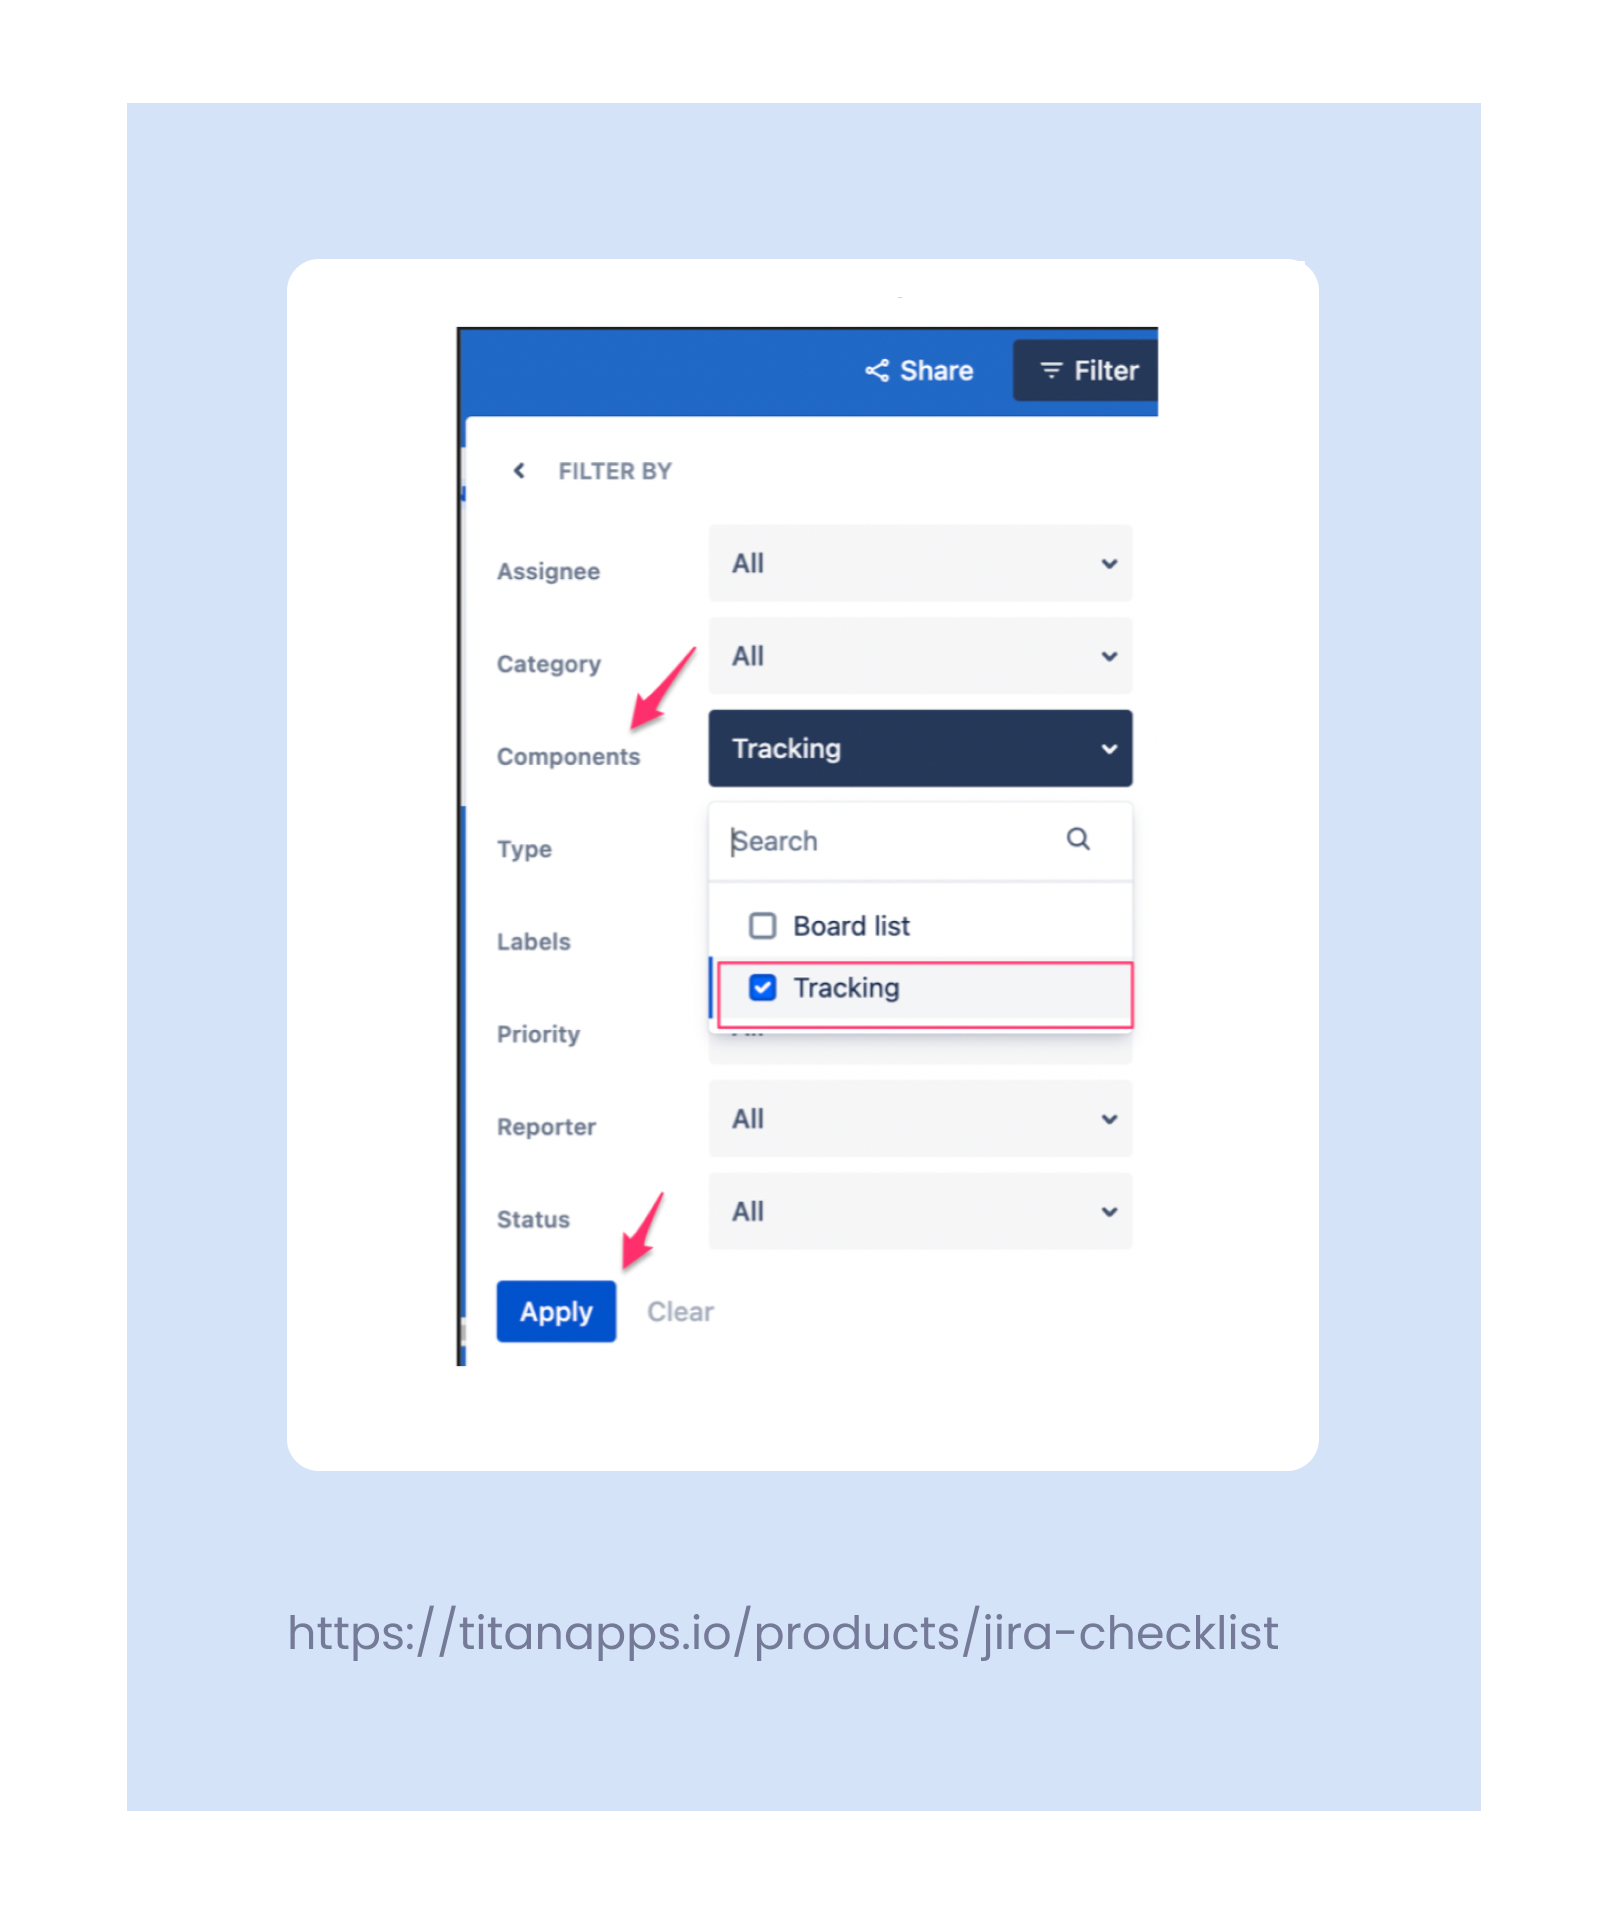
Filters – Both Labels and Components can be easily filtered out. Here’s how to filter out a Component:
- Go to Board.
- Click on Filters and go to More Filters.
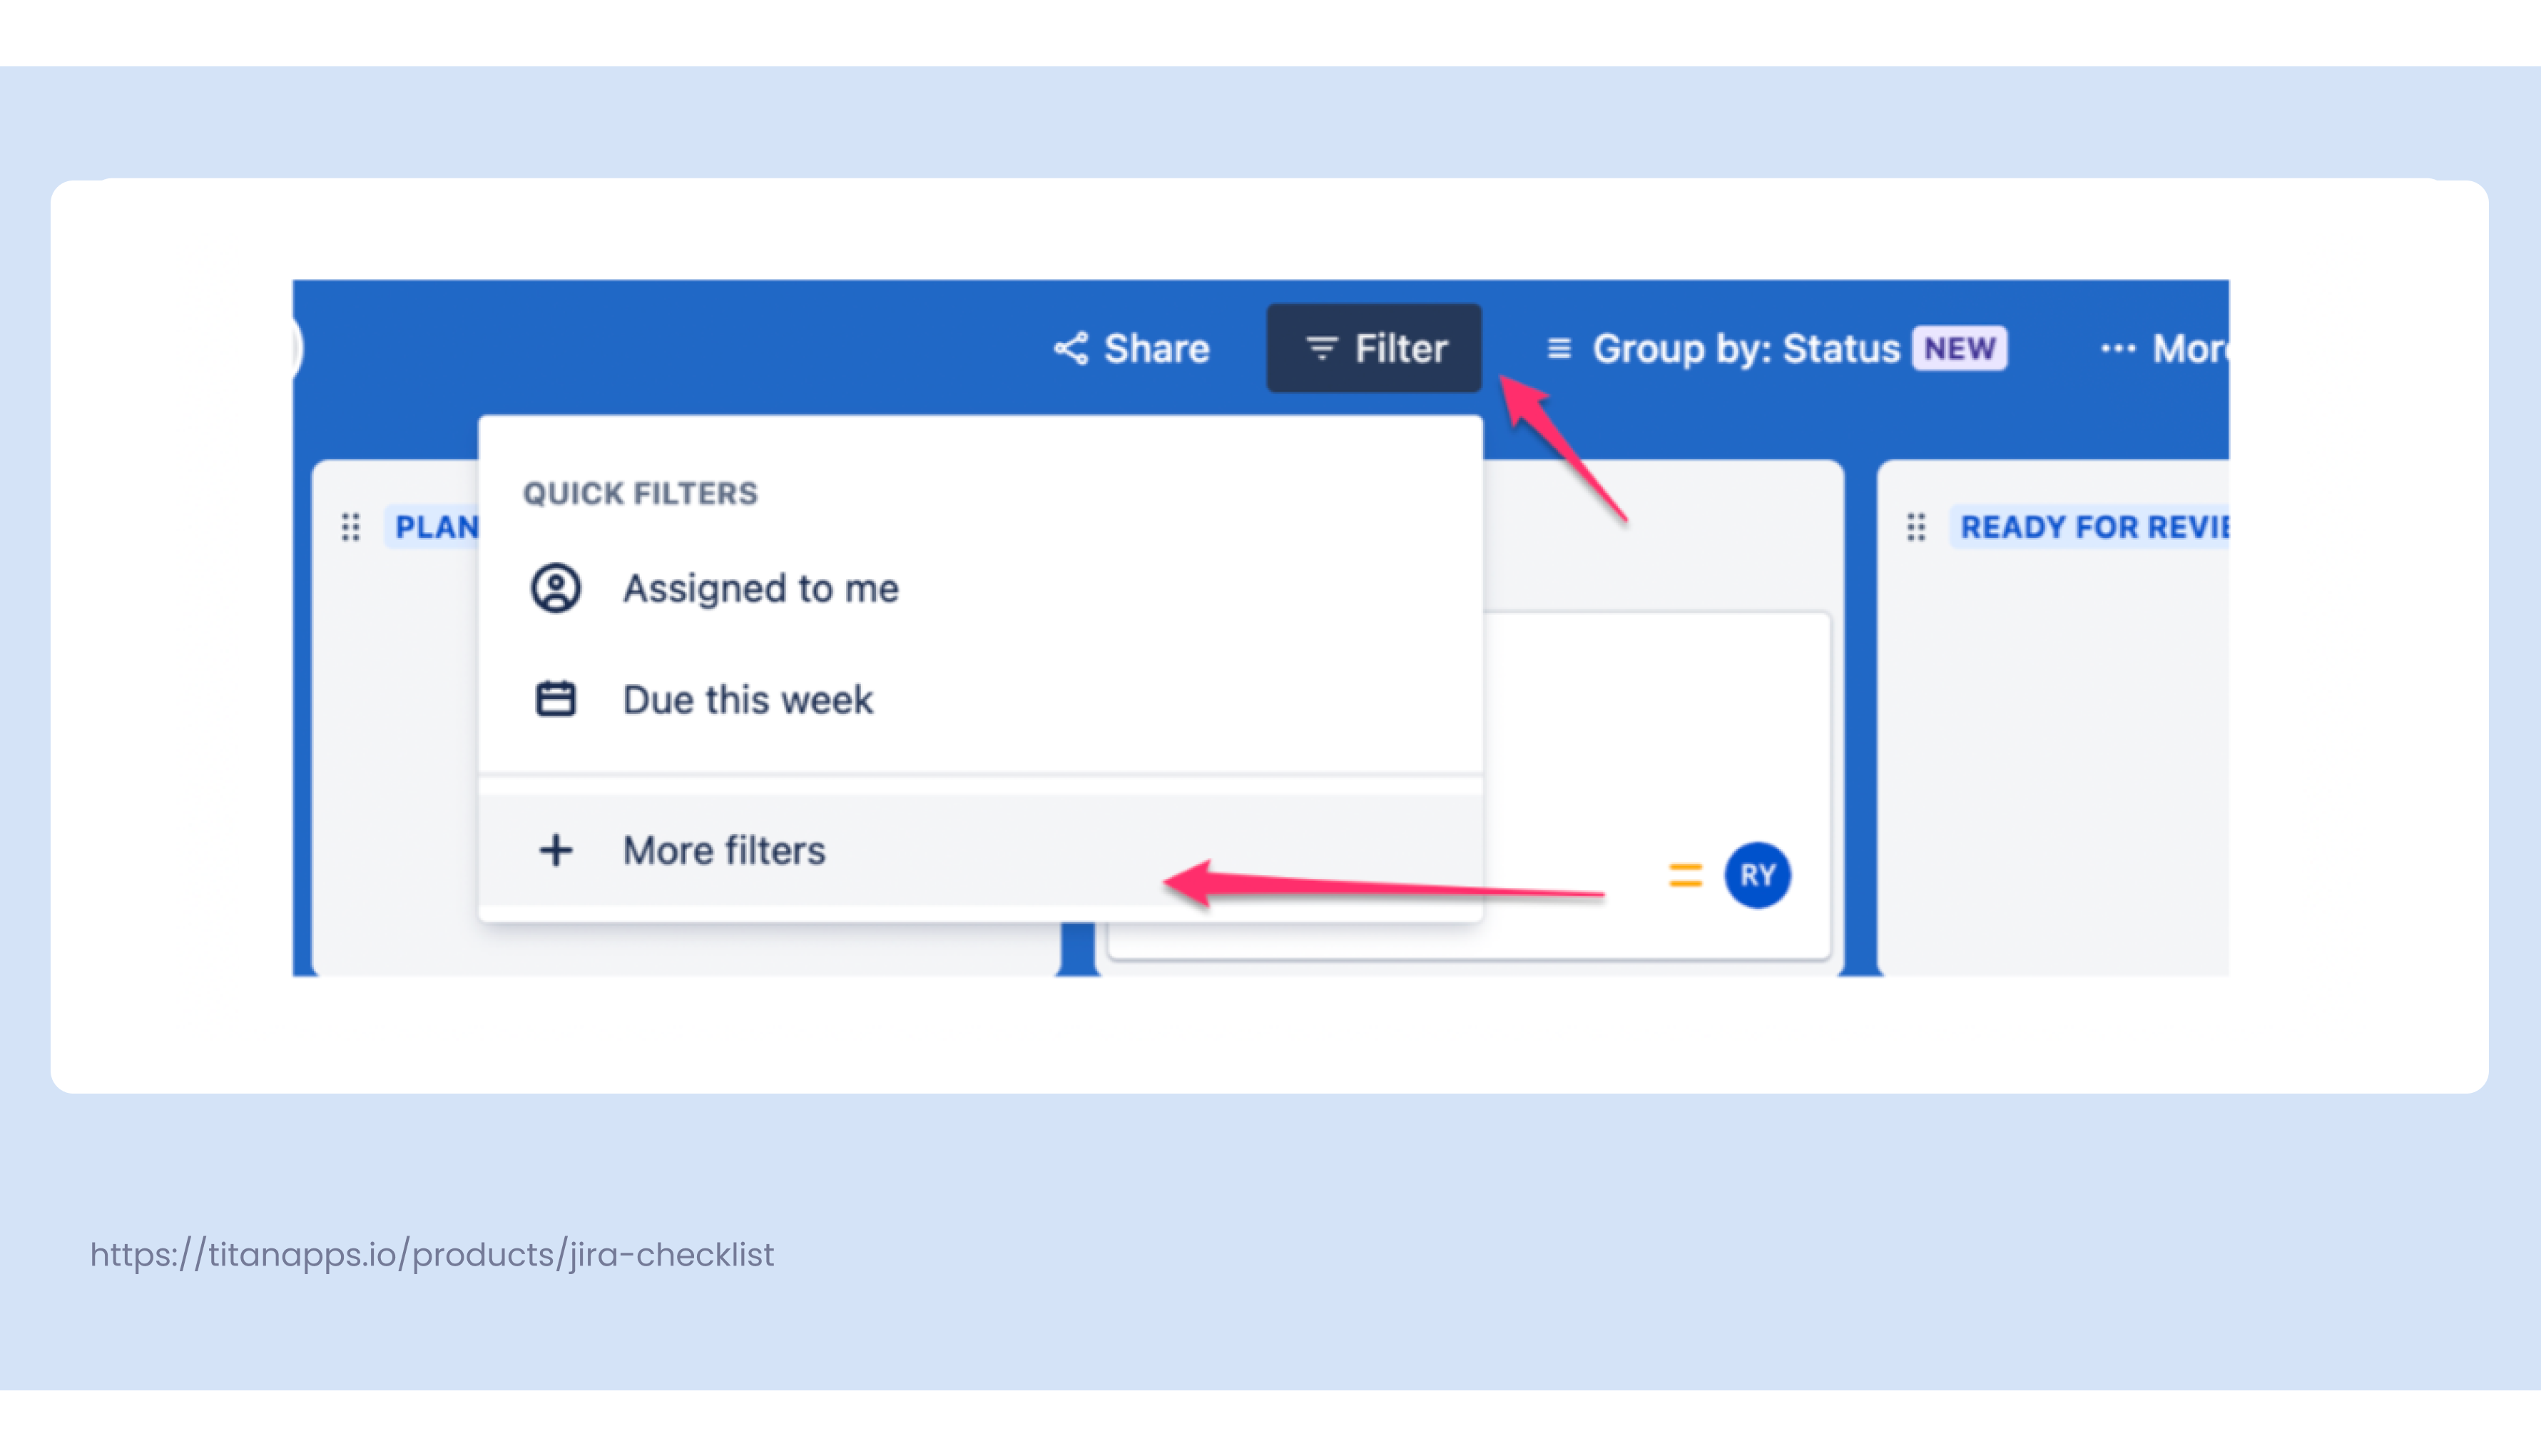
- Select the Component that you want to filter from the dropdown menu (we’ve selected Tracking here) and click on Apply. Projects under the select Component will be shown now.
Management – Jira Components can be managed (viewed and edited) from the Components Page view. There’s no labels page view but filters can come in handy as a workaround for this.
Limit – There can be an unlimited number of components and labels in Jira.
Considering components and labels serve almost the same purpose, it’s up to you to decide when to use which one as both will turn out to be of use at certain point in project management.
Jira Components vs Compass Components
Jira components are a project-level select field. They help group issues in one Jira project and support ownership through a component lead and default assignee.
Compass components solve a different problem. They represent pieces of your software architecture (services, libraries, applications) and store context such as ownership, dependencies, and performance signals. Teams use Compass when they want architecture-level visibility, not just project-level categorization.
Compass components in Jira are currently available only in company-managed software projects (not business projects, not service projects, and not team-managed).
It is worth using Compass when your main goal is to track work by service/module across projects and align Jira issues with software architecture ownership and dependencies. For pure project categorization and triage, Jira components are enough.
Pros and Cons of Jira Components
Before we learn about the pros and cons of Jira components, go ahead and learn about Jira best practices which provide insights on permissions, customization, roadmaps and epics and a lot more.
Jira is known for its flexibility, which comes from its many templates and powerful fields. But like any other tool, there are some drawbacks too. Below we’ll take a look at both the pros and cons of Jira Components.
Here are some pros of using Jira components:
- The biggest advantage is organizing issues for smooth and coherent operations of a project by using components as a unified source of work for all teams.
- Components give you visibility over the progress of issues through the Components Page View or by using JQL queries to filtering out the required information.
- The possibility to define component leads and default assignee makes it easier to manage workflows in an issue as only one member is ultimately responsible for the said component.
And some drawbacks:
- First off, only admins can create them. This means if you’re a developer or tester, you’ll need to get your admin to create the components for you.
- Jira components can’t be shared across projects; they must be created and maintained separately for each project.
Jira components are especially helpful if you have a long list of milestones or complex details that you want to keep track of on any given project.
In conclusion, Jira components help you streamline and optimize your workflow. Hopefully, this article gave you an idea of what you need to know about components, and some use cases of how they could be used in your company’s workflow.
PS: Another workaround to break down complex projects is Jira Checklist – a customizable checklist for Jira to break down your complex projects into structured to-do lists to manage processes such as software development, business operations and many more.
Additionally, we have a detailed guide on how to use Jira Subtasks, checklist, and multiple subtasks which takes your project management up a notch and help you deliver the best.
FAQ: Jira Components
Are Jira components available in Jira Cloud and Data Center?
Yes. Jira Cloud supports components in company-managed projects/spaces. Jira Data Center also supports components, but UI and admin paths differ.
Who can create and manage components?
A project admin (and Jira admin) can create and manage components through project settings. Permissions still apply for assigning and editing issues.
What’s the difference between a component lead and default assignee?
A component lead is the owner of that component. The default assignee setting decides who gets assigned when a Jira issue is created with that component. Many teams set default assignee to the component lead.
What happens if an issue has multiple components?
If default assignees conflict, Jira assigns the issue based on the component that comes first alphabetically (when component defaults are used).
How do I filter Jira issues by component (JQL)?
Use JQL queries that filter by the Components field to build stable filters for boards and dashboards. Components are more consistent than labels when you need long-term reporting.
Can I automate routing based on components?
Yes. Automation rules can auto-assign issues, send notifications, or route work when “component = X.” Teams often notify a Slack channel or Microsoft Teams when critical issues appear for a component owner.
Can Jira apps use components?
Yes. Many apps and plugins rely on components for categorization, reporting, or automation triggers. Components are a practical way to standardize workflows inside one Jira project.
Can components help apply checklist templates (Definition of Done)?
Yes, in a practical “routing” sense. Teams can apply different checklist templates for different components (Frontend vs Backend DoD). Link: TitanApps Definition of Done in Jira with Examples.
What’s the difference between Jira components and Compass components?
Jira components group issues inside one project. Compass components represent software architecture components (services/libraries/apps) with ownership and dependencies, then link that context to Jira issues.
Do I need Compass for components?
No. Use Jira components for project-level grouping. Consider Compass when you need architecture-level component catalog, dependency context, and metrics across modules and teams.