


 Jira
Jira monday.com
Jira is an excellent solution for backlog management. It transforms the backlog from a static document with limited visibility into a tool where interested parties can get updates whenever they wish.
Let’s take a deeper look at backlog management as well as some other Jira best practices.
How do you create a backlog in Jira?
Creating a backlog in Jira is surprisingly straightforward. In fact, certain project management templates like Scrum even have it enabled by default.
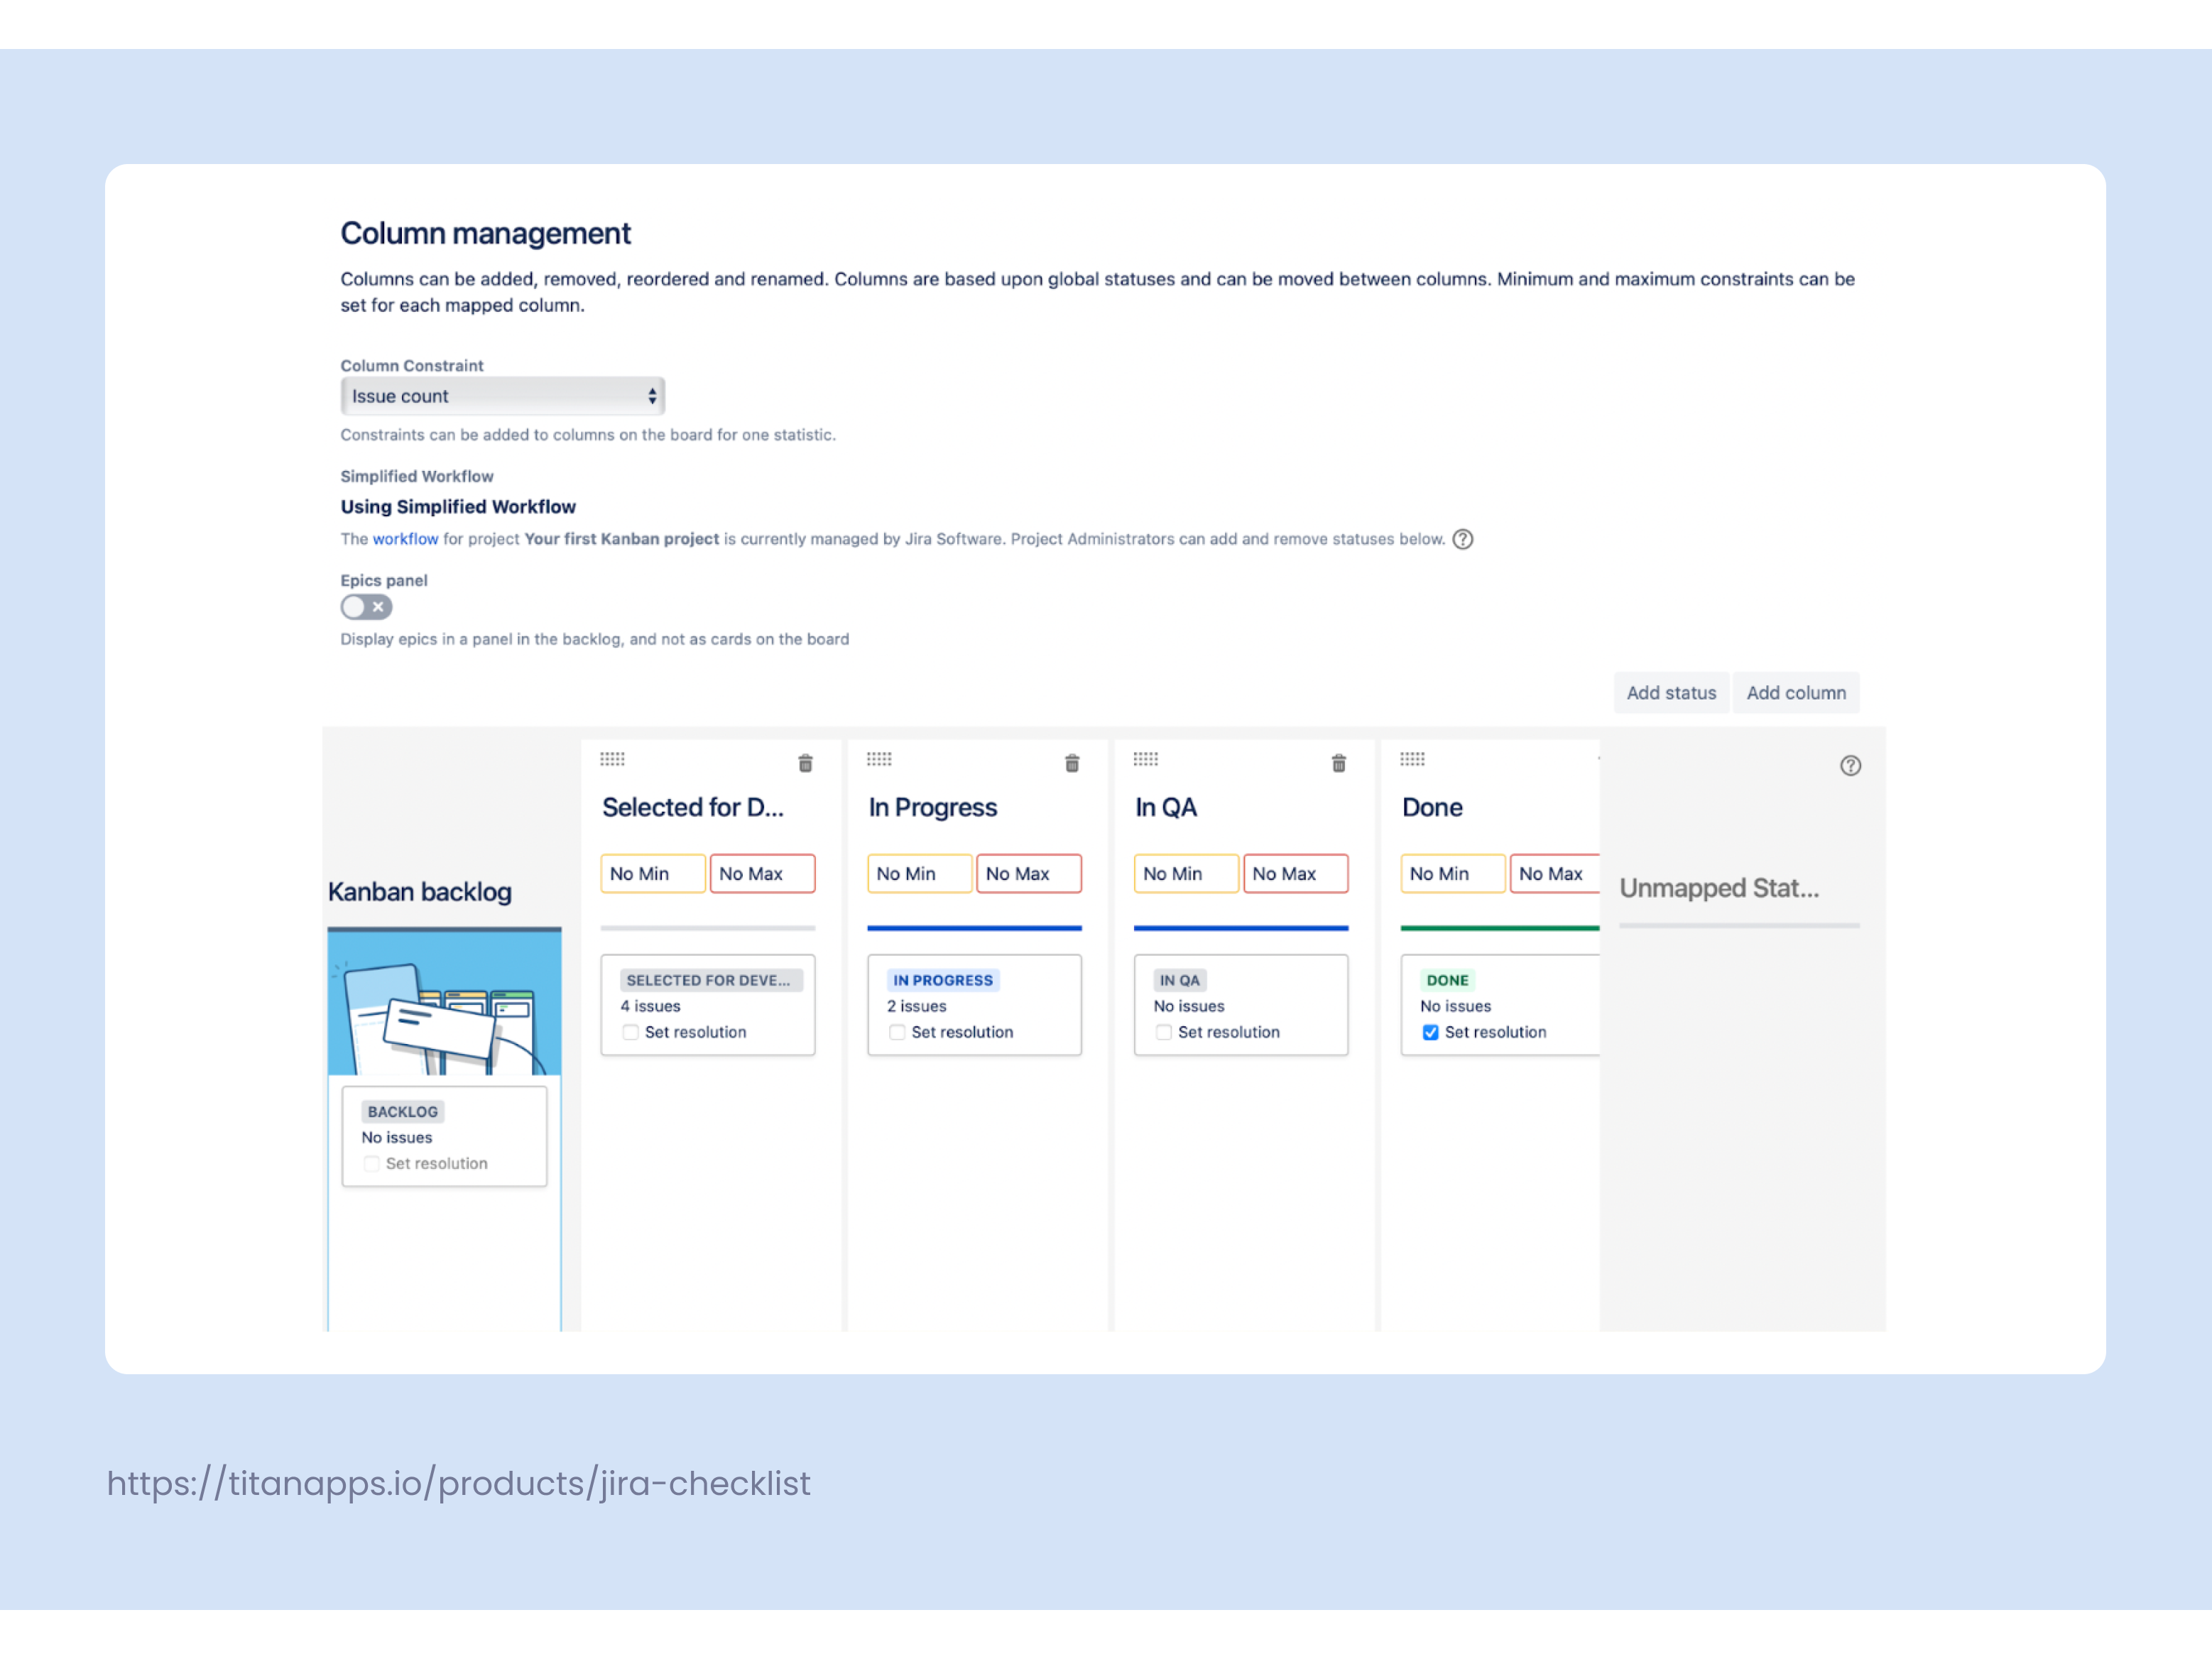
A Kanban board will treat the first column as a backlog. Frankly, this isn’t very convenient, and I’d advise you to enable the backlog separately as this will offer you much more flexibility without cluttering the actual board.
- Go to the three dots menu at the top right corner of your board.
- Select Board settings.
- Select the Columns option.
- Drag the backlog card from the board into the Kanban backlog column.
- Delete the original Backlog column by clicking the trash bin icon. Alternatively, you can rename the column and assign it a new custom status. I’d suggest going with something like Selected for Development to better fit your workflow.
Components of a Jira product backlog
Typically, a backlog in Jira is a convenient place for storing the tasks a team must complete while working on a project. Think of it as a centralized hub for creating, storing, and managing Jira issues. These issues can be divided into three categories:
- The tasks you are working on currently;
- The work you must complete in the future;
- Some low-priority tasks you can’t cover right now but would potentially return to in the future.
That being said, the backlog is not reserved for user stories. It is a place where you must keep track of all of your work. Ensure to include things such as customer requests, technical debt, design changes, and bugs.
Pro tip: You can create separate buckets for specific work like bugs or technical debt if your project has Sprints enabled.
Backlog management tips and best practices
Let’s look at some tips and best practices that will help you manage the backlog.
Use your backlog as the backbone of planning, but never as an action plan
Some Product Owners use the backlog as the scope of work that absolutely needs to be done as is and push this idea onto the rest of the team. In reality, the input from their team, as well as their feedback and experience, can actually affect prioritization.
That said, leaning too much in the opposite direction isn’t helpful either. Ultimately, the Product Owner is responsible for prioritization. That’s why, in a perfect world, the PO dictates priorities, and the developers dictate velocity.
Prioritize based on input from various sources
Potential business value is a nice indicator of the priority for a certain task. It may even be your only source of truth in the earlier stages of product planning. Still, it is not the only criterion for prioritization.
I’d suggest relying on input from multiple sources to prioritize work more clearly.
- Check the roadmap to see dependencies and potential blockers;
- Consider when you’d like to receive feedback regarding a new feature;
- Account for implementation difficulty;
- Consider feature requests from customers. Perhaps some are more crucial than others?
Embrace the change
While it is true you should keep the iterations to the tasks the team is working on to an absolute minimum so as not to disrupt the flow of work, the backlog calls for the opposite treatment. There will be cases where certain issues will block others. Your priorities and scope will change over time. Therefore, change is inevitable.
If there’s no way to avoid change – embrace it. Foster a culture where the Product Owner is not the only person responsible for prioritization. Encourage the whole team to discuss their work
It’s OK to leave some tasks behind
There will inevitably come a time when the product backlog outgrows the team’s capacity. If certain items are left lingering after several backlog grooming sessions – just close them.
Still, I’d suggest creating a custom status for these issues. This way, low-priority items will not get mixed with work that has actually been done and it will also be easier to analyze these tasks in the future.
Refine your near-term tasks
While keeping your long-term work items vague is OK, the near-term tasks or the work you are planning to work on soon needs to be refined and defined. This involves having complete user stories, accurate estimations, and information about dependencies if certain teams are involved in a task.
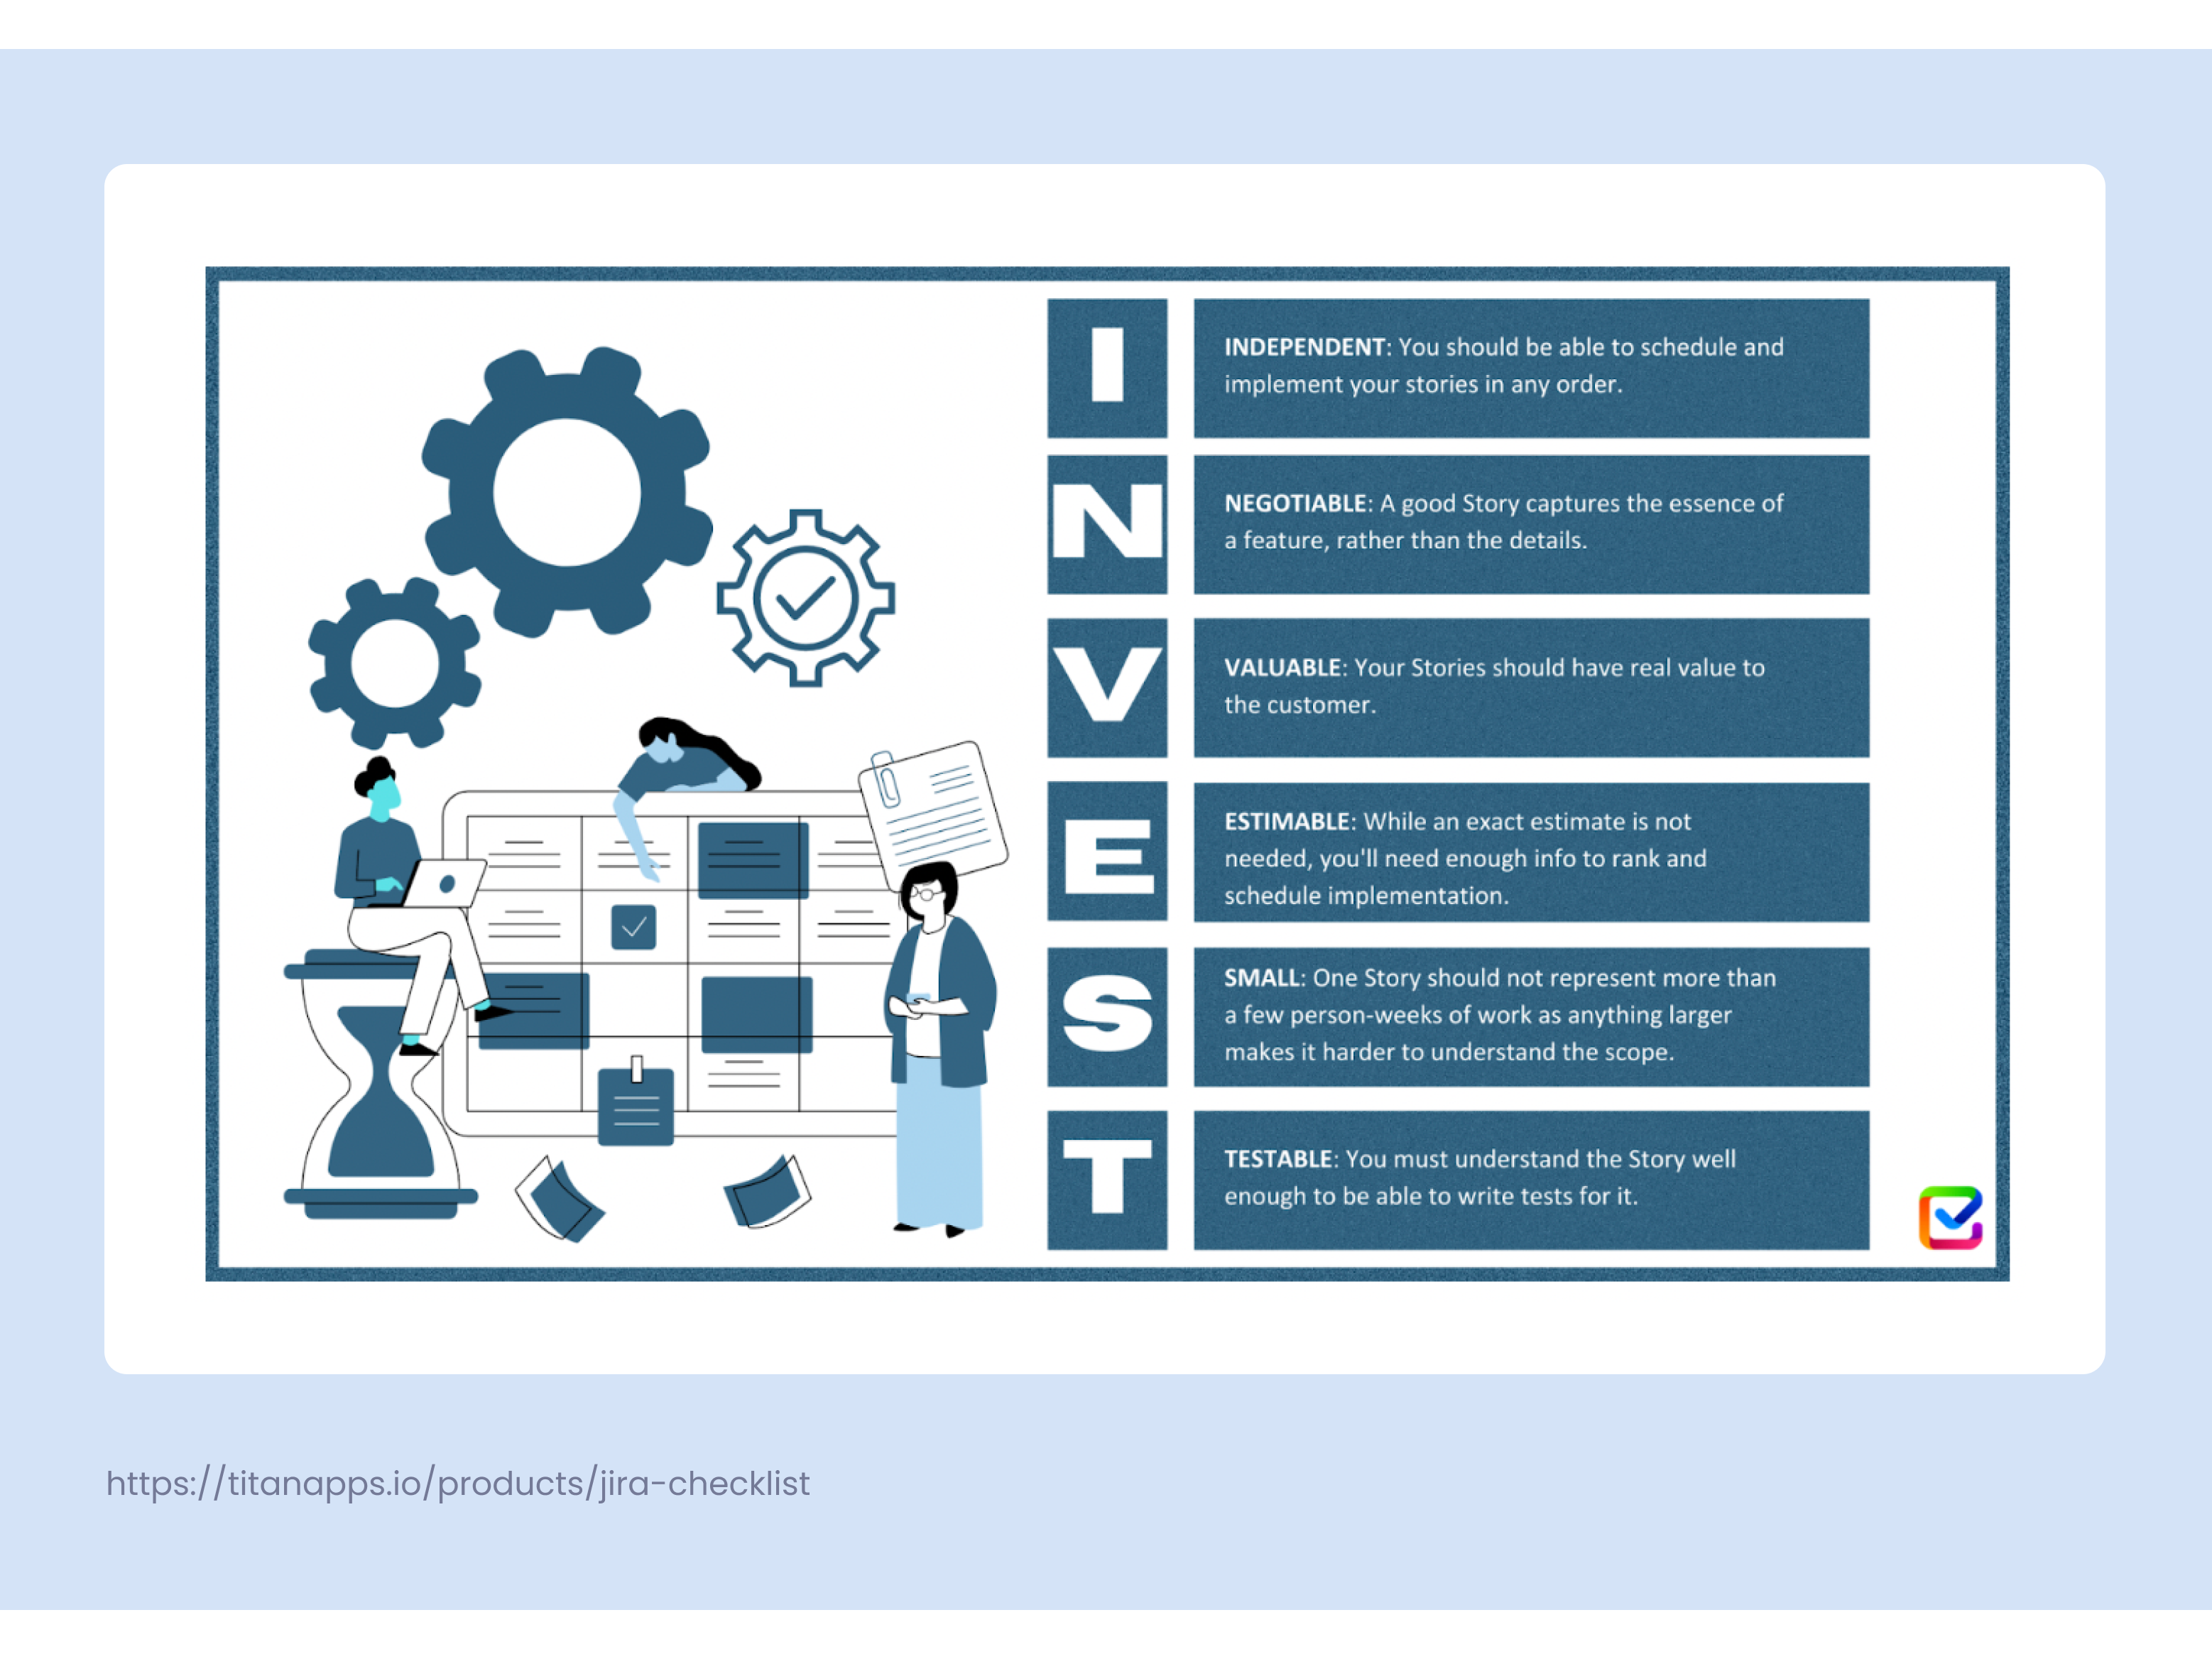
That said, a defined user story doesn’t mean that 100% of the Acceptance Criteria has been covered. What you need is to ensure that the story is immediately actionable. This means that your team should understand the story well enough to be certain they can deliver. Many companies use the INVEST checklists for this purpose.
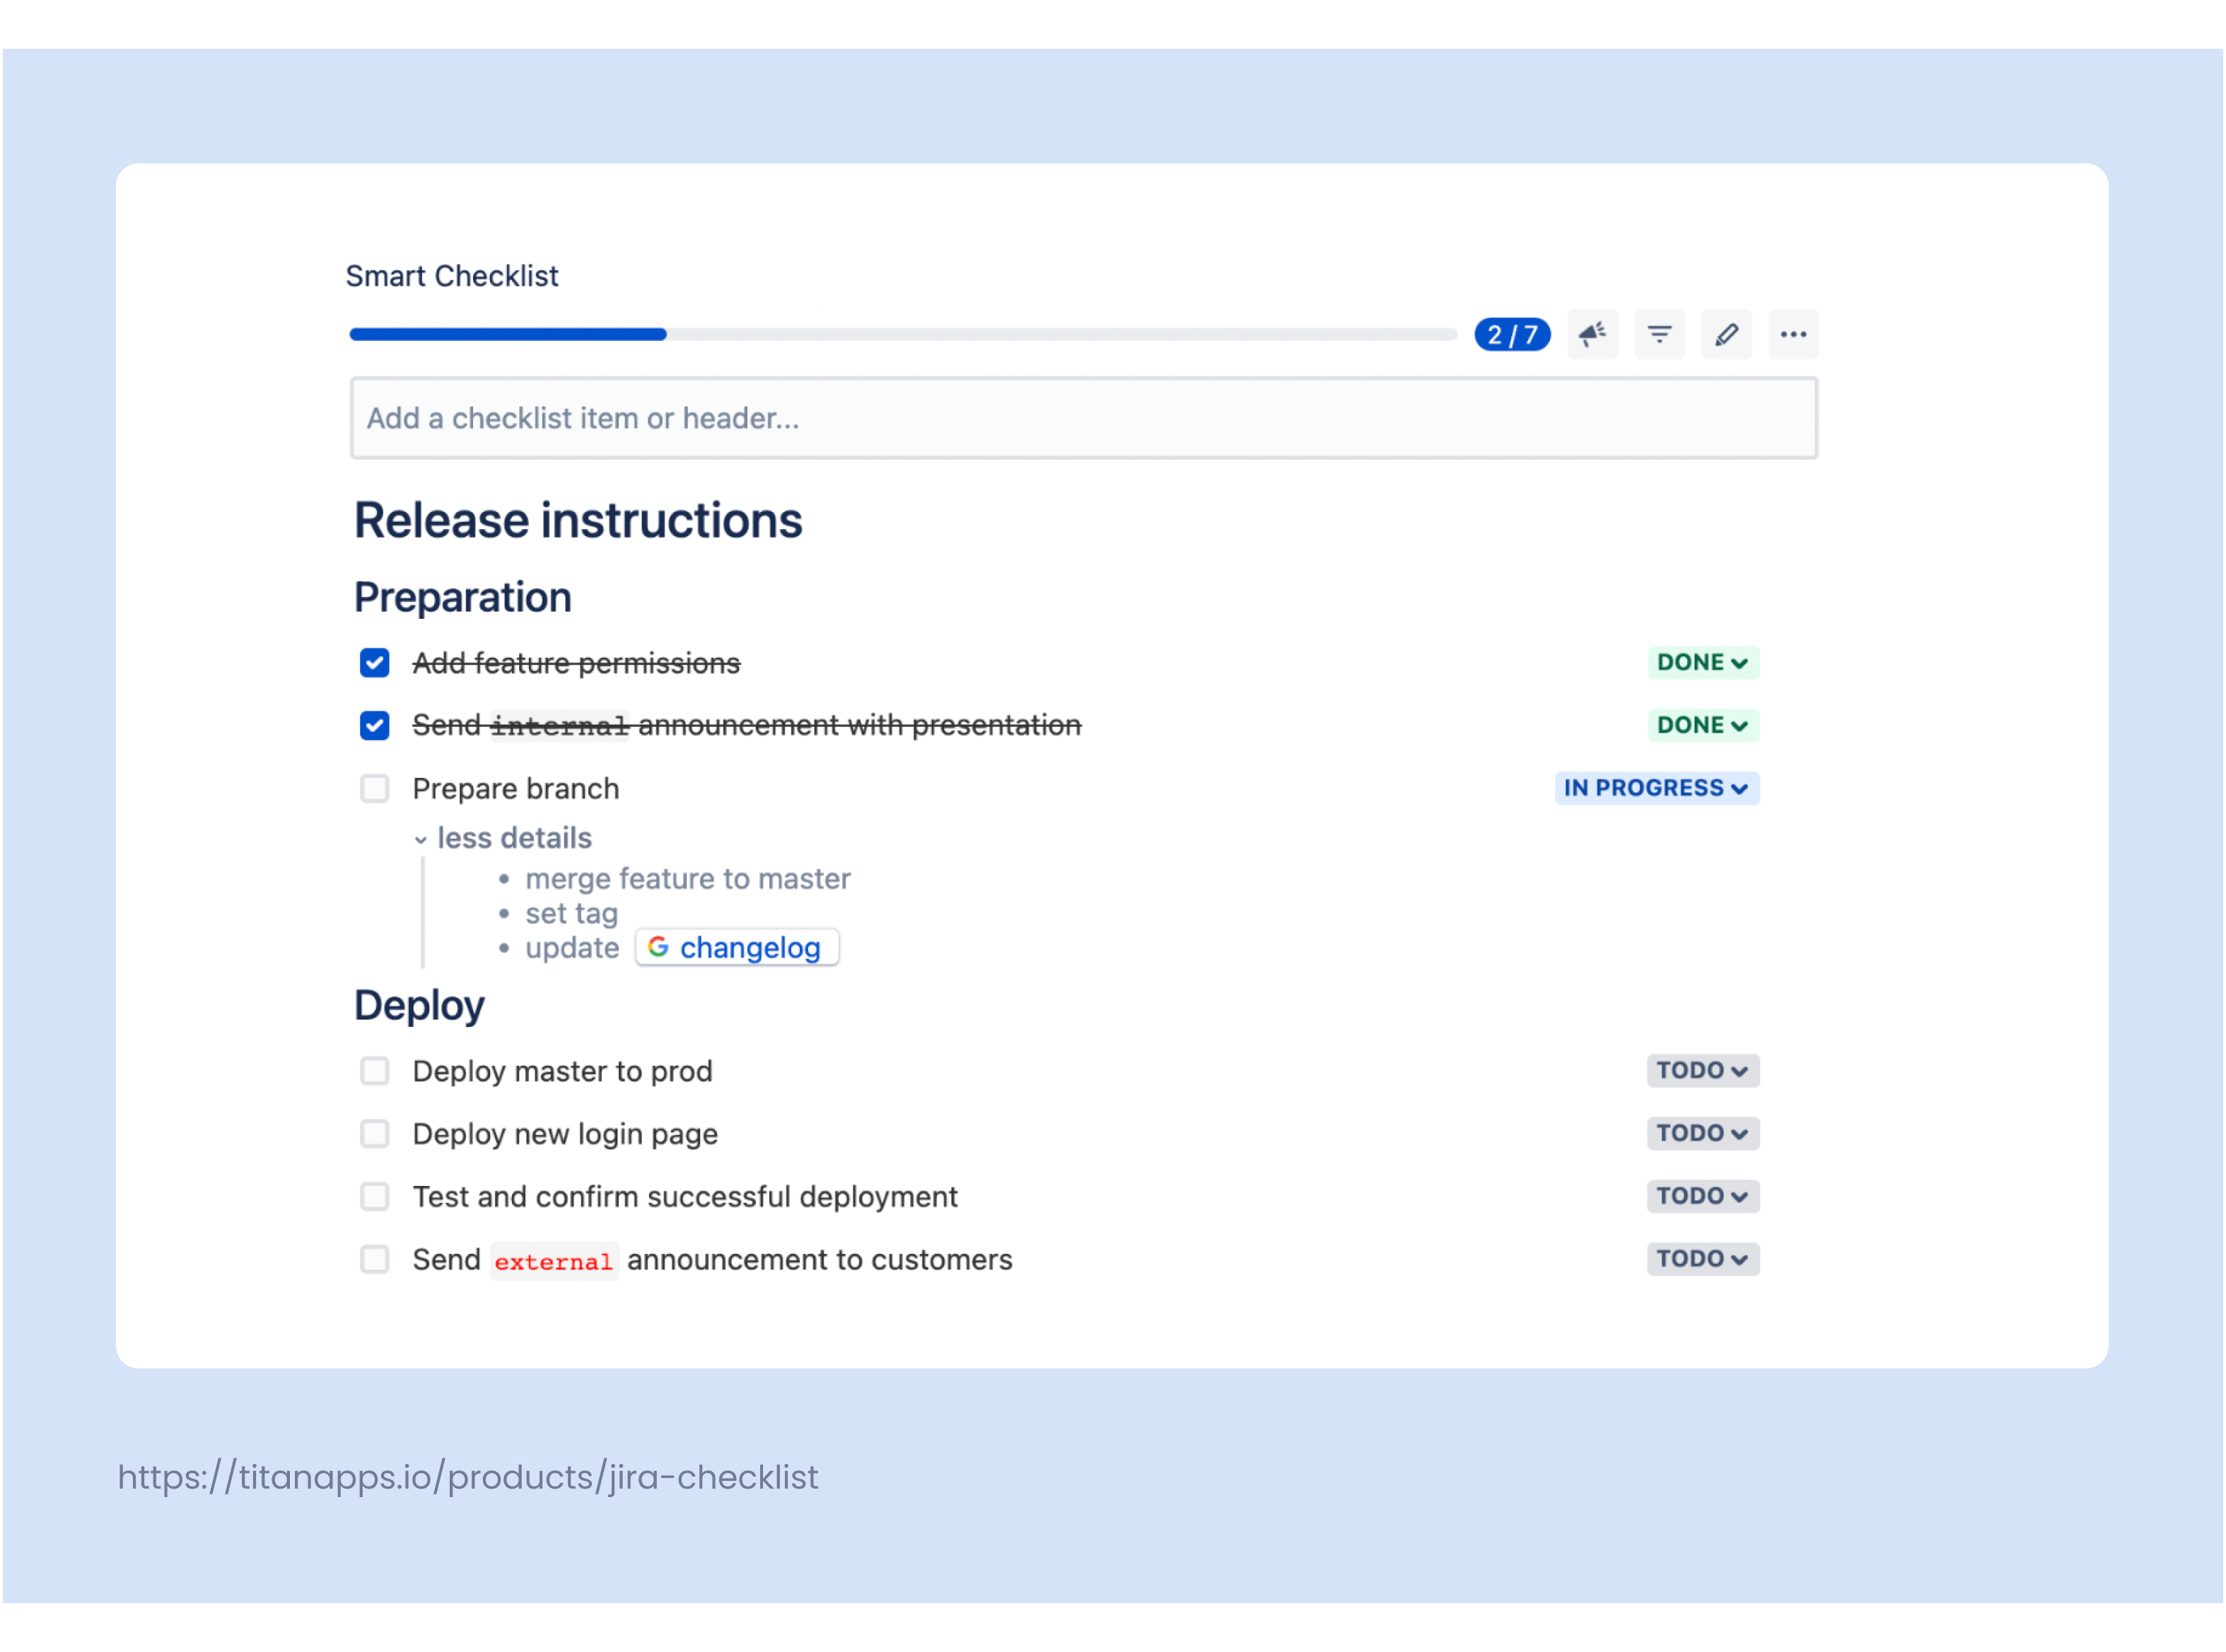
Pro Tip: You can use a Jira Checklist to document the core points of the Story, mentioning the additional tasks as individual checklist items.
Sometimes, backlog refinement is a bad idea
While, ideally, you’d want to always have your tasks ready to go, backlog refinement may not be a great idea when:
- You are still in the early stages of a project’s development cycle: Yes, you will need a certain buffer of tasks and reasonably clear priorities, but going too far with planning at the earlier stages of development may lead to decisions that are based on incomplete information. Moreover, much of the effort you’ll dedicate to refining the backlog now may be wasted as priorities shift in a different direction.
- Working on a project in a rapidly changing environment: Again, the work you’ve put into refining your stories may go to waste if the priorities shift because the project has changed.
Everything is simpler when the process is well-documented and the progress is visible at a glance.
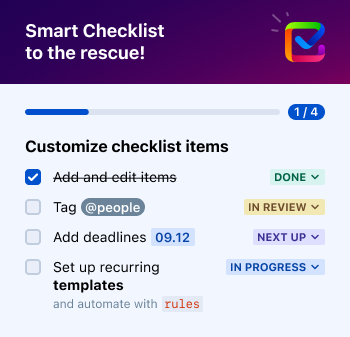
Help your team create and manage task lists with Smart Checklist!


