Jira
Jira monday.com
Project Management is a vast and intricate topic. A lot of nuance goes into maintaining a steady flow of work.
Still, Project management can be reduced to its golden triangle: Scope, Timeline, and Budget. We’ll consider these three sides of the triangle when examining Jira’s functionality.
To be a bit more specific, we’ll take a look at things like:
- Setting up and configuring a project in Jira
- Timeline management
- Reports that can shed light on the team’s productivity
- Setting up certain useful automations
- Several bonus tips for managing recurring tasks
Setting up a project in Jira
Jira offers a nice selection of Project Templates that can help you set up a project quickly. If we are talking about Jira Software specifically, these templates focus on offering solutions for agile management.
This section will look at the differences between the Project Templates. We will also dive a bit deeper into the initial setup by covering such aspects as managing the workflow, permissions, and integrations.
They are also a nice option for larger companies looking to standardize certain settings.
Picking a project template
If you develop software, your go-to choices are probably Kanban and Scrum.
Use the Scrum template if your team works in time-boxed iterations or Sprints. I suggest using Scrum if you prefer your projects structured in a way that breaks down complex work into small iterations. The Scrum template has the functionality for running time-boxed Sprints and offers a backlog out of the box.
Both of these features support a Push system, allowing you to carefully plan out new Sprints based on a proven estimation of productivity. To summarize, Scrum is best suited for projects with a clear goal and scope like the development of a new product. Learn more >>>
The Kanban template is much more suited for a Pull system. It is designed to help your team take on the work they are ready for at the moment. This approach is more flexible as it prioritizes a continuous flow of work rather than fixed iterations. The functionality of a Kanban project in Jira complements the Pull system and its principles by giving you the option to clearly identify the perfect workload per team member and limit WIP so no one gets overwhelmed.
The Kanban project is perfect for processes where new tasks come naturally. Some better examples will include sales or support processes. Learn more >>>
Both of these Project Templates are pretty well set up from the start. Many smaller teams can use them as is, without worrying too much about the extra bells and whistles.
Still, there’s a ton of settings you can explore if you feel the need to finetune your board. Here are several examples of features you might want to look at while setting up a project:
- Having all of you come straight to the ToDo column can make a Kanban board look cluttered. That’s why I’d like to point out that you can add a Product Backlog from the board settings.
- You can limit WIP in a Kanban board to ensure consistency of delivery, as people are less likely to bite off more than they can chew.
- Jira allows you to create multiple Sprints in the backlog. This feature can also help you categorize backlog items better. For instance, you can separate technical debt, bugs, feature requests, etc., into several categories for comfort and ease of future planning. Our team has made it a rule to pull at least two tickets out of the Tech Debt backlog during every Sprint Planning session.
? Note: Atlassian has other products besides Jira Software. Jira Work Management, for example, is designed to help business teams better communicate and organize their work. You can learn more about different Atlassian products and Project Templates here >>>
Team-managed vs. company-managed projects
Among the first decisions Jira will prompt you to make when creating a new project is the choice between Team-Managed and Company-managed projects.
Team-managed projects are better suited for smaller, self-governing teams. This project type gives you more control over the features and settings. These projects are much simpler to set up and manage, as project admins can work autonomously without relying on Jira admins. The tradeoff is that you will be lacking some more complex features as well as settings that can be applied to multiple projects across the whole company.
Company-managed projects, on the other hand, are a great fit for those who would like to collaborate more effectively and share certain processes across multiple projects.
Workflow management
By default, a Project Template in Jira comes with a ready-to-use workflow out of the box. In essence, this workflow allows you to drag your cards from every column and back. This workflow is fine for a lot of teams and projects and the only thing you probably want to modify from the start are the board columns themselves.
For instance, you might want a separate status for tasks that are either blocked, in QA, in review, etc.
The goal of custom workflows is to create a transparent and visualized process that meets your company’s needs on one Kanban board. It also simplifies organizational communication and provides an overview of a project’s or sprint’s progress, thus helping with sprint capacity planning in Jira.
A custom workflow will allow you to create:
- Statuses
- Assignees
- Transitions
- Resolutions
You can read more about managing a workflow in Jira here >>
? Pro tip: Workflows in team-managed and company-managed projects have certain differences. For starters, Project Admins can change workflows in team-managed projects instead of Jira Admins. That being said, the workflow scene will be specific to a project, so you will not be able to share it across several Jira boards.
In addition, team-managed projects have certain limitations, like the inability to have specific workflows for each issue type.
Managing permissions in Jira
Every Jira project has a permission scheme. The permission scheme itself is just an object that Jira references when checking permission in your projects. To make the scheme useful, you need to grant users, groups, and/or roles permission for their project in the scheme.
This may sound overly complicated, but you are essentially deciding who in your team will be able to do the following:
- Edit project role memberships
- Edit project components
- Set up various automation rules
- Edit the project version for certain details like the URL, name, Project Lead, etc.
- Create, assign, and move new issues through the workflow
? Pro tip: This is a complex and nuanced topic. I’d advise you to read through official Atlassian documentation before tackling it.
Integrations
As a Project Management tool, Jira must be ready to fit into your typical workflow. Luckily, Atlassian has been actively developing it for years to accommodate this need.
Jira has integrations with tools like Slack or Gmail for better communication. A wide variety of integrations are also available for different teams and departments.
Designers can benefit from an integration with Figma, Moro, and AdobeXD.
Developers can benefit from GitHub, Jenkins, or Dynatrace.
Support and sales teams will probably enjoy the integration with Zendesk.
Keep in mind that the apps I’ve named are merely at the peak of the iceberg. There are dozens of integrations with useful apps you can use in your day-to-day work. Take a look at Jira’s integrations page and set up your tools as part of the initial project setup.
Most of these apps are super easy to install. Simply visit the corresponding page on the Atlassian Marketplace and follow the installation wizard’s instructions.
? Note: Some third-party apps come at an additional cost.
Working with a timeline
Now that we have our initial project set up, let’s talk about your list of goals, tasks, and priorities.
Your “goals” or large volumes of work that can be broken down into separate tasks should become Epics—an issue type within Jira that is a parent to issues such as user stories, tasks, and subtasks.
? Pro tip: We typically use a framework called BRIDGeS for multi-context analysis of a project. At the end of the session, this framework leaves us with prioritized, ready-to-use Epics and tasks.
Once you have your work broken down into Epics, creating a roadmap – or, as Jira calls it – a Timeline is quite simple.
- Navigate to your board;
- Select the “Timeline” option from the menu on the right;
- Click on the “+ Create Epic” to add an Epic;
- Add child issues by clicking on the “+” sign next to the Epic;
- Click on the timeline to set the timeframe for the Epic.
Some tips and tricks for managing your Timeline in Jira:
- Add dependencies: You can add Dependencies between Epics from the Timeline. Simply hover over the timeline for an Epic and you will see two dots – one at the top right corner and one in the bottom left corner. Click and drag them to link one Epic to another. This is useful for understanding the order of work or visualizing potential blockers.
- Use different colors for Epics: You can right-click on the timeframe to change the color of an Epic easily or to remove start and end dates. Color-coding your Epics is a useful element of visualization.
- View settings: You can adjust the timeline settings to filter out certain completed issues or expand/collapse all of the Epics simultaneously. Another useful option in the view settings is the progress bar. Enable it to see a bar indicating an Epic’s progress.
- Filter out Epics with a certain status: You can use the status category filter to hide the Epics and tasks that are marked as done from the timeline. This simple filter greatly improves the visibility of the roadmaps for times when you need to review done/in progress/future scope.
? Pro tip: The color of the connective thread will change to red if the dates of Epics overlap. This feature is handy for easily seeing if certain dependencies are becoming blockers. Still, I’d recommend using dependencies wisely otherwise, the roadmap will become confusing because of the intertwined Epics.
Reports
Jira offers a variety of reporting tools to Product Managers. These tools are easily accessible from the reports tab on the right-side menu. This is probably the best and most diverse tool in Jira’s arsenal when it comes to ensuring that your team is moving correctly on the timeline and that the project stays within budget.
These reports can be used to analyze the performance of your team. They are also easily shareable and exportable. There is a wide selection of reports, but using all of them isn’t necessary. Here is a brief overview of several reports that we find to be the most useful:
- Burndown chart: Tracks the remaining story points in Jira and predicts the likelihood of completing the Sprint goal.
- Burnup chart: This chart tracks project progress over time and compares the work that is planned to the work that has been completed to date.
- Sprint report: This analyzes the work done during a Sprint and points out overcommitment or scope creep in a Jira project.
- Velocity chart: This is a kind of bird’s eye view report that shows historical data of work completed from Sprint to Sprint. It is a nice tool for predicting how much work your team can reliably deliver based on previously burned Jira story points.
Automations
Jira Automation is a no-code feature that allows Jira users to create “if this — then that” conditions based on a wide selection of events and triggers, such as an issue being moved from “todo” to “in progress” or all subtasks of a parent issue being moved to “done.”
These automations are quite useful. Setting up a couple of them from the start can save you countless hours later.
For example, you can set up an automated notification to a Slack channel if an emergency happens on prod. Or you can automatically request a review from approvers when a new comment is added to an issue.
Some of the most common uses of automation for Jira include:
- Making changes based on issue workflow transitions
- Automatically assigning tasks to specific team members based on the content of an issue
- Sending periodic status updates
- Automatically creating issues for recurring tasks
You can explore the Automations as well as certain interesting use cases here >>>
Automating recurring issues
Obviously, the initial setup of a Jira project is only the first stepping stone toward successfully managing your teams. Every project, regardless of size or type, has a wide variety of repetitive or recurring tasks.
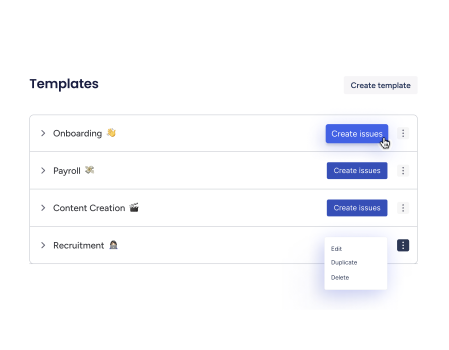
And this is where apps like Smart Templates for Jira come in. Smart Templates is a productivity tool designed to optimize team performance and establish company standards. It allows you to create issues or entire issue hierarchies once and reuse them every time your team needs to report a bug, start the hiring process, onboard a new employee, or launch payroll.
If this seems like something you’d like to consider for your team, you can give the app a try for free.
Conclusion
Jira has a wide selection of tools and features that can help Project Managers along every step of the project’s life cycle. I hope that this short introduction has demystified the functionality you’ll be relying on.